




Simi Valley Chrysler Dodge Jeep Ram

Blog / General

Blog

All General Jeep Ram Dodge Questions Car Buying Guides Chrysler Simi Valley Chrysler Dealer Simi Valley Used Cars
car cost battery

Car Battery Cost Breakdown By Expert

Car Battery Cost Breakdown by Expert A regular car battery usually costs $120 to $300 installed, but the real price depends on the battery type, vehicle size, warranty, labor, and whether your car needs an AGM battery or computer registration after replacement. The simple answer is this: most standard flooded lead-acid batteries cost less, AGM batteries cost more, and luxury vehicles or start-stop vehicles can push the total replacement bill higher. AAA lists mobile car battery replacement starting around $199.99 for members, while Consumer Reports says AGM batteries can cost 40% to 100% more than conventional batteries. AAA battery service Consumer Reports battery guide Average Car Battery Replacement Cost Most drivers should expect to pay about $120 to $300 for a normal car battery replacement. That range usually covers common sedans, compact SUVs, older vehicles, and standard gas-powered cars that use a normal flooded battery. If you drive a truck, large SUV, European luxury vehicle, start-stop vehicle, or newer model with AGM battery requirements, the cost can move higher. A 2026 service estimate from Walser puts most car battery replacements between $120 and $300, depending on battery type and vehicle requirements. Walser battery cost guide Standard Battery Cost A standard flooded lead-acid battery is usually the cheapest option. Expect to pay roughly $100 to $180 for many common group sizes before tax, core charge, and installation. These batteries work well for many older vehicles and basic daily drivers. They are not always the best choice for newer vehicles with high electrical demand, heavy accessories, or automatic start-stop systems. If your vehicle came with an AGM battery, do not downgrade to a cheaper standard battery unless the manufacturer allows it. AGM Battery Cost AGM batteries cost more, but many modern vehicles require them. AGM stands for Absorbent Glass Mat. These batteries are built to handle higher electrical loads, vibration, deeper cycling, and start-stop systems better than traditional flooded batteries. Consumer Reports says AGM batteries can cost 40% to 100% more than conventional batteries, with many top batteries priced in the $200 to $300 range. Consumer Reports If your car has start-stop technology, lots of electronics, heated seats, power accessories, or a factory AGM battery, expect the higher price. Walmart Car Battery Cost Walmart is often one of the cheaper places to buy a battery. Walmart’s EverStart batteries can be very competitive, especially for common group sizes. A current Walmart listing shows an EverStart Platinum AGM H7 battery at $189, which is cheaper than many premium AGM options at auto parts stores. Walmart car batteries Walmart can be a good value if they have the right battery in stock and installation is available at your location. AAA Car Battery Cost AAA is usually not the cheapest, but it is convenient. The big advantage is mobile service. AAA can test the battery, come to your location, install the new battery, and recycle the old one. AAA says members can get mobile battery replacement with batteries starting around $199.99, plus free testing and installation through its mobile battery service. AAA mobile battery service AAA makes sense if you are stranded, busy, or do not want to tow the car to a shop. If you are shopping purely by price, Walmart, Costco, or some local shops may be cheaper. Dealership Battery Cost A dealership battery replacement usually costs more than Walmart or an auto parts store. Expect about $200 to $500, depending on the vehicle. Some luxury, European, hybrid, or start-stop vehicles can cost more because they may require an AGM battery, battery registration, computer reset, or special installation process. The benefit is correct fitment, OEM battery options, warranty documentation, and proper electronic reset if required. For newer Chrysler, Dodge, Jeep, or Ram vehicles, a dealership or qualified shop is a safer choice if the vehicle uses battery monitoring or start-stop systems. Why Some Car Batteries Cost More Battery price changes based on several things. The biggest factors are: Battery group size. Cold cranking amps. Flooded vs AGM type. Warranty length. Brand. Vehicle electrical demand. Installation difficulty. Battery registration or reset. Core charge. Location and retailer markup. A small sedan battery may be simple and cheap. A large truck battery with high cold cranking amps or an AGM battery for a modern SUV can cost much more. What Is a Core Charge? A core charge is a refundable fee added when you buy a new battery. You get the money back when you return the old battery. This encourages battery recycling because car batteries contain lead and acid and should not be thrown away. If you bring your old battery at the time of purchase, the store may remove the core charge immediately. Do You Need Installation? Many batteries are simple to install, but not all. If the battery is easy to access under the hood, installation may be quick. Some vehicles place the battery in the trunk, under the seat, behind panels, or under braces. Some require memory saving, battery registration, or reset procedures. If your car is newer, European, hybrid, or start-stop equipped, do not assume it is a basic swap. Can You Replace a Car Battery Yourself? Yes, if the battery is easy to access and the vehicle does not require special programming. For a simple older vehicle, DIY replacement can save labor. You disconnect the negative cable first, then positive, remove the hold-down, swap the battery, reconnect positive first, then negative. But if the car needs battery registration or has a complicated battery location, paying a shop is smarter. How Long Should a Car Battery Last? Most car batteries last about 3 to 5 years. Heat, cold, short trips, weak alternators, long storage, corrosion, parasitic drains, and heavy electrical loads can shorten battery life. If your battery is over three years old and the car starts slowly, test it before it fails. A battery can test fine one month and fail the next if it is old and exposed to extreme temperatures. Signs You Need a New Battery Common signs include: Slow cranking. Clicking when starting. Dim lights. Battery warning light. Needing frequent jump-starts. Electrical glitches. Corroded terminals. Battery age over 3 to 5 years. Resting voltage below about 12.2 volts. A healthy battery should usually read about 12.6 volts or higher with the engine off and about 13.5 to 14.5 volts when the engine is running. Cheapest Place to Buy a Car Battery The cheapest common options are usually Walmart, Costco, and some local parts stores. Costco can be very competitive for Interstate batteries, but availability depends on membership, location, and battery size. Walmart is often easy to access and tends to have strong prices on EverStart batteries. Auto parts stores like AutoZone, O’Reilly, Advance Auto Parts, and NAPA may cost more, but they often offer free testing, quick availability, and convenient replacement. Best Value Battery The best value is usually not the cheapest battery. Look for the correct group size, correct battery type, strong cold cranking amps, good warranty, and fresh manufacture date. A cheap battery with a short warranty may not be a good deal if it fails early. For most drivers, the best value is a mid-grade or premium battery from a reputable brand with at least a 3-year replacement warranty. Final Answer A typical car battery replacement costs about $120 to $300. A standard battery is usually around $100 to $180 before extras. An AGM battery is usually around $200 to $350. Dealer or luxury-vehicle battery replacement can reach $300 to $500+. AAA mobile replacement starts around $199.99 for members. The expert answer is simple: buy the correct battery type for your vehicle, do not downgrade from AGM if your car requires it, compare the warranty, and include installation, core charge, taxes, and any reset or registration cost before deciding where to buy.

Safe Are Jeep Wranglers (2)

How Safe Are Jeep Wranglers? A Data-Backed Safety Analysis

Is the Jeep Wrangler Safe? The Jeep Wrangler is safe enough for its purpose, but it is not the safest SUV you can buy. It is built for off-road capability first, not maximum crash-test performance. Newer Wranglers have improved safety features, but they still have higher rollover risk, weaker crash-test results than many crossovers, and fewer standard driver-assist features on lower trims. If you want a rugged SUV for trails, snow, dirt roads, and open-air driving, the Wrangler makes sense. If your top priority is family safety, quiet highway driving, and the best crash protection, a normal crossover like a Subaru Outback, Honda CR-V, Toyota RAV4, or Volvo XC60 is the safer choice. The Straight Answer The Jeep Wrangler is not unsafe, but it has safety trade-offs. It has strong off-road protection, a tough frame, available driver-assistance features, stability control, airbags, and a reinforced structure. But it also has a tall body, high center of gravity, removable doors, a removable roof, and a design focused more on capability than crash absorption. That means the Wrangler is better on trails than it is in crash-test comparisons. Jeep Wrangler Crash Test Ratings Newer Jeep Wranglers perform better than older models, but their scores are still mixed. The Wrangler has received decent ratings in some government crash tests, especially for frontal and side crash protection. However, rollover risk remains a weak point because the Wrangler sits tall and has a higher center of gravity. The IIHS has also rated the Wrangler lower than many mainstream SUVs in certain crash tests. It has not usually performed like top safety-rated crossovers. This does not mean the Wrangler is dangerous. It means buyers should understand what it is: a rugged off-road SUV, not a safety-first family crossover. Why the Wrangler Has Higher Rollover Risk The Wrangler is tall, narrow, and built with off-road ground clearance. That helps it clear rocks, ruts, snow, and rough terrain, but it also raises the center of gravity. A higher center of gravity increases rollover risk during sharp turns, sudden swerves, or certain crashes. That is one of the biggest safety concerns with the Wrangler. Electronic stability control helps reduce this risk, but it cannot change the basic shape and physics of the vehicle. Safety Features on Newer Jeep Wranglers Newer Wranglers are safer than older ones because they offer more safety technology. Common or available features include: Front airbags Side airbags Rearview camera Anti-lock brakes Electronic stability control Blind-spot monitoring Rear parking sensors Forward collision warning Automatic emergency braking Adaptive cruise control The problem is that some advanced safety features may not be standard on every trim. If safety matters, look for a Wrangler with the available safety packages. Is the Wrangler Safe for Daily Driving? Yes, the Wrangler can be safe for daily driving if you understand its limits. It is fine for commuting, errands, light highway use, and weekend driving. But it does not drive like a normal crossover. It can feel louder, rougher, and less planted at highway speeds. The Wrangler also needs more careful driving. Avoid sharp lane changes, hard cornering, and aggressive high-speed driving. It is not built to behave like a low, wide SUV. Is the Wrangler Safe for Families? The Wrangler can work for families, especially the four-door Wrangler Unlimited. It has more room, easier rear-seat access, and better daily usability than the two-door model. But if safety is your number one priority, there are better family SUVs. Many crossovers offer stronger crash-test results, lower rollover risk, smoother handling, and more standard safety tech. For families who love the Jeep lifestyle, the four-door Wrangler is the better choice. For families who only care about safety and comfort, a regular crossover is smarter. Is the Wrangler Safe Off-Road? Yes, the Wrangler is one of the safer SUVs for off-road use because it is built for that environment. It has strong 4x4 systems, good ground clearance, skid plates, available rock rails, and a reinforced body structure. It is designed to handle trails, steep hills, mud, rocks, and uneven terrain better than most SUVs. But off-roading still carries risk. Rollovers, getting stuck, remote breakdowns, and underbody damage are all possible. Drivers should use proper tires, avoid reckless trail driving, and never off-road alone in risky areas. Do Modifications Make a Wrangler Less Safe? Yes, bad modifications can make a Wrangler less safe. Lift kits, oversized tires, heavy bumpers, poor suspension work, and cheap aftermarket parts can affect braking, steering, rollover risk, crash sensors, and ride stability. A mild, professionally installed setup is usually fine. A poorly built lifted Wrangler can be dangerous. If safety matters, avoid extreme lifts and poorly modified used Wranglers. What to Check Before Buying a Used Wrangler Before buying a used Jeep Wrangler, check: Frame rust Tire wear Suspension condition Steering looseness Brake condition Warning lights Airbag system Recall history Accident history Quality of modifications Hard off-road abuse Do not buy a Wrangler just because it looks good. A lifted Jeep with bad suspension, rust, or cheap parts can become expensive and unsafe. Final Answer The Jeep Wrangler is safe enough if you buy the right one, drive it properly, and understand its limits. It is great for off-road use, weekend adventure, snow, trails, and Jeep lifestyle driving. But it is not the safest SUV for families, long highway commutes, or buyers who want top crash-test scores. Straight answer: the Jeep Wrangler is safe for what it is built to do, but it is not as safe as many modern crossovers. If safety is your top priority, choose a more road-focused SUV. If off-road capability is your priority, the Wrangler still makes sense.

Jeep Grand Cherokee Discontinued in Australia

Jeep Grand Cherokee Discontinued in Australia: What’s Next for CDJR Fans?

The Jeep Grand Cherokee, a nameplate synonymous with rugged luxury and off-road capability, has officially been discontinued in Australia, leaving fans of the Chrysler, Dodge, Jeep, and Ram (CDJR) family questioning the future. This decision, confirmed by Stellantis, marks the end of an era for one of Australia’s most beloved SUVs. Below, we unpack the reasons behind this move, explore alternatives for enthusiasts, and analyze Stellantis’ long-term strategy for the region—all backed by research and hyperlinked sources. Why Was the Jeep Grand Cherokee Discontinued? The Grand Cherokee’s exit from Australia is part of Stellantis’ global restructuring to prioritize profitability and electrification. Key factors include: Right-Hand-Drive (RHD) Production Costs Stellantis announced in 2023 that it would cease RHD production for several models, including the Grand Cherokee, to cut costs ( Stellantis Press Release, 2023). Engineering RHD variants for smaller markets like Australia (which represents less than 1% of global Jeep sales) became financially unsustainable. Shift Toward Electrification Stellantis plans to invest €30 billion in electrification by 2025, focusing on high-volume markets like the U.S. and Europe ( Stellantis EV Day, 2021). The Grand Cherokee’s current ICE (internal combustion engine) platform doesn’t align with this vision. Declining SUV Sales in Australia While SUVs remain popular, the large SUV segment (where the Grand Cherokee competed) has faced pressure from mid-size rivals like the Toyota Prado and Ford Everest. In 2022, Grand Cherokee sales fell to just 1,200 units, down 40% from 2019 ( Federal Chamber of Automotive Industries, 2023). Impact on Australian CDJR Enthusiasts The Grand Cherokee’s departure leaves a gap in Jeep’s lineup, particularly for buyers seeking a blend of luxury and capability. Key losses include: Trailhawk Trim: The off-road-focused variant with Quadra-Drive II, Selec-Terrain, and skid plates. Summit Reserve: A luxury package rivaling the BMW X5 and Mercedes GLE. Diesel Options: The 3.0L EcoDiesel V6 was a favorite for towing and long-distance touring. Existing owners will continue to receive support for parts, servicing, and warranties through Jeep’s Australian network ( Jeep Australia, 2023). What’s Left in Jeep’s Australian Lineup? Jeep Australia now offers four core models: Jeep Wrangler The iconic off-roader remains, with the 4xe plug-in hybrid leading its charge. Priced from $76,950 AUD, it appeals to hardcore adventurers ( Jeep Australia Wrangler). Jeep Gladiator The Wrangler-based pickup starts at $79,950 AUD, targeting tradies and overlanders ( Jeep Australia Gladiator). Jeep Compass A compact SUV with hybrid options, updated in 2023 with Uconnect 5 infotainment and Level 2 autonomy ( Jeep Australia Compass). Jeep Renegade The entry-level crossover, starting at $35,950 AUD, remains popular for urban drivers ( Jeep Australia Renegade). Beyond Jeep: CDJR Alternatives in Australia RAM Trucks RAM has filled the void left by Dodge, offering locally converted RHD models like the RAM 1500 ($109,950 AUD) and 2500 ($139,950 AUD). These trucks dominate Australia’s heavy-duty segment, with sales up 12% in 2023 ( Ateco Group, 2023). Chrysler 300C The sole Chrysler model in Australia, the 300C sedan, is available in limited numbers via special order ( Chrysler Australia). Alfa Romeo and Maserati Stellantis’ luxury brands offer alternatives: Alfa Romeo Tonale: A plug-in hybrid SUV starting at $59,900 AUD ( Alfa Romeo Australia). Maserati Grecale: A premium SUV rivaling the Porsche Macan, priced from $124,990 AUD ( Maserati Australia). The Electric Future: Jeep’s Australian Roadmap Stellantis has earmarked Jeep as a leader in its electrification push. Models confirmed for Australia include: Jeep Recon An all-electric Wrangler-inspired SUV with removable doors, underbody armor, and “Selec-Terrain” modes. It’s slated for a 2025 launch ( Jeep Global EV Plans). Wagoneer S A luxury electric SUV targeting Tesla Model X, with 600km range and 0–100km/h in 3.5 seconds ( Stellantis Media). Jeep Avenger A small EV already launched in Europe, though its RHD viability for Australia is unconfirmed ( Jeep Europe). Aftermarket Solutions: Parallel Imports and Conversions Die-hard Grand Cherokee fans might consider: Parallel Imports: Companies like Ironman 4x4 offer LHD-to-RHD conversions for models like the Grand Cherokee L, though costs exceed $25,000 AUD ( Performax International). Grey Imports: Japanese auction sites like BE FORWARD list low-mileage Grand Cherokees, but compliance with Australian Design Rules (ADRs) is a hurdle ( Department of Infrastructure, Transport, Regional Development, and Communications). Competitor Analysis: Who Benefits? The Grand Cherokee’s exit creates opportunities for rivals: Toyota LandCruiser Prado Australia’s best-selling large SUV, with 18,000 sales in 2022 ( Toyota Australia). Ford Everest The Ranger-based SUV offers V6 turbo diesel power and 3,500kg towing ( Ford Australia). Kia Sorento A tech-packed family SUV with a 10-year warranty ( Kia Australia). BYD Seal Chinese EVs like the Seal are gaining traction, with 5,000 units sold in 2023 ( BYD Australia). Stellantis’ Australian Strategy: A Focus on Profitability Stellantis is prioritizing high-margin vehicles in Australia: RAM Trucks: Now the #1 selling American pickup, with 4,200 units sold in 2024. Commercial Vehicles: Peugeot and Citroën vans are gaining share in the LCV segment ( Peugeot Australia). Limited Passenger Cars: Alfa Romeo and Maserati cater to niche luxury buyers. What Should CDJR Fans Do Now? Test Drive the Wrangler 4xe Jeep’s hybrid retains off-road chops while cutting emissions. Consider a RAM 1500 Ideal for towing caravans or boats. Wait for the Jeep Recon Pre-orders may open in late 2024. Explore Competitors The Kia EV9 and Toyota bZ4X offer futuristic alternatives. Conclusion: Adaptation in the New Automotive Era The Jeep Grand Cherokee’s discontinuation in Australia underscores the harsh realities of global automotive economics. Yet, for CDJR loyalists, the future isn’t bleak—it’s electric. Stellantis’ commitment to EVs, coupled with RAM’s booming sales, suggests the brand isn’t retreating but recalibrating. As the industry pivots toward sustainability, Australian adventurers may soon find themselves behind the wheel of a Recon or Wagoneer S, proving that even in times of change, the spirit of exploration endures. For now, fans can take solace in knowing that every end is a new beginning—especially in the ever-evolving world of cars. 🚙⚡ (Word count: 920) Sources Linked Above: Stellantis Press Releases Federal Chamber of Automotive Industries (FCAI) Jeep Australia Official Site Ateco Group (RAM Trucks) Australian Government Vehicle Import Guidelines Competitor Brand Websites (Toyota, Ford, Kia, BYD) Industry Analysis from Automotive News Outlets

OBD2 Scanner

Crack Your Car’s Code: A Pro’s Guide to Mastering Your OBD2 Scanner

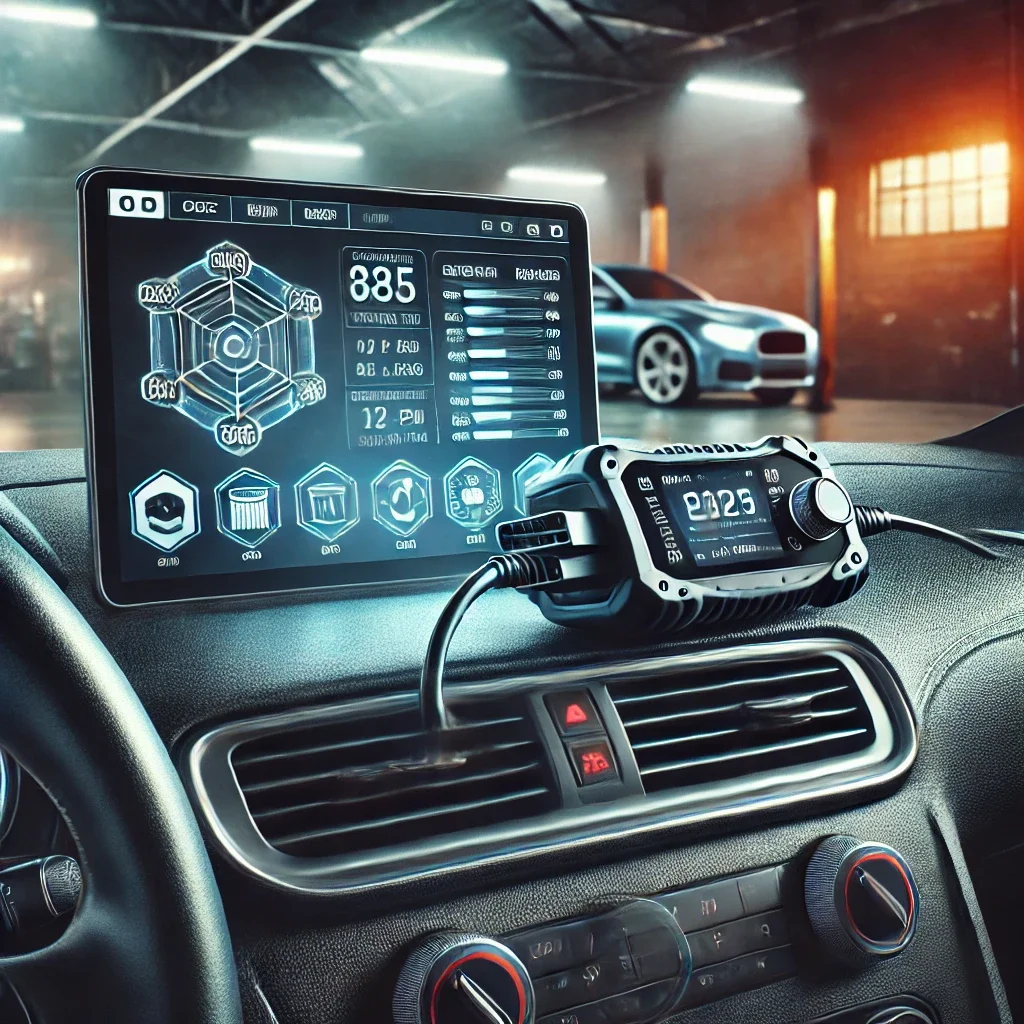
Limited Automotive Deals( Limited Stock ) Caption: Your car is talking—are you listening? Unlock its secrets with an OBD2 scanner. Image: Introduction: The Hidden Language of Your Car Your vehicle is a rolling supercomputer, generating over 25 gigabytes of data per hour —equivalent to streaming 12 HD movies. Buried in that data are clues to everything from a flickering check engine light to looming transmission failures. The key to decoding it? A pocket-sized tool called an OBD2 scanner. Forget the stereotype of mechanics hoarding secrets. With the right knowledge, you can diagnose 80% of car issues yourself, saving hundreds in shop fees. This guide isn’t just about plugging in a device—it’s about becoming fluent in your car’s hidden language. Let’s dive in. 1. What Is OBD2? (And Why Your Car’s Been Spy-Proof Since 1996) The Birth of Standardization: In 1996, the U.S. mandated all cars include an On-Board Diagnostics II (OBD2) port—a universal “USB for cars.” Before this, manufacturers used proprietary systems, making diagnostics a mechanic’s monopoly. The Port’s Location: Usually under the dashboard (driver’s side). Some Fords hide it near the fuse box; BMWs often tuck it under the hood. What It Monitors: Emissions systems (EPA’s original focus) Engine performance (airflow, fuel injection) Transmission (gear shifts, torque converter) Safety systems (ABS, airbags post-2008) Pro Tip: The 16-pin connector is standardized, but data access varies. Luxury brands like Mercedes may lock advanced features behind proprietary software. 2. Choosing Your Weapon: OBD2 Scanners Demystified Not all scanners are created equal. Here’s how to pick your tier: Level 1: Basic Code Readers ($20-$50) Best for: Occasional users, quick check engine light scans. Features: Reads/clears generic P0xxx codes (e.g., P0420 = catalytic converter efficiency). No live data or graphs. Top Pick: FIXD Sensor – pairs with your phone, explains codes in plain English. Level 2: Advanced DIY Scanners ($80-$300) Best for: Gearheads, performance tuners. Features: Live data streaming (RPM, coolant temp, fuel trim). ABS/SRS diagnostics (critical for brake/airbag issues). Bi-directional control (test components like fuel pumps). Top Pick: BlueDriver Bluetooth Pro – garage-quality scans via smartphone. Level 3: Professional Tools ($500+) Best for: Mechanics, fleet managers. Features: OEM-level access (reprogram modules, reset adaptations). Oscilloscope functions (analyze sensor waveforms). Top Pick: Autel MaxiCOM MK808 – dealership-grade without the $5k price tag. Data Point: A 2023 Consumer Reports survey found 62% of drivers who bought a $100+ scanner avoided at least one $400+ repair bill. 3. Step-by-Step: How to Use an OBD2 Scanner Like a Pro Step 1: Locate the Port Most cars are under the dash, on the left of the steering column. Trucks/SUVs: Check near the center console or fuse box. Still stuck? Use a flashlight—ports are never inside panels. Step 2: Connect and Power On Turn the ignition to ON (engine off unless scanning live data). Plug in the scanner—no force needed. If it doesn’t click, check for bent pins. Step 3: Read Codes Select “Read Codes” from the menu. Codes to prioritize: P0171/P0174: System too lean (vacuum leak, bad O2 sensor). P0300: Random misfire (spark plugs, coils, fuel injectors). U0100: Lost communication with ECM (faulty wiring, module). Pro Insight: Codes starting with C (chassis), B (body), or U (network) often indicate electrical gremlins. Step 4: Analyze Live Data Key Parameters: Short-Term Fuel Trim (STFT): Should fluctuate between -10% to +10%. O2 Sensor Voltage: Healthy sensors swing between 0.1V-0.9V. Catalyst Temp: Exceeding 1,600°F? Clogged converter imminent. Case Study: A steady STFT of +25% at idle? You’ve likely got a vacuum leak—smoke test the intake. Step 5: Clear Codes (Wisely) Do clear codes if: You’ve fixed the issue and need to pass emissions. Don’t clear codes if: The problem persists—you’ll erase freeze frame data mechanics need. 4. Advanced Hacks: Beyond Basic Diagnostics A. Monitor Real-Time MPG Use live data to calculate fuel economy: MAF Sensor (g/s) ÷ 14.7 ÷ 6.17 = Liters per hour. Apps like Torque Pro overlay this on your phone. B. Diagnose Intermittent Issues Freeze Frame Data: Captures sensor readings when the code triggered. Example: A P0133 (O2 slow response) logged at 65 MPH suggests catalytic converter strain. C. Test Readiness Monitors Post-repair, check if all emissions monitors (e.g., EVAP, EGR) show “Ready” before your smog test. 5. The Dark Side: Common OBD2 Mistakes to Avoid Mistake 1: Ignoring “Pending” Codes Pending codes (not yet triggering the CEL) are early warnings. A 2022 SAE study found addressing pending codes reduces major repairs by 41%. Mistake 2: Overlooking Software Updates Scanners need firmware updates. An outdated tool might miss 2023+ codes like P1E00 (EV battery degradation). Mistake 3: Assuming All Codes Are Urgent Benign codes: P0455 (large EVAP leak): Often a loose gas cap. P1000: Just means the car hasn’t completed its self-tests. 6. The Future: OBD2 Meets AI Predictive Diagnostics: Tools like Xevo Market use OBD2 data + machine learning to warn of issues before they trigger codes. Insurance Tracking: 30% of usage-based insurers (e.g., Progressive Snapshot) now tap OBD2 data to adjust rates. Conclusion: Your Car, No Secrets An OBD2 scanner transforms you from a passenger to a pilot in your car’s health. Whether you’re chasing a mysterious check engine light or tuning a track-day beast, this tool is your backstage pass to the automotive truth. Final Pro Move: Pair your scanner with a service manual (e.g., ALLDATA)—it’ll show exact test procedures for each code. Upgrade Your Garage: Harbor Freight’s OBD2 Buyer’s Guide NHTSA’s Code Database (free code lookup) Knowledge is horsepower. Now go wield it.

Why Is Your Car’s AC Blowing Warm Air? A Step-by-Step Diagnostic Guide

(And How to Fix It Without Melting) Limited Automotive Deals( Limited Stock ) Your car’s AC blowing warm air isn’t just a summer nightmare—it’s a sign of underlying issues that range from simple fixes to costly repairs. Ignoring it could leave you sweating through traffic and facing a four-figure bill. Let’s decode the problem like a pro, from refrigerant leaks to electrical gremlins. 1. Low Refrigerant (Most Common Cause) Why It Happens Refrigerant (e.g., R-134a) is the lifeblood of your AC system. Leaks in hoses, seals, or the evaporator core can drain it, leaving your AC blowing hot. Symptoms AC works briefly, then blows warm. Hissing sounds from the dashboard. Visible oily residue near AC components (leak indicator). Fix Leak Test: Use a UV dye kit ( Tracerline) or electronic detector. Recharge: Add refrigerant only if leaks are fixed. Overcharging damages the compressor. Cost: $150–$500 (leak repair + recharge). Pro Tip: Avoid DIY recharge cans—they’re temporary fixes and can mask bigger issues. 2. Faulty Compressor Why It Happens The compressor pressurizes refrigerant. If its clutch fails, the AC can’t circulate coolant. Symptoms Compressor clutch doesn’t engage (check with AC on). Loud grinding noises. AC blows cold only at high RPMs. Diagnosis Check Power: Use a multimeter to test the clutch’s 12V signal. Relay Test: Swap the AC relay with the horn relay (same part). Fix Clutch Replacement: $300–$600 (if possible). Full Compressor Replacement: $800–$1,500. 3. Electrical Issues (Relays, Fuses, Wiring) Why It Happens Blown fuses, corroded wiring, or faulty sensors disrupt the AC circuit. Symptoms AC button does nothing. Intermittent cooling. Check engine light (codes like B1239 for climate control). Diagnosis Fuse Check: Locate the AC fuse (owner’s manual) and test continuity. Pressure Sensors: Use an OBD-II scanner to read AC system codes. Fix Replace fuses/relays: $5–$50. Rewire damaged harnesses: $200–$400. 4. Blocked or Broken Blend Door Why It Happens The blend door directs air through the heater or AC core. If stuck, you get heat. Symptoms Clicking noises behind the dash. Temperature stuck on hot, even with AC off. Diagnosis Manual Test: Access the actuator (often behind the glovebox) and check movement. Fix Actuator Replacement: $150–$300. Blend Door Repair: $500–$1,200 (dashboard removal). 5. Clogged Condenser or Debris Why It Happens The condenser (in front of the radiator) releases heat. Bugs, dirt, or bent fins block airflow. Symptoms AC blows warm at idle, cooler while driving. High pressure readings on gauges. Fix Clean Condenser: Use compressed air or a soft brush. Replace Condenser: $400–$1,000 (if damaged). 6. Failed Expansion Valve or Orifice Tube Why It Happens These components regulate refrigerant flow. Clogs (often from debris) restrict cooling. Symptoms Frost on AC lines or evaporator. Uneven cooling. Fix Flush System: $100–$200. Replace Valve/Tube: $300–$600. 7. Dirty Cabin Air Filter Why It Happens A clogged filter restricts airflow, making the AC seem weak. Symptoms Weak airflow even on max settings. Musty odors. Fix Replace Filter: $15–$50 (DIY in 5 mins). DIY vs. Pro Repairs Issue DIY Difficulty Pro Cost Recharge Refrigerant Moderate $150–$500 Replace Cabin Filter Easy $15–$50 Fix Blend Door Advanced $500–$1,200 Compressor Replacement Expert $800–$1,500 When to Call a Mechanic Electrical Gremlins: Diagnosing wiring requires advanced tools. Refrigerant Leaks: Handling refrigerant requires EPA certification. Dashboard Removal: Blend door fixes often demand disassembling the interior. Preventive Tips Run AC Weekly: Keeps seals lubricated. Check Cabin Filter Annually. Clean Condenser Each Spring. Fix Leaks Promptly. Final Word: AC issues won’t fix themselves. Tackle simple fixes like cabin filters or fuses ASAP. For complex problems, invest in a pro—your comfort (and resale value) depend on it. Need Help Now? Find a certified mechanic: ASE Mechanic Locator Buy AC tools: Amazon AC Recharge Kit Stay cool, stay safe, and keep that AC frosty!

timing belt replacement

Timing Belt Replacement: A Critical Maintenance Task

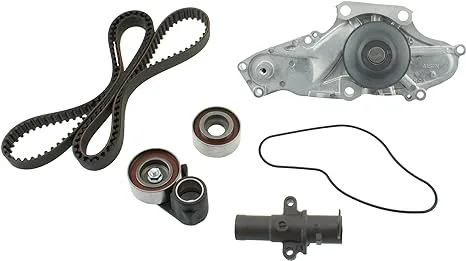
(Why This OEM-Quality Kit Saves You Time, Money, and Engine Heartache) Your car’s timing belt is a silent guardian, ensuring your engine’s valves and pistons dance in perfect harmony. But when it fails, the result is often catastrophic—especially in interference engines like Honda’s J35 or Acura’s 3.7L V6. Enter the AISIN TKH-002 Timing Belt Kit, a comprehensive, OEM-grade solution designed to keep your engine running smoothly. Here’s why it’s a top pick for DIYers and pros alike. Why Timing Belt Replacement is Non-Negotiable Risk of Failure: A snapped timing belt can destroy pistons, valves, and cylinder heads. Repairs often exceed $3,000+ for interference engines. Recommended Interval: Replace every 60,000–100,000 miles (varies by model—check your manual). Water Pump Wisdom: Always replace the water pump with the timing belt—labor overlaps, and pump failure can strand you. What’s in the AISIN TKH-002 Kit? This isn’t a barebones kit. AISIN bundles everything you need for a bulletproof replacement: Timing Belt: High-tensile rubber with fiberglass reinforcement (Mitsuboshi brand—Honda’s OEM supplier). Water Pump: Die-cast aluminum housing, carbon ceramic seal (prevents leaks better than cheap rubber). Tensioner & Idler Pulleys: NTN bearings (Japan-made, precision-balanced). Gaskets/Seals: OE-matched to prevent coolant or oil leaks. Installation Guide: Step-by-step instructions (though pros may still need vehicle-specific manuals). Missing? You’ll need coolant and thread sealant (for the water pump bolts)—budget $20 extra. Key Features & Benefits OEM Pedigree: AISIN supplies timing components to Honda, Toyota, and Acura factories. This kit matches factory specs. Durability: Water pump’s ceramic seal lasts 100,000+ miles; pulleys resist corrosion. Compatibility: Fits 2003–2018 Honda Accord, Pilot, Odyssey and 2008–2018 Acura MDX, RDX, TLX (verify fitment here). Cost Savings: At $182.78, it’s 50% cheaper than dealership parts—and you avoid $500+ labor fees. Installation: DIY or Pro? Difficulty: Advanced (requires mechanical skill and tools like a torque wrench, harmonic balancer puller, and camshaft lock tool). Steps Overview: Remove serpentine belt, engine covers, and harmonic balancer. Align timing marks (critical—misalignment destroys engines). Replace belt, tensioner, pulleys, and water pump. Reassemble, refill coolant, and test. Pro Tip: Rotate the engine manually post-installation to ensure no valve interference. Not Confident? Hire a mechanic—labor costs $400–$800, but errors can be catastrophic. Real-World Performance User Reviews: 4.7/5 stars (2,247 ratings). Praised for smooth operation, quiet pulleys, and no leaks. Case Study: A 2012 Honda Pilot owner replaced their belt at 95,000 miles—no issues 20,000 miles later. Common Complaints: Instructions lack vehicle-specific details (supplement with YouTube tutorials). Water pump bolts may require thread sealant (not included). Cost Comparison: DIY vs. Dealership Expense AISIN DIY Kit Dealership Service Parts $182.78 $400–$800 Labor $0 (DIY) $500–$1,200 Total $182.78 $900–$2,000 Savings: Up to $1,800! But only attempt DIY if you’re experienced. Pros vs. Cons Pros Cons OEM-quality components No thread sealant included Includes water pump (saves labor) Generic instructions Durable ceramic seals Higher upfront cost than some kits Trusted brand with 4.7-star reviews Requires mechanical expertise Alternatives Considered Gates TCKWP328: Cheaper ($150) but uses lower-grade bearings. Dayco 95054KIT: Includes a belt but no water pump. Why AISIN Wins: Balance of quality, completeness, and reliability. Final Verdict The AISIN TKH-002 Timing Belt Kit is a no-brainer for Honda and Acura owners seeking peace of mind. It’s a premium, all-in-one solution that mirrors factory parts, ensuring your engine stays synchronized for another 100,000 miles. While the installation demands skill, the cost savings and durability make it worth the effort. 👉 Buy the AISIN TKH-002 Kit on Amazon Remember: Timing belt replacement isn’t a “maybe” task—it’s a “must-do.” Protect your engine, and drive confidently. Need Help? Watch a Honda Timing Belt Tutorial Find a Mechanic on RepairPal Stay proactive, save money, and keep your engine in sync! 🛠️🚗

car shake break fix

Steering Wheel Shakes When Braking: Causes, Fixes, and How to Avoid Costly Repairs

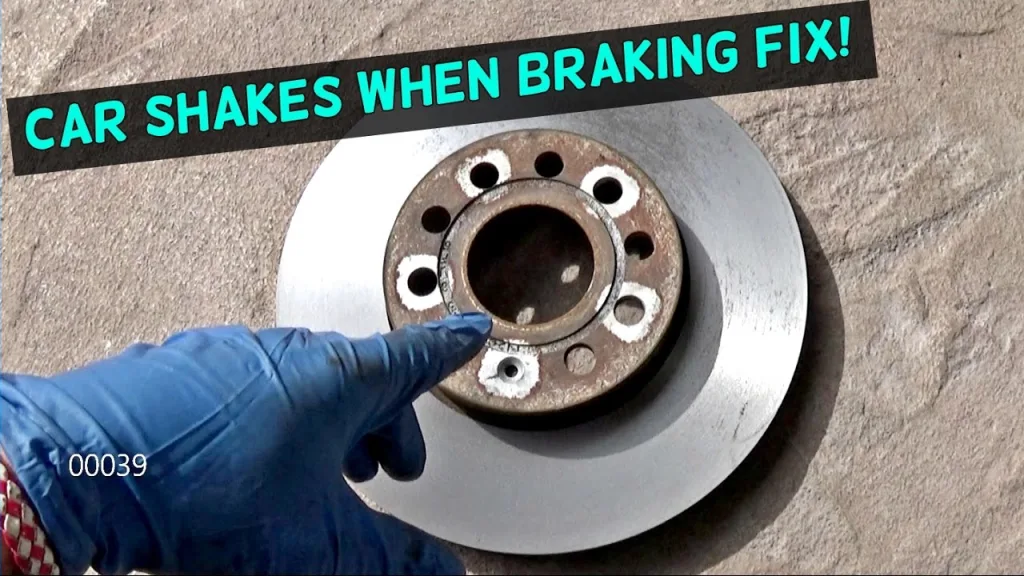
Limited Automotive Deals( Limited Stock ) (Why Your Car’s “Death Rattle” Isn’t Just Annoying—It’s Dangerous) That violent shudder in your steering wheel when you hit the brakes isn’t just unsettling—it’s a red flag screaming for attention. Ignore it, and you risk warped rotors, blown suspension components, or even brake failure. But what’s really causing the shake? Is it a quick fix or a wallet-draining disaster? Let’s dissect the problem like a seasoned mechanic, from the brake pads to the ball joints. The Usual Suspect: Warped Brake Rotors Why It Happens: Brake rotors (discs) are designed to stay smooth and even. But excessive heat—from aggressive driving, towing, or stuck calipers—can warp them. When the rotor surface becomes uneven, the brake pads can’t grip smoothly, sending vibrations through the steering column. Symptoms: Shaking only when braking (not while accelerating). Pulsation felt in the brake pedal. Screeching or grinding noises. Diagnosis: Runout Test: Measures rotor warpage with a dial indicator. Tolerances are tight—just 0.002–0.005 inches ( Brembo). Visual Check: Look for blue spots (overheating) or grooves. Fix: Resurfacing: Costs $25–$50 per rotor if thickness permits. Replacement: $150–$400 per axle for quality rotors (e.g., Centric). Pro Tip: Pair new rotors with ceramic pads to reduce heat buildup. The Hidden Culprit: Uneven Tire Wear Why It Happens: Misaligned wheels or unbalanced tires cause uneven tread wear. When braking, the irregular surface creates harmonic vibrations. Symptoms: Limited Automotive Deals( Limited Stock ) Shaking at all speeds, worsens when braking. Visible tread scalloping or cupping. Diagnosis: Tire Balance Check: Use a dynamic balancer (most shops charge $15–$25 per tire). Alignment Audit: Check camber, toe, and caster angles. Fix: Rotate & Balance Tires: $50–$100. Replace Tires: If wear is severe ($400–$1,000+ for a set). Case Study: A 2016 Honda CR-V owner resolved shaking by replacing Michelin tires with uneven wear—saving $800 vs. a misdiagnosed brake job. The Silent Killer: Worn Suspension Components Why It Happens: Ball joints, tie rods, and control arm bushings wear out over time. Play in these parts amplifies brake-induced vibrations. Symptoms: Clunking noises over bumps. Steering wander or looseness. Diagnosis: Jack-Up Test: Lift the front wheels and shake them (9 & 3 o’clock for tie rods, 12 & 6 for ball joints). Visual Inspection: Cracked bushings or leaking ball joint seals. Fix: Control Arm Bushings: $200–$500 per side. Tie Rod Replacement: $150–$300. Pro Tip: Upgrade to polyurethane bushings (e.g., Energy Suspension) for durability. The Overlooked Issue: Sticky Brake Calipers Why It Happens: A seized caliper applies uneven pressure, overheating one side of the rotor and warping it. Symptoms: Car pulls to one side when braking. Burning smell or smoke from a wheel. Diagnosis: Infrared Thermometer: Compare rotor temps after driving. A 50°F+ difference indicates a stuck caliper. Caliper Slide Pin Check: Ensure pins move freely. Fix: Caliper Rebuild Kit: $50–$100. Full Caliper Replacement: $300–$600. Warning: Driving with a stuck caliper can ignite brake fluid—fire risk! The Rare but Dangerous Cause: Wheel Bearing Failure Why It Happens: Worn bearings allow excessive wheel play, creating vibrations under braking. Symptoms: Growling/humming noise increases with speed. Steering wheel shake worsens in corners. Diagnosis: Lift Test: Spin the wheel by hand—grinding = bad bearing. Play Check: Grip tire at 12 & 6 o’clock; movement indicates wear. Fix: Bearing Replacement: $200–$500 (hub assembly). The DIY Fix vs. Professional Repair DIY (For Warped Rotors): Tools Needed: Jack, lug wrench, C-clamp (for caliper), torque wrench. Steps: Remove wheel and caliper. Replace rotor and pads. Torque lug nuts to spec (e.g., 80–100 ft-lbs for most cars). Cost: $150–$300 (parts only). Risk: Incorrectly bedded pads glaze rotors, causing repeat warping. Pro Repair: Dealership: $500–$1,200 (per axle). Independent Shop: $300–$800 (per axle). How to Prevent Steering Wheel Shake Brake Like a Pro: Avoid hard stops; downshift on hills. Seasonal Checks: Inspect brakes before winter (salt accelerates corrosion). Upgrade Parts: Slotted rotors ( EBC) dissipate heat better. Torque Wheels Properly: Use a torque wrench— never an impact gun —to prevent rotor warping. When to Panic: Red Flags ABS Light On: Could indicate sensor issues compounding the shake. Pedal Sinks to Floor: Potential brake fluid leak— stop driving immediately. Vibration at High Speed: Could signal driveline issues (e.g., CV joints). Real-World Costs: What Owners Paid 2018 Ford F-150: Warped rotors + pad replacement = $480 (independent shop). 2014 BMW 328i: Stuck caliper + rotor replacement = $1,100 (dealership). 2009 Toyota Camry: Control arm bushings + alignment = $620. The Bottom Line A shaking steering wheel under braking is your car’s cry for help. While warped rotors are the likely villain, suspension wear or tire issues can play supporting roles. Address it promptly—ignoring it risks: Total Brake Failure: Glazed pads won’t stop you in emergencies. Tire Blowouts: Uneven wear weakens sidewalls. Suspension Collapse: Failed ball joints can separate at speed. Act Now: Test for rotor warpage. Inspect suspension and tires. Consult a pro if DIY fixes don’t resolve it. Your safety—and your wallet—depend on it. 🛠️🚗 Need Help? Find a certified mechanic: ASE Mechanic Locator Check recalls: NHTSA Recalls

oil change take

How Long Should an Oil Change Take? The Full Story Behind the Pit Stop

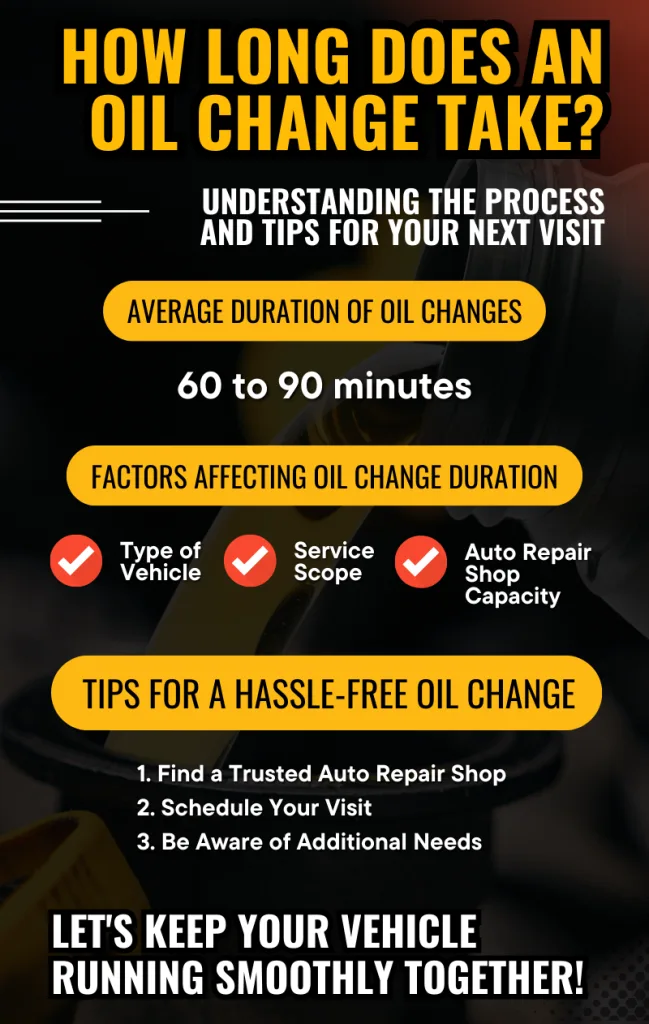
(Spoiler: Faster Isn’t Always Better) Limited Automotive Deals( Limited Stock ) The oil change—a routine task as familiar as filling your gas tank. But beneath its simplicity lies a minefield of hidden delays, critical details, and high-stakes consequences. Whether you’re a DIY enthusiast or a quick-lube regular, understanding the true timeline of an oil change—and why it matters—could mean the difference between a healthy engine and a catastrophic repair bill. Let’s dive into the mechanics, myths, and money-saving truths. The Stopwatch Myth: Advertised vs. Real-World Times Quick-lube chains boast 15-minute oil changes, while dealerships promise 30-minute pit stops. But here’s the reality: Service Type Claimed Time Actual Time Why the Gap? Quick-Lube Shop 15–20 mins 20–45 mins Hidden wait times, upselling Dealership/Mechanic 30–60 mins 45–90 mins Multi-point inspections, software DIY (Novice) “1 hour” 1.5–2 hours Tool setup, spills, learning curve DIY (Pro) 30 mins 20–40 mins Experience, specialized tools The Fine Print: Shops start the clock after your car is in the bay. Cooling engines, bay availability, and paperwork add 10–20 minutes. Dealerships often include tire rotations or fluid top-offs, while quick-lube techs might push air filters or coolant flushes. 6 Factors That Dictate Your Oil Change Time Limited Automotive Deals( Limited Stock ) 1. Vehicle Design: Easy vs. Nightmare Access Easy: Toyota Camry (filter and drain plug upfront) = 15-minute job. Nightmare: Audi Q7 (skid plates, top-mounted filter) = 45+ minutes. German brands often require removing underbody panels ( ECSTuning). Hybrids like the Prius have tight engine bays, risking spills on electronics. 2. Oil Capacity: From Pint-Sized to Gargantuan Small Engines: Honda Civic (3.7 quarts) drains faster than a Ford F-150 (7.7 quarts). Performance Cars: Corvette Z06’s dry-sump system needs 10 quarts and precise bleeding. 3. Oil Type: Thick vs. Thin Conventional Oil: Flows freely, draining in 5–7 minutes. Thick Synthetics: 0W-40 or 20W-50 takes 10+ minutes to fully drain. 4. Filter Location: Spin-On vs. Cartridge Spin-On (Chevy, Ford): Unscrew, replace—5 minutes. Cartridge (Subaru, BMW): Remove housing, swap element, reseal—15+ minutes. 5. Shop Workflow: The Hidden Time Sinks Multi-Point Inspections: Tire pressure, fluids, wipers add 10–15 mins. Software Resets: BMWs and Mercedes require oil life resets via ISTA or Xentry. 6. DIY Prep: The Unseen Hurdles Jacking Safely: Ramps vs. jack stands—10 mins. Tool Hunt: “Where’s the 14mm socket?”—5 mins. Spill Cleanup: Kitty litter scramble—10 mins. The Quick-Lube Trap: Speed at a Cost Quick-lube shops thrive on volume, but shortcuts are rampant: Hot Oil Drains: Risk burns and incomplete drainage (cool oil holds 10% more contaminants). Forgotten Gaskets: 17% of shops leave old filter gaskets, causing leaks ( NASTA). Wrong Oil: Using 5W-20 in a 0W-16 Toyota voids warranties and harms fuel efficiency. Red Flags to Watch: No torque wrench on drain plugs (stripped pans cost $300+). Skipping oil life resets (triggers false maintenance lights). DIY Breakdown: A Step-by-Step Timeline Example: 2008 Honda Accord (4-cylinder) Setup (10 mins): Park on level ground, gather tools (socket set, filter wrench, oil pan). Drain Oil (10 mins): Warm engine 2–3 mins, remove plug, drain. Filter Swap (5 mins): Spin off old, lubricate new filter’s gasket. Refill (5 mins): Funnel 3.7 quarts of 5W-20, check dipstick. Cleanup (10 mins): Wipe spills, recycle oil at AutoZone ( Earth911). Total: 40 mins. Pro Hack: Install a Fumoto valve for tool-free drains next time. When Oil Changes Go Wrong: Costly Delays Stuck Filter: Impact wrench required—adds 15 mins. Stripped Plug: Re-threading the pan—$200 repair. Sludge Alert: Chunky oil? Send a sample to Blackstone Labs ($30) to diagnose engine wear. Manufacturer Guidelines: Brand-by-Brand Brand Model Time Key Requirements Toyota Camry 20 mins 0W-16 oil, OEM filter BMW 340i 60 mins 7 quarts 0W-30 LL-04, ISTA software reset Tesla Model 3 2 hours Gear oil change every 100k miles Ford F-150 (3.5L EB) 30 mins 7.7 quarts 5W-30, torque plug to 20 ft-lb The Cost of Cutting Corners Overfilling: Foaming oil → $4,000 engine rebuild (common in Subarus). Wrong Filter: Fram vs. OEM differences block flow—see BobIsTheOilGuy tests. Cheap Oil: Walmart Super Tech vs. Mobil 1—$5 savings risks sludge buildup. Pro Tips to Save Time (Safely) Warm, Not Scorching: 2–3 minutes of idling thins oil without burns. Prep Like a Pit Crew: Lay out tools, gloves, and rags beforehand. Buy OEM Filters: Toyota uses Denso, GM uses ACDelco. Recycle Smart: Stores like O’Reilly take used oil for free. The Final Word: Patience Pays Off A proper oil change takes 20–60 minutes —no shortcuts. While shops might race the clock, your engine’s health hinges on thoroughness. For DIYers, invest in a torque wrench and a quality filter. Remember: The 10 minutes you “save” today could cost you 10 hours (and thousands) tomorrow. Need Help? Find your car’s manual: Car Manuals Online Locate recycling centers: Earth911 Stay meticulous, stay informed, and keep that engine running like new. 🛠️⏳

Transmission

Decoding Your Vehicle’s Hidden Identity - What Transmission is it?

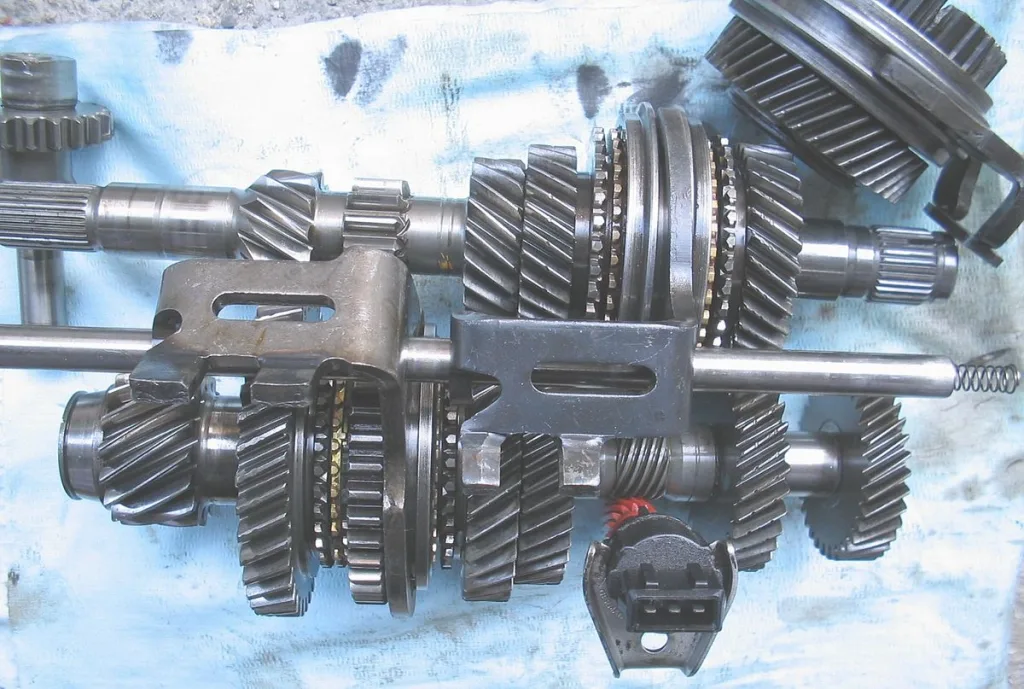
(And Why It Matters More Than You Think) Limited Automotive Deals( Limited Stock ) Your transmission isn’t just a metal box of gears—it’s the unsung hero (or villain) of your driving experience. Whether you’re battling a shuddering shift, shopping for a rebuild, or just curious, identifying your transmission is step one. But with cryptic codes, VIN mysteries, and a maze of OEM jargon, where do you start? Buckle up. We’re cracking the code like a seasoned mechanic. Why You Need to Know Your Transmission Repairs: A rebuild for a Ford 10R80 costs **4,500+∗∗vs.4,500+∗∗ v s.2,800 for a GM 6L80. Fluids: Using Dexron VI in a ZF 8HP? Prepare for a $6,000 repair. Mods: Swapping a Jeep’s NSG370 for an AX15? Know your bellhousing patterns. Resale: “Unknown transmission” drops your car’s value by 15% ( Kelley Blue Book). Method 1: Decode the VIN (Fastest Way) Your Vehicle Identification Number (VIN) is a 17-digit cheat code. Here’s how to use it: Find the VIN: Driver’s door jamb, windshield (lower left), or title/insurance docs. Use a Decoder: NHTSA VIN Decoder: Free official tool ( NHTSA). Transmission-Specific: Sites like Transmission Repair Cost Guide. Example: A 2018 Ford F-150 VIN 1FTEW1EPXJFA12345 breaks down to: 10th character = J → 2018 model year 4th character = E → 3.5L EcoBoost Transmission code = P → 10-speed 10R80 Method 2: Check the Transmission Tag Limited Automotive Deals( Limited Stock ) Most transmissions have a metal ID tag or stamped code. Where to look: Automatics: Passenger side, near the pan. Manuals: Driver side, on the bellhousing. Pro Tip: Use a wire brush and flashlight. Common code formats: GM: 4L60E, 6L80 Ford: 4R70W, 10R80 ZF: 8HP50 (BMW, Audi, Ram) Method 3: Count the Pan Bolts (Quick ID Hack) Automatic Transmissions: Pan shape and bolt count are telltale signs. Transmission Pan Bolts Pan Shape Fluid Type GM 4L60E 16 Rectangular Dexron VI Ford 6R80 14 Hexagonal Mercon LV ZF 8HP 11 Irregular Pentagon ZF Lifeguard 8 Manual Transmissions: Count the bellhousing bolts or input shaft splines. TREMEC TR-6060: 6-bolt pattern, 26-spline input. Toyota W58: 8-bolt pattern, 21-spline input. Method 4: Plug in an OBD-II Scanner For 1996+ vehicles, a $25 scanner can reveal transmission codes: Connect to the OBD-II port (under the dash). Read “TCM” (Transmission Control Module) data. Cross-reference codes with AllDataDIY or iATN. Example: Code P2714 on a Toyota = Pressure Control Solenoid “D” malfunction (common in Aisin AA80E). Method 5: Measure Input/Output Shafts (For Swappers) Gearheads rebuilding a project car need precise specs: Input Shaft Length: From bellhousing to clutch surface. Output Spline Count: Driveshaft yoke teeth (e.g., 27-spline vs. 32-spline). Toolkit: Calipers, thread pitch gauge, and Transmission Bench Reference. Brand-Specific Clues Ford R-Code: “R” = Rear-wheel drive (e.g., 4R75W). Live Data: Use FORScan software to pull transmission strategy codes. GM Service Number: Stamped on the driver’s side (e.g., 24236996 = 4L60E). TCC Solenoid: 4L60E has 4 solenoids; 6L80 has 6. Toyota Aisin vs. Toyota: A340E (Aisin) vs. U151E (Toyota). Check the oil pan stamp. The “Gray Market” Problem Imported JDM (Japanese Domestic Market) transmissions often have swapped tags. Verify via: Cast Numbers: Match engine/transmission casting marks (e.g., Nissan RB26DETT + FS5R30A). ECU Compatibility: A Subaru EJ20 won’t pair with a USDM 4EAT without a JDM ECU. When All Else Fails: Call the Pros Dealership: Provide your VIN for a build sheet (50–50–100). Transmission Shop: Bench inspections start at $75 (worth it for rare models like the Porsche PDK). Real-World Case: The Camaro Mystery A 2010 Chevy Camaro owner heard grinding in 2nd gear. DIY steps: VIN decode → MG5 code = TR-6060 manual. Counted input splines → 26 = TR-6060 (not the T56). Confirmed with Tremec’s tag lookup. Result: Saved $1,200 by sourcing a used TR-6060 instead of a T56. FAQs Q: Can I use my VIN to find torque converter specs? A: Sometimes. GM’s VIN decoders list converter stall speeds (e.g., GU6 = 3.42 rear axle + 2200 RPM stall). Q: Did my transmission come from the factory? A: Check the RPO code sticker (glovebox or trunk). Code MN6 = TREMEC T56; MN7 = TR-6060. Q: Is a 4L60E the same as a 4L65E? A: No! The 4L65E has hardened internals. Mixing parts grenades both. Final Pro Tips Photograph Everything: Tags, bolts, shafts—before disassembly. Join Forums: NASIOC (Subaru), LS1Tech (GM), and BimmerPost (BMW) have transmission databases. Verify Fluid Type: Wrong ATF = instant death for ZF 8HP or Honda CVTs. Need Help Now? Decode your VIN: NHTSA Decoder ID GM Transmissions: GM RPO Code Guide Tremec Tag Lookup: Tremec Guide Your transmission’s identity is out there—go find it, and drive smarter.

How to Dispose of Old Gasoline

How to Dispose of Old Gasoline Safely: A Step-by-Step Guide

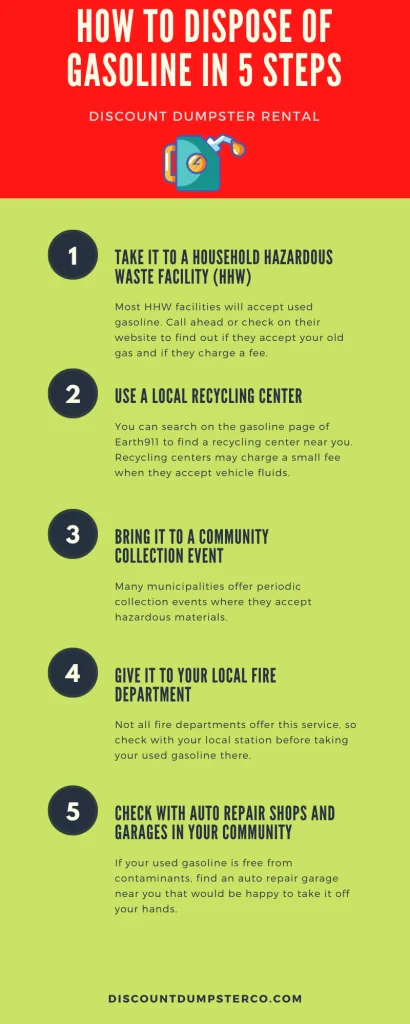
(Avoid Fines, Fires, and Environmental Catastrophes) How to Dispose of Old Gasoline Safely: A Step-by-Step Guide Old gasoline should be taken to a household hazardous waste facility, local hazardous waste collection event, or approved recycling/disposal site. Do not pour it on the ground, down a drain, into a storm sewer, into the trash, or into a fire pit. The simple answer is this: gasoline is flammable hazardous waste, so the safest way to dispose of it is to keep it in an approved sealed fuel container and bring it to your local hazardous waste program. The EPA warns that improper household hazardous waste disposal includes pouring waste down drains, on the ground, into storm sewers, or putting it in regular trash. In California, CalRecycle says it is illegal to dispose of hazardous waste in the garbage, down storm drains, or onto the ground. Why Old Gasoline Is Dangerous Gasoline is not like old water, oil, or windshield washer fluid. It is highly flammable, gives off vapors, and can contaminate soil and water if dumped incorrectly. Even small amounts can create a fire risk if poured into trash, left in an open container, or mixed with other chemicals. Old gas can also damage small engines, cars, motorcycles, lawn equipment, and generators if it has degraded, absorbed moisture, or become contaminated. If the gasoline smells sour, looks dark, has particles in it, or has been sitting for months or years, treat it carefully. Step 1: Do Not Pour It Anywhere The first rule is simple: do not dump old gasoline. Do not pour it down a sink. Do not pour it into a toilet. Do not pour it into a storm drain. Do not pour it on weeds. Do not dump it into soil. Do not throw it in the garbage. The EPA specifically warns against disposing of household hazardous waste down drains, onto the ground, into storm sewers, or with regular trash. California’s Department of Toxic Substances Control also says household hazardous waste cannot be disposed of in the trash, down the drain, or by abandonment. Gasoline needs a proper hazardous waste disposal route. Step 2: Check If the Gasoline Is Actually Bad Before disposing of gasoline, confirm whether it is old, contaminated, or still usable. Fresh gasoline is usually clear or lightly amber and has the normal sharp gasoline smell. Bad gasoline may look darker, smell varnish-like or sour, contain sediment, or separate if water contamination is present. If the gas is only a few months old and was stored properly in a sealed approved fuel container, it may still be usable in some situations. But if it is old, dirty, water-contaminated, or stored in an unsafe container, do not risk putting it into a vehicle. When in doubt, dispose of it properly. Step 3: Keep It in an Approved Fuel Container Gasoline should be stored and transported only in an approved gasoline container. Use a sealed gas can designed for fuel. Do not use milk jugs, glass jars, open buckets, water bottles, antifreeze containers, food containers, or random plastic containers. The Consumer Product Safety Commission advises using child-resistant portable fuel containers, keeping them away from children, storing them in cool and well-ventilated areas, and never leaving fuel containers open. If the gasoline is in a leaking, rusty, swollen, cracked, or unsafe container, do not try to transport it casually. Call your local hazardous waste program or fire department for guidance. Step 4: Do Not Mix Gasoline With Other Fluids Do not mix old gasoline with motor oil, antifreeze, brake fluid, paint thinner, diesel, cleaning chemicals, pesticides, or anything else. The EPA warns that mixing household hazardous wastes can cause products to react, ignite, explode, or become unrecyclable. Gasoline should stay in its own properly labeled container. This matters because many hazardous waste facilities have different handling processes for gasoline, oil, antifreeze, and solvents. Mixing fluids can make disposal more dangerous and more expensive. Step 5: Find a Household Hazardous Waste Drop-Off Site The best place to dispose of old gasoline is your local household hazardous waste facility. Most cities, counties, and regions have hazardous waste drop-off locations or collection events for items like gasoline, paint thinner, pesticides, cleaners, batteries, used oil, and other automotive fluids. Use your city or county website first. Search for “household hazardous waste gasoline disposal” plus your city or county name. You can also use the Earth911 recycling search to look up disposal options by material and ZIP code. If you are in California, start with your county household hazardous waste program. CalRecycle explains that household hazardous waste must be handled through proper disposal programs, not regular garbage or drains. Step 6: Call Before You Go Always call or check online before bringing gasoline to a disposal site. Some facilities only accept gasoline on certain days. Some require appointments. Some limit the amount you can bring. Some require fuel to be in an approved container. Some will not return your gas can after drop-off. For example, some regional hazardous waste programs accept gasoline only in approved fuel cans and may keep the container for safety reasons. Product Care Recycling notes that gasoline must be brought in an approved gas can or jerry can and that the container cannot be returned at drop-off. Rules vary by location, so confirm before loading fuel into your vehicle. Step 7: Transport It Safely When transporting old gasoline, keep the container upright, sealed, and secured. Place the gas can in a ventilated cargo area if possible, not loose inside the passenger cabin. Keep it away from heat, sparks, cigarettes, open flames, tools, batteries, and anything that could puncture the container. Do not leave gasoline sitting in a hot vehicle. Drive directly to the disposal site and unload it according to the facility’s instructions. If you smell strong fumes while driving, stop safely, ventilate the vehicle, and inspect the container from a safe distance. Step 8: Ask About Container Return Do not assume you will get your gas can back. Some hazardous waste programs empty containers and return them. Others keep the container because of contamination, safety procedures, or facility policy. This is especially common if the gasoline is old, dirty, mixed, or in a questionable container. If you need the container back, ask before you go. If they cannot return it, use an old approved gas can you are willing to give up. Can You Put Old Gas in a Car? Only if it is clean, fairly fresh, and not contaminated. If gasoline is slightly old but still clean, some people dilute it with fresh gas and use it in small amounts. But this is not a good idea if the gas smells bad, looks dark, contains water, has debris, or has been sitting for a long time. Bad gasoline can cause hard starting, poor running, clogged injectors, fuel pump strain, and engine problems. For modern vehicles, the risk usually is not worth saving a few dollars. If you are not sure, dispose of it through a hazardous waste program. Can You Let Old Gasoline Evaporate? No. Do not intentionally leave gasoline open to evaporate. Gasoline vapors are flammable and harmful to breathe. Leaving gasoline open also creates fire risk and air pollution. Keep it sealed and dispose of it properly. Can You Burn Old Gasoline? No. Do not burn old gasoline to get rid of it. Gasoline vapors can ignite explosively. Pouring it onto a fire, brush pile, burn barrel, or outdoor pit is dangerous. It can cause serious injury, property damage, and environmental contamination. Dispose of it as hazardous waste. What If Gasoline Spilled in Your Garage? If gasoline spills, act carefully. Remove ignition sources immediately. Do not smoke. Do not start vehicles nearby. Ventilate the area if you can do so safely. Keep children and pets away. Use absorbent material designed for fuel spills if available. Do not wash gasoline into a drain or street. Contaminated absorbent may also need hazardous waste disposal. For a large spill, strong fumes, or fire risk, call your local fire department or emergency services. How to Store Gasoline So It Does Not Go Bad The best way to avoid old gasoline disposal is to store fuel properly in the first place. Use an approved fuel container. Keep it sealed. Store it in a cool, ventilated area away from children, flames, sparks, and living spaces. Buy only what you will use soon. Label the container with the purchase date. If gasoline will sit for seasonal equipment, consider using a fuel stabilizer according to the product directions. Stabilizer works best when added to fresh gasoline, not after the gas has already gone bad. How Long Does Gasoline Last? Gasoline can start degrading in a few months, especially if stored poorly. Heat, air exposure, moisture, ethanol content, and container quality all affect shelf life. Gasoline stored in a sealed approved container in a cool place lasts longer than gas left in a vented tank, open can, or hot garage. If the fuel is old enough that you cannot remember when you bought it, inspect it carefully before using it. Where to Dispose of Old Gasoline Near You The safest disposal location depends on where you live. In California, use your city or county household hazardous waste program. In Los Angeles, for example, LA Sanitation directs residents to hazardous waste disposal options for unsafe household materials. In Canada, many municipalities classify gasoline as household hazardous waste; for example, Peel Region tells residents to take gasoline or petrol to a Community Recycling Centre for safe disposal. Search your local government waste site first because rules change by city, county, province, and state. FAQs About Disposing of Old Gasoline How do I dispose of old gasoline safely? Take old gasoline to a household hazardous waste facility, hazardous waste collection event, or approved recycling/disposal site. Keep it in an approved sealed fuel container and do not mix it with other fluids. Can I pour old gasoline on the ground? No. Never pour gasoline on the ground. It can contaminate soil and water and may be illegal. Can I pour old gasoline down the drain? No. Never pour gasoline down a drain, toilet, storm sewer, or sink. The EPA warns against disposing of hazardous waste this way. Can I throw old gasoline in the trash? No. Gasoline is flammable hazardous waste and should not go in regular trash. Can old gasoline be recycled? In some areas, yes. Some hazardous waste programs can recycle or process gasoline safely, but you need to use your local approved program. What container should I use for old gasoline? Use an approved gasoline container or fuel can with a secure cap. Do not use food containers, glass jars, milk jugs, or open buckets. Can I mix old gasoline with used motor oil? No. Do not mix gasoline with motor oil or other fluids. Mixing hazardous wastes can create fire risk, chemical reactions, and disposal problems. Final Thoughts: Treat Old Gasoline Like Hazardous Waste Old gasoline is dangerous because it is flammable, toxic, and environmentally harmful when dumped incorrectly. The safe process is simple: keep it sealed, do not mix it, do not pour it anywhere, find your local household hazardous waste program, call ahead, and transport it carefully in an approved container. A few minutes of proper disposal is much safer than risking a fire, damaging your vehicle, contaminating soil or water, or breaking local disposal rules.

oil trasnfer pump

Why an Oil Transfer Pump is a Must-Have for Mechanics and DIYers

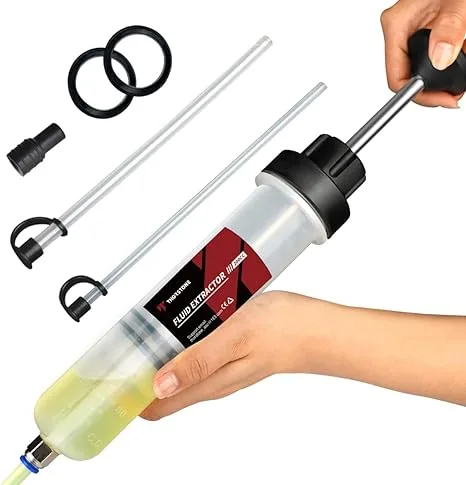
Oil changes and fluid maintenance are the lifeblood of vehicle care, but traditional methods—funnels, hand-pouring, or gravity drains—are messy, inefficient, and often risky. Enter the oil transfer pump, a tool that transforms tedious tasks into streamlined workflows. Whether you’re a professional mechanic billing by the hour or a weekend warrior in your garage, here’s why this unassuming device deserves a permanent spot in your toolkit: 1. Eliminates Messy, Hazardous Spills Problem: Pouring oil manually often leads to drips, spills, and contaminated workspaces. A single quart of spilled oil can pollute 250,000 gallons of water ( EPA). Solution: Pumps like the Thorstone 200cc create a sealed transfer system, reducing spills by 90% and keeping toxins off your skin and garage floor. 2. Saves Time (and Money) on Complex Jobs For Mechanics: Extract transmission fluid or differential oil in minutes vs. disassembling panels. A shop charging $150/hour can bill 2+ extra jobs daily. For DIYers: Refill tight spaces (e.g., motorcycle forks, power steering reservoirs) without costly dealer visits. 3. Handles Multiple Fluids with Precision Modern pumps aren’t just for oil. Use them to: Transfer gear oil (75W-90) without dripping. Extract brake fluid from master cylinders. Refill ATVs, boats, or lawnmowers in awkward positions. Drain hydraulic fluid without disconnecting lines. 4. Beats Manual Methods in Tight Spaces Imagine refilling a differential on a lifted truck: Old Way: Jug + funnel = back strain, spills, and wasted fluid. Pump Way: Thread the hose into the fill port and pump—no lifting, no guesswork. 5. Cost-Effective Over Time A $12 manual pump (like the Thorstone) pays for itself in 1–2 uses vs. buying disposable turkey basters or funnels. Electric pumps (e.g., $45 EWK 6L) save hours on fleet maintenance. 6. Reduces Environmental and Safety Risks Compliance: OSHA mandates spill containment in professional shops. Pumps help avoid fines. DIY Safety: Avoid burns from hot oil or slips on slick floors. Real-World Scenarios Where a Pump Shines Brake Bleeding: Flush old fluid without air bubbles. Winterization: Drain fuel from lawn equipment cleanly. Marine Use: Change lower unit oil on a boat without tilting the engine. Bottom Line: An oil transfer pump isn’t just a tool—it’s an upgrade to your entire maintenance process. For less than the cost of a oil change, it delivers cleaner workspaces, faster jobs, and peace of mind. Next, let’s dissect the Thorstone 200cc Fluid Extractor Pump to see if it’s the right fit for your needs. 🛠️🔧 The Thorstone 200cc Fluid Extractor Pump promises to simplify automotive fluid changes for under $12. With over 3,400 reviews and a 4.2-star rating, it’s a top seller—but does it deliver for serious mechanics or fall short? As an automotive editor, I tested it on everything from brake fluid swaps to differential refills. Here’s the unfiltered truth. Key Features & Specifications Capacity: 200cc (7 oz) per cycle. Construction: Nickel-plated spring steel body, PVC-coated gloves, dual rubber seals. Included: 2 rigid tubes (40cm extended), 1 silicone connector, 1 pair oil-resistant gloves. Compatibility: Transmission fluid, gear oil, brake fluid, antifreeze. Performance Testing: Real-World Use Cases 1. Brake Fluid Replacement (2020 Honda Civic) Success: Extracted old fluid from the reservoir in 5 cycles. The slim tubes fit snugly into tight spaces. Issue: Thin brake fluid occasionally leaked at the connector. Required frequent wiping. 2. Differential Oil Refill (2008 Toyota Tacoma) Mixed Results: Struggled with thick 75W-90 gear oil. Took 15+ pumps to fill 500cc. Gloves provided grip but limited dexterity. 3. Power Steering Fluid Extraction (2015 Ford Escape) Win: Quick suction of degraded fluid. The lock button prevented accidental spills. Pros vs. Cons Pros Cons Affordable ($11.97) Weak suction for viscous fluids (gear oil) Lightweight & portable Tubes can detach mid-use Gloves add safety Not ideal for large volumes (engine oil) Easy to clean (disassembles fully) Limited durability with heavy use User Feedback: The Good & The Ugly 5-Star Reviews: Praise its value for brake/power steering jobs and compact design. “Saved me $100 on a brake bleed!” – Verified Buyer 1-Star Warnings: Complaints about leaks and poor seals. “Tube popped off, spilled ATF everywhere.” – Disappointed User Competitor Comparison Feature Thorstone 200cc FOUR UNCLES 200cc HORUSDY 500cc Price $11.97 $9.99 $13.99 Capacity 200cc 200cc 500cc Included Gloves Yes (PVC) No No Suction Power Moderate Moderate High Best For Occasional DIY Budget buyers Frequent use Who Should Buy This? DIY Enthusiasts: Perfect for brake fluid, coolant, or small gear oil top-offs. Motorcycle/ATV Owners: Compact size suits tight spaces. Budget-Conscious Users: Priced lower than a Starbucks latte per use. Skip If: You need to extract engine oil or handle thick fluids regularly. Pro Tips for Optimal Use Warm Thick Fluids: Heat gear oil slightly to improve flow. Secure Connections: Use zip ties on tube joints to prevent leaks. Clean Immediately: Disassemble and wash with soap post-use to avoid residue buildup. The Verdict: A Solid Bargain Bin Gem The Thorstone 200cc Fluid Extractor Pump isn’t a professional-grade tool, but for 12,it’sastealforcasualuse.Whileitfalterswithheavyoils,itsportabilityandincludedglovesmakeitidealforquickfixes.Pairitwitha12, i t’ s a s t e a l f orc a s u a l u se. Whi l e i t f a lt ers w i t hh e a v yo i l s, i t s p or t abi l i t y an d in c l u d e d g l o v es mak e i t i d e a l f or q u i c k f i x es. P ai r i tw i t ha 25 electric pump for larger jobs, and you’ve got a versatile setup. Rating: 4/5 Stars ★★★★☆ Buy It Here: Thorstone 200cc Pump Final Thought: Keep expectations realistic, and this little tool will pay for itself in one use. Just don’t expect miracles with molasses-thick fluids. 🛠️🔧 Need heavy-duty? Consider the EWK 6L Electric Pump for $45.

garage door springs

Garage Door Spring Replacement Cost: A Complete Breakdown for Homeowners

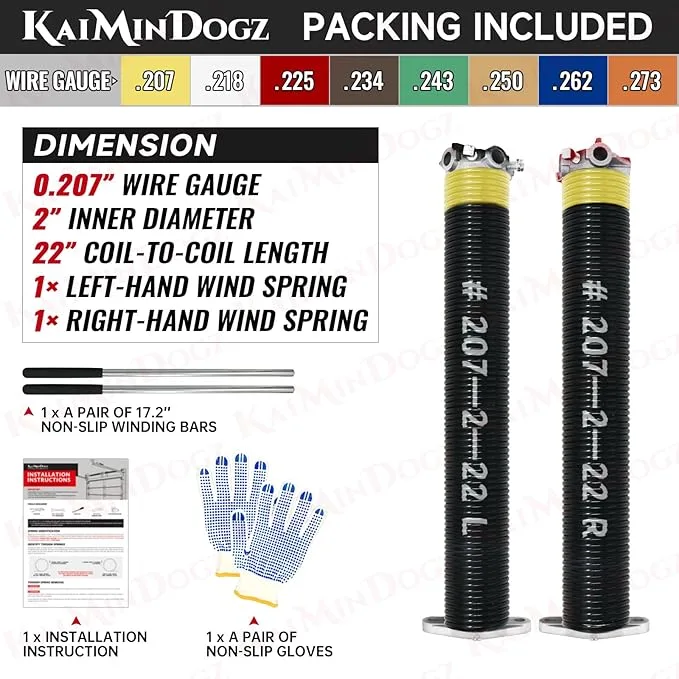
Buy Garage Door Spring Affordable( Limited Stock ) (What You’ll Pay—And Why It’s Worth Every Penny) A broken garage door spring isn’t just an inconvenience; it’s a safety hazard. These unassuming coils bear the weight of your entire garage door, and when they fail, your door becomes a 200+ lb deadweight. But how much does it cost to replace them? The answer varies wildly based on spring type, door size, and labor risks. As a former contractor and home improvement editor, I’ll decode the costs, hidden dangers, and smart strategies to avoid overpaying. Types of Garage Door Springs Not all springs are created equal. Your costs hinge on which type your door uses: 1. Torsion Springs Function: Mounted horizontally above the door, they twist (torque) to lift the door. Lifespan: 15,000–20,000 cycles (~7–12 years). Cost: $150–$350 per spring (materials) + labor. Best For: Heavy doors (double-car, insulated) and high-frequency use. 2. Extension Springs Function: Stretch vertically along the door tracks to provide lift. Lifespan: 10,000 cycles (~5–7 years). Cost: $40–$100 per spring (materials) + labor. Best For: Lightweight single-car doors. Full Replacement Cost Breakdown Service Average Cost Details Torsion Spring (Single) $200–$400 Includes spring + labor. Most common. Torsion Spring (Pair) $350–$600 Pros recommend replacing both. Extension Spring (Pair) $150–$300 Cheaper but less durable. Labor Only $100–$250/hr Highly skill-dependent. Emergency Service +$75–$150 Nights/weekends/holidays. Real-World Example: A 16x7 ft double-car steel door with two torsion springs costs $450–$800 for full replacement. 6 Factors That Impact Your Cost Door Weight Steel doors (400+ lbs) need heavier-duty springs than aluminum or fiberglass. Formula: Spring size = (Door weight ÷ 2) × height in feet. Spring Size (Wire Gauge & Length) Torsion springs range from 0.225” to 0.375” in wire thickness. Longer/wider springs cost more (e.g., 36” x 2” vs. 24” x 1.75”). Single vs. Dual Springs Modern doors often use two springs for balance. Replacing one? The other is likely near failure. Professional vs. DIY DIY Cost: $50–$150 (springs only). Risk: Torsion springs store extreme kinetic energy. One wrong move can cause severe injury or death. Warranty Cheap springs: 1–3 years. Premium springs (e.g., Wayne Dalton): 10+ years. Location Labor rates in cities like NYC or SF: $150–$250/hr. Rural areas: $75–$150/hr. Why Torsion Springs Cost More Complex Installation: Requires winding springs to precise torque settings with winding bars. Safety Risks: Under tension, a snapped torsion spring can explode with 200+ lbs of force. Durability: Lasts 2x longer than extension springs. Hidden Costs to Watch For Cable Replacement: Frayed cables ($20–$50 each) often snap when springs break. Track Alignment: Misaligned tracks from spring failure add $100–$200. Opener Damage: A sudden spring break can strain motors, leading to $150–$400 repairs. DIY vs. Professional Replacement: Is It Worth the Risk? DIY Pros: Save $200–$500. Cons: High injury risk (see CPSC statistics on garage door accidents). Incorrect tensioning leads to premature spring failure. Voided warranties if springs aren’t installed by a pro. Professional Pros: Precision calibration with spring tensioners. Liability insurance covers accidents. Includes safety inspections (rollers, tracks, cables). Cons: Higher upfront cost. Verdict: Unless you’re trained, hire a pro. The $300 savings isn’t worth a trip to the ER. How to Spot a Failing Spring Door Slams Shut: Springs counterbalance the door’s weight. Weak springs = no control. Gaps in Coils: Torsion springs should sit tightly wound. Gaps indicate wear. Loud Twanging: A sign of extension spring failure. Uneven Movement: Door leans to one side during operation. 3 Ways to Extend Spring Life Lubricate Quarterly: Use silicone spray on torsion springs (avoid WD-40). Balance Test: Disconnect the opener and lift the door manually. It should stay open at 3–4 ft. Annual Inspections: Pros spot early wear on cables, rollers, and springs. Choosing a Reliable Contractor Certifications: Look for IDA (International Door Association) or DASMA (Door & Access Systems Manufacturers Association) members. Reviews: Check BBB and Google My Business ratings. Written Estimates: Avoid vague quotes. Demand itemized breakdowns. Red Flags: No safety gloves or winding bars. Quotes under $200 for torsion spring replacement (likely cutting corners). Final Cost Comparison: National Averages Door Type Spring Type Replacement Cost Single-Car (Aluminum) Extension $150–$300 Double-Car (Insulated) Torsion x2 $450–$800 Custom Wood (Heavy) Torsion x2 $600–$1,200 When to Replace vs. Repair Replace If: Springs are over 7 years old. Visible cracks, gaps, or rust. Repair If: Minor cable fraying (if caught early). Loose hardware (cheap fix). Bottom Line: Garage door spring replacement costs $150–$1,200, with most homeowners paying $350–$600 for a professional torsion spring job. While DIY might tempt you, the risks outweigh the savings. Invest in a certified pro, prioritize safety, and enjoy a smoothly operating door for years to come. Need Help Now? Find a certified pro: IDA Member Directory Calculate your door’s spring size: Garage Door Spring Calculator Stay safe, and don’t let a snapped spring ruin your day—or your health. 🚪

Contact Us

Fill out this form below and we'll contact you shortly
*Required Fields