


Compare Jeep Grand Cherokee L and Wagoneer
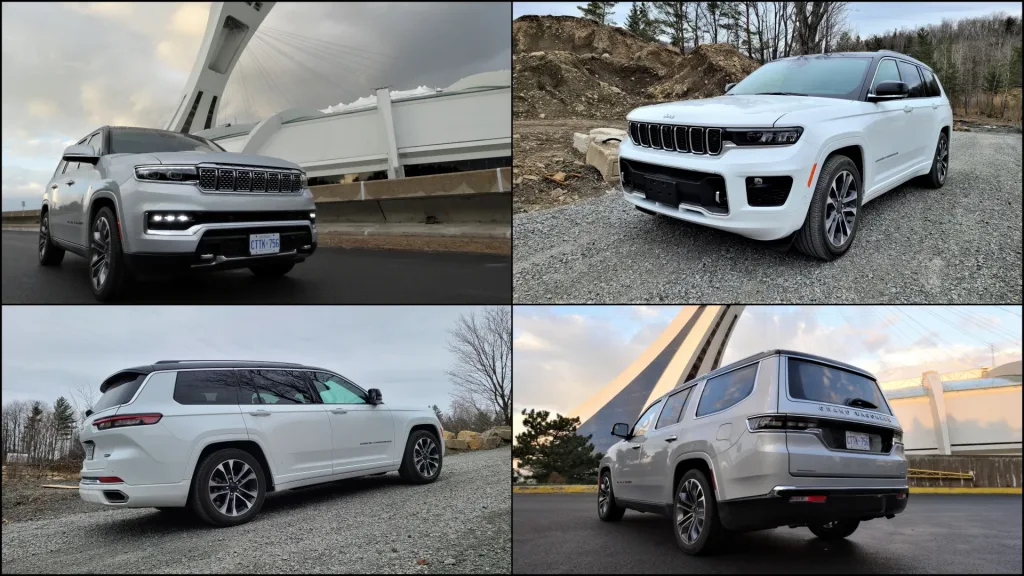
Yes, Jeep SUVs do offer 3rd row seating. The main Jeep SUVs with three rows are the Jeep Grand Cherokee L and the Jeep Wagoneer / Grand Wagoneer lineup, depending on model year and availability.
For most families near Simi Valley, Thousand Oaks, Moorpark, Oxnard, Los Angeles, San Fernando Valley, Santa Clarita, and Burbank, the Jeep Grand Cherokee L is the more practical three-row Jeep SUV. The Wagoneer and Grand Wagoneer are better for shoppers who want maximum passenger room, more cargo space, stronger towing capability, and a larger full-size SUV feel.
If you want to compare options, start with the new Jeep inventory at Simi Valley Chrysler Dodge Jeep Ram, check the used Jeep inventory, or value your current vehicle before upgrading through the trade-in page.
Table of Contents
- Which Jeep SUVs Have 3rd Row Seating?
- Jeep Grand Cherokee L: The Practical 3-Row Jeep SUV
- Jeep Wagoneer and Grand Wagoneer: The Bigger 3-Row Jeep Option
- Grand Cherokee vs. Grand Cherokee L: Which One Has More Room?
- Grand Cherokee L vs. Wagoneer: Which 3-Row Jeep Is Better?
- Is the Third Row Comfortable for Adults?
- How Much Cargo Space Do 3-Row Jeep SUVs Offer?
- Can a 3-Row Jeep SUV Tow?
- Common Buyer Warnings Before Buying a Used 3-Row Jeep
- Local Dealership Angle: Simi Valley CDJR
- Final Answer
Which Jeep SUVs Have 3rd Row Seating?
The Jeep SUVs with 3rd row seating are the Jeep Grand Cherokee L and the Jeep Wagoneer / Grand Wagoneer family.
The standard Jeep Grand Cherokee is a two-row SUV with seating for up to five passengers. The Grand Cherokee L is the longer three-row version with seating for up to seven passengers. Jeep confirms that the two-row Grand Cherokee seats up to five, while the Grand Cherokee L seats up to seven.
The Wagoneer and Grand Wagoneer are larger full-size Jeep SUVs with three-row seating. They are designed for shoppers who want more passenger space, more cargo capacity, more towing ability, and a more premium full-size SUV experience.
So the simple answer is:
- Choose the Jeep Grand Cherokee L if you want a midsize three-row Jeep SUV.
- Choose the Wagoneer or Grand Wagoneer if you want a larger full-size three-row Jeep SUV.
- Choose the regular Grand Cherokee if you only need two rows and prefer a smaller, easier-to-park SUV.
Jeep Grand Cherokee L: The Practical 3-Row Jeep SUV
The Jeep Grand Cherokee L is usually the best fit for families who want three rows without going all the way up to a full-size SUV.
It gives you:
- Seating for up to seven passengers.
- Available second-row captain’s chairs or a second-row bench, depending on configuration.
- A usable third row for kids, teens, or occasional adult passengers.
- Available 4×4 capability.
- Strong towing capability when properly equipped.
- A more manageable size than a Wagoneer.
- A more premium feel than many mainstream three-row SUVs.
According to Jeep, the Grand Cherokee L offers up to 84.6 cubic feet of cargo space with the second and third rows folded. Jeep also notes that a second-row bench seat is available so the vehicle can carry up to seven passengers. Source: Jeep Grand Cherokee 3-Row SUV
That makes the Grand Cherokee L a smart choice for families who need extra seating but still want a vehicle that feels comfortable for daily driving, school pickup, road trips, and weekend getaways.
Jeep Wagoneer and Grand Wagoneer: The Bigger 3-Row Jeep Option
The Wagoneer and Grand Wagoneer are the larger three-row Jeep SUVs. They are built for shoppers who want more room, more towing confidence, and more upscale features than the Grand Cherokee L.
The Grand Wagoneer is especially strong for buyers who need a premium full-size SUV. Jeep lists the 2026 Grand Wagoneer with seating for seven, 179 cubic feet of passenger volume, and strong cargo space depending on configuration. Source: Jeep Grand Wagoneer Specs
The Grand Wagoneer is also the stronger choice for towing. Jeep lists an available maximum towing capacity of up to 10,000 pounds when properly equipped. Source: Jeep Grand Wagoneer Capability
Choose the Wagoneer or Grand Wagoneer if you want:
- A larger full-size SUV.
- More third-row room.
- More cargo space.
- More luxury features.
- Stronger towing capability when properly equipped.
- A better fit for larger families.
- A stronger road-trip SUV.
The tradeoff is size. A Wagoneer or Grand Wagoneer will feel larger in traffic, parking lots, tight garages, and city driving compared to a Grand Cherokee L.
Grand Cherokee vs. Grand Cherokee L: Which One Has More Room?
The Jeep Grand Cherokee and Jeep Grand Cherokee L are closely related, but they are not the same.
The standard Grand Cherokee has two rows and seats up to five passengers. It is better for drivers who want a premium SUV, strong available 4×4 capability, and easier daily maneuverability without needing a third row.
The Grand Cherokee L adds the third row and stretches the vehicle to create space for up to seven passengers. It is the better choice if you have a larger family, drive with kids and friends, or want extra flexibility for road trips.
Choose the standard Grand Cherokee if you want:
- Two rows.
- Easier parking.
- Slightly simpler family use.
- More focus on front and second-row comfort.
- A good mix of daily driving and Jeep capability.
Choose the Grand Cherokee L if you want:
- Three rows.
- Seating for up to seven.
- More passenger flexibility.
- More cargo flexibility.
- A better family SUV setup.
- A stronger alternative to three-row crossovers.
For shoppers near Simi Valley and Thousand Oaks who want one SUV for daily driving, family trips, and weekend adventures, the Grand Cherokee L is usually the more flexible choice.
Grand Cherokee L vs. Wagoneer: Which 3-Row Jeep Is Better?
The better choice depends on how much space and capability you need.
The Jeep Grand Cherokee L is better if you want a three-row SUV that still feels manageable for daily driving. It is easier to park, easier to maneuver, and more practical for many families who only need the third row part of the time.
The Wagoneer or Grand Wagoneer is better if you want more room and more towing strength. It is the better choice for larger families, frequent road trips, heavy cargo needs, and towing larger trailers when properly equipped.
Choose the Grand Cherokee L if:
- You want three rows but do not want a massive SUV.
- You need seating for up to seven.
- You want a premium midsize SUV feel.
- You want available Jeep 4×4 capability.
- You want a practical family SUV for daily use.
Choose the Wagoneer or Grand Wagoneer if:
- You need more adult-friendly third-row space.
- You want more cargo space behind the rows.
- You tow more often.
- You want a larger, more premium SUV.
- You regularly travel with a full family and luggage.
For most local families, the Grand Cherokee L is the sweet spot. For shoppers who want the biggest Jeep SUV available, the Wagoneer and Grand Wagoneer are the stronger fit.
Is the Third Row Comfortable for Adults?
The third row in the Jeep Grand Cherokee L is useful, but it is best for kids, teens, and shorter trips with adults. Adults can use it, but it is not as spacious as a full-size SUV third row.
The Wagoneer and Grand Wagoneer are better if adult third-row comfort is a major priority. Their larger body gives passengers more room to stretch out, especially on longer drives.
Think of it this way:
- Grand Cherokee L: better for families who need occasional third-row use.
- Wagoneer / Grand Wagoneer: better for regular adult third-row use.
- Standard Grand Cherokee: better if you do not need a third row at all.
If you regularly drive with six or seven people, test the third row before buying. Seat comfort depends on passenger height, second-row position, seat configuration, and cargo needs.
How Much Cargo Space Do 3-Row Jeep SUVs Offer?
Cargo space depends on which Jeep SUV you choose and how many seats are in use.
The Jeep Grand Cherokee L is flexible because you can fold the third row when you do not need it. With the second and third rows folded, Jeep lists up to 84.6 cubic feet of cargo space. Source: Jeep Grand Cherokee 3-Row SUV
That is useful for:
- Groceries.
- Strollers.
- Sports gear.
- Camping supplies.
- Luggage.
- Home improvement items.
- Road-trip bags.
The Wagoneer and Grand Wagoneer offer more space overall because they are full-size SUVs. They are better if you need to carry passengers and cargo at the same time.
If you have a big family and often travel with luggage, the Wagoneer or Grand Wagoneer makes more sense. If you only need the third row occasionally, the Grand Cherokee L is usually enough.
Can a 3-Row Jeep SUV Tow?
Yes, three-row Jeep SUVs can tow when properly equipped, but towing capacity depends on engine, drivetrain, equipment, trim, and vehicle condition.
The Jeep Grand Cherokee L can tow up to 6,200 pounds when properly equipped, according to Jeep’s Grand Cherokee specifications. Source: Jeep Grand Cherokee Specs
The Grand Wagoneer can tow up to 10,000 pounds when properly equipped, according to Jeep. Source: Jeep Grand Wagoneer Capability
That makes the Grand Cherokee L strong enough for many smaller trailers, light campers, personal watercraft, and utility trailers. The Grand Wagoneer is the better choice if you tow heavier loads more often.
Before towing, always check:
- Owner’s manual.
- Exact towing rating by VIN.
- Trailer weight.
- Tongue weight.
- Payload.
- Hitch rating.
- Tire condition.
- Brake controller needs.
- Cooling system condition.
- Local towing laws.
Always use “when properly equipped” for towing because not every trim or configuration has the same rating.
Common Buyer Warnings Before Buying a Used 3-Row Jeep
A used Jeep Grand Cherokee L, Wagoneer, or Grand Wagoneer can be a strong family SUV, but condition matters.
Before buying, check:
- Service history.
- Tire wear.
- Brake condition.
- Suspension noise.
- Oil leaks.
- Coolant leaks.
- Transmission shifting.
- 4×4 system operation.
- Infotainment screen function.
- Power seat and power-folding seat operation.
- Liftgate operation.
- Prior accident history.
- Rust or underbody damage.
- Water leaks.
- Towing history.
- Aftermarket wiring.
- Open recalls by VIN.
If the SUV was used for towing, inspect the hitch, rear suspension, brakes, tires, and cooling system. If it was used off-road, inspect the underbody, skid plates, suspension, wheels, and alignment.
Always check recalls by VIN using the official NHTSA recall lookup tool, especially when buying a used family SUV.
Local Dealership Angle: Simi Valley CDJR
For shoppers near Simi Valley, Thousand Oaks, Moorpark, Oxnard, Los Angeles, San Fernando Valley, Santa Clarita, and Burbank, a three-row Jeep SUV makes sense if you want family space without giving up Jeep capability.
At Simi Valley Chrysler Dodge Jeep Ram, you can compare available Jeep Grand Cherokee L, Wagoneer, Grand Wagoneer, and other Jeep SUVs in new inventory.
If you want a lower payment or more trim options, check the used inventory and compare mileage, condition, service history, trim, drivetrain, and warranty coverage.
You can also start your approval through the finance application, estimate your vehicle’s value through the trade-in page, schedule maintenance with the service department, or order genuine Mopar parts through the parts department.
For families who need a daily driver, road-trip SUV, school-run vehicle, and weekend adventure vehicle in one package, the Grand Cherokee L is usually the best starting point. For maximum space and towing strength, move up to the Wagoneer or Grand Wagoneer.
Final Answer: Do Any Jeep SUVs Have 3rd Row Seating?
Yes, Jeep SUVs do have 3rd row seating. The main options are the Jeep Grand Cherokee L and the Jeep Wagoneer / Grand Wagoneer lineup.
The best choice for most families is the Jeep Grand Cherokee L because it offers seating for up to seven, useful cargo flexibility, available 4×4 capability, and a more manageable size than a full-size SUV. The Wagoneer and Grand Wagoneer are better if you want maximum space, more premium features, and stronger towing capability when properly equipped.
For shoppers near Simi Valley, Thousand Oaks, Moorpark, Oxnard, Los Angeles, San Fernando Valley, Santa Clarita, and Burbank, compare new and used three-row Jeep SUVs at Simi Valley Chrysler Dodge Jeep Ram, check financing options, value your trade, or schedule a test drive to see which Jeep SUV fits your family best.
What Does Srt Stand For Dodge?

SRT stands for Street and Racing Technology. In Dodge vehicles, the SRT badge means the model was engineered for higher performance, stronger acceleration, upgraded handling, aggressive styling, and track-inspired capability.
The simple answer: SRT is Dodge’s performance badge. It has been used on some of Dodge’s most powerful vehicles, including the Charger SRT Hellcat, Challenger SRT Hellcat, Durango SRT, Durango SRT Hellcat, Challenger SRT Demon, and Viper SRT. Dodge’s current SRT page says the SRT lineup still lives on through the Durango SRT, while also paying tribute to the Charger SRT and Challenger SRT models. (dodge)
What Does SRT Mean?
SRT = Street and Racing Technology
That name tells you the purpose of the badge:
| Letter | Meaning | What It Means |
|---|---|---|
| S | Street | Built to be driven on public roads |
| R | Racing | Inspired by track and drag-strip performance |
| T | Technology | Uses upgraded engineering, powertrain, braking, cooling, and handling tech |
SRT is not just a cosmetic badge. On true SRT models, it usually means a more serious engine, upgraded brakes, performance suspension, aggressive tuning, and stronger cooling systems.
What Makes a Dodge SRT Different?
A Dodge SRT model is usually built above the normal trim levels.
Compared with a regular Dodge model, an SRT version may include:
More horsepower.
More torque.
Larger brakes.
Performance suspension.
Sportier transmission tuning.
More aggressive exhaust.
Performance tires.
Track apps or performance pages.
Better cooling.
Unique SRT styling.
That is why SRT models are usually more expensive, faster, and more collectible than standard trims.
Popular Dodge SRT Models
Some of the most famous Dodge SRT vehicles include:
Dodge Challenger SRT Hellcat
Dodge Charger SRT Hellcat
Dodge Challenger SRT Demon
Dodge Challenger SRT Super Stock
Dodge Durango SRT 392
Dodge Durango SRT Hellcat
Dodge Viper SRT
Dodge says the 2023 Charger SRT Hellcat Redeye offered best-in-class horsepower at the time, while the Challenger SRT lineup included extreme models like the Super Stock. (dodge)
Is SRT the Same as Hellcat?
No. SRT and Hellcat are related, but they are not the same thing.
SRT is the performance division/badge.
Hellcat refers to Dodge’s supercharged 6.2L HEMI V8 engine family and the high-output models that use it.
So a Hellcat is usually an SRT, but not every SRT is a Hellcat.
Example:
| Model | SRT? | Hellcat? |
|---|---|---|
| Durango SRT 392 | Yes | No |
| Charger SRT Hellcat | Yes | Yes |
| Challenger SRT Demon | Yes | Hellcat-based |
| Viper SRT | Yes | No |
Is SRT Better Than Scat Pack?
SRT is usually positioned above Scat Pack, especially when talking about Hellcat models.
A Scat Pack Dodge usually uses a naturally aspirated 6.4L 392 HEMI V8. It is powerful, loud, and fun, but it is generally below the supercharged SRT Hellcat models.
Basic comparison:
| Trim | Typical Engine | Main Purpose |
|---|---|---|
| R/T | V8 muscle value | |
| Scat Pack | 392 HEMI performance | |
| SRT 392 | Higher-performance 392 model | |
| SRT Hellcat | Supercharged extreme performance | |
| SRT Demon | Drag-strip-focused limited model |
Does Dodge Still Make SRT?
Yes, but the SRT lineup has changed.
The gas-powered Dodge Charger and Challenger SRT models ended with the 2023 model year, but Dodge still references the Durango SRT as part of the current SRT lineup. (dodge)
The SRT name also remains important across Stellantis performance vehicles and performance parts. Dodge’s official site references factory-backed performance parts designed, developed, and validated by SRT Engineering. (dodge)
Final Answer
SRT stands for Street and Racing Technology.
For Dodge, SRT means a high-performance model built with more power, stronger brakes, better cooling, sharper handling, and more aggressive engineering than regular trims.
The easiest way to remember it:
SRT = Dodge performance.
Hellcat = supercharged SRT power.
Scat Pack = strong 392 HEMI performance below Hellcat.
How Much Does a RAM 1500 Weigh?
How Much Does a Ram 1500 Weigh?
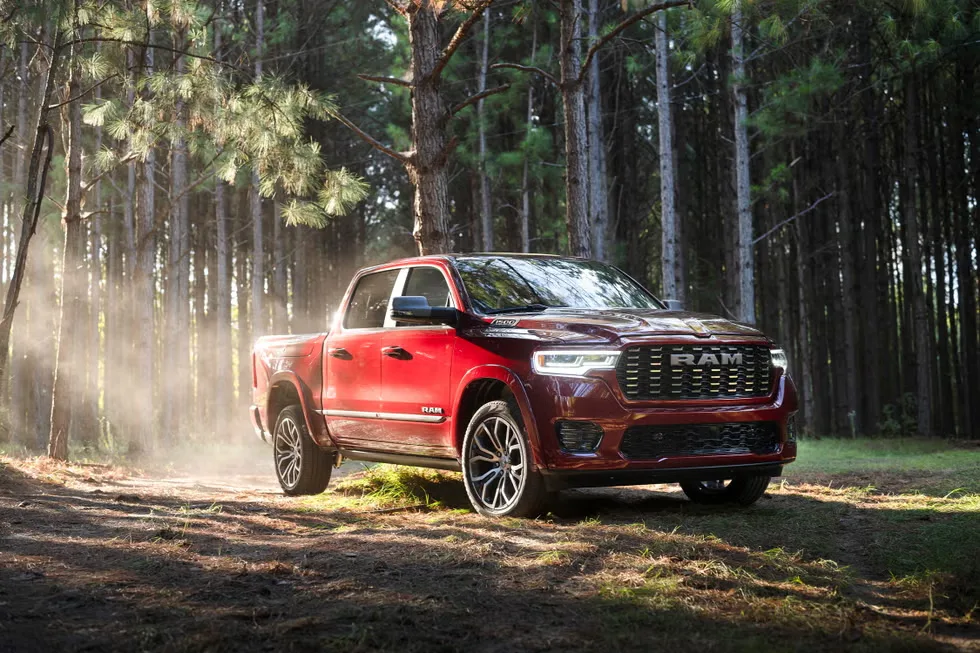
A Ram 1500 usually weighs between about 4,800 and 6,400 pounds, depending on cab style, bed length, drivetrain, engine, trim, and options.
The simple answer is this: a normal Ram 1500 Crew Cab 4×4 usually weighs around 5,000 to 5,500 pounds, while heavier luxury, off-road, and high-output trims can get closer to 6,000 pounds or more. Ram’s official 2026 specs list one Ram 1500 configuration at 4,836 pounds curb weight, while Edmunds lists a 2026 Ram 1500 Crew Cab configuration at 4,982 pounds curb weight. Ram 1500 specs Edmunds Ram 1500 specs
What Is Curb Weight?
Curb weight is the truck’s weight before passengers and cargo.
It usually includes standard equipment and operating fluids, but it does not include people, tools, bed cargo, trailer tongue weight, aftermarket bumpers, larger tires, bed covers, toolboxes, lift kits, or camping gear.
So when someone asks, “How much does a Ram 1500 weigh?” they usually mean curb weight.
Ram 1500 Weight by Configuration
A Ram 1500 can weigh very differently depending on the build.
A lighter 2WD Quad Cab work-truck-style model will weigh less than a loaded Crew Cab 4×4 Limited, Tungsten, Rebel, or RHO. Four-wheel drive adds weight. Bigger cabs add weight. Luxury trims add weight. Off-road equipment adds weight.
A practical range looks like this:
Lighter Ram 1500 models: around 4,800 to 5,100 pounds
Typical Crew Cab 4×4 models: around 5,000 to 5,600 pounds
Luxury and off-road trims: around 5,600 to 6,100+ pounds
Heavier RHO/TRX-style performance trucks: can approach or exceed 6,000 pounds
Car and Driver tested a 2026 Ram 1500 and listed a curb weight of 5,967 pounds, showing how heavily equipped versions can weigh far more than a base configuration. Car and Driver Ram 1500
Ram 1500 GVWR
GVWR means Gross Vehicle Weight Rating.
That is the maximum safe loaded weight of the truck, including the truck itself, passengers, cargo, accessories, and trailer tongue weight.
Ram’s official 2026 Ram 1500 specs list one configuration with a 7,200-pound GVWR, 2,360-pound payload, and 7,660-pound towing capacity. Ram 1500 specs
That means the empty truck may weigh under 5,000 pounds, but the maximum safe loaded weight can be much higher.
Curb Weight vs Payload
Curb weight tells you how much the truck weighs empty.
Payload tells you how much weight you can add.
Payload includes:
Passengers
Cargo
Tools
Bed load
Aftermarket accessories
Trailer tongue weight
Coolers, camping gear, and luggage
This is where truck buyers make mistakes. A Ram 1500 may have a strong tow rating, but if the payload is low, passengers and trailer tongue weight can eat up the capacity quickly.
Ram lists maximum payload up to 2,360 pounds for the 2026 Ram 1500, but that is for a specific configuration, not every trim. Ram capability
Why Ram 1500 Weight Matters
Ram 1500 weight affects towing, payload, fuel economy, braking, tire wear, acceleration, and ride quality.
A lighter Ram 1500 may have better payload and efficiency. A heavier luxury or off-road trim may feel more planted and comfortable, but it can have less payload left for cargo and trailer tongue weight.
If you tow often, do not look at curb weight alone. Check:
GVWR
Payload
GCWR
Axle ratings
Tow rating
Tongue weight
Door sticker payload
The door sticker on the exact truck is the number that matters most.
How to Find the Exact Weight of Your Ram 1500
The best place to check is the driver-side door sticker.
Look for:
GVWR
GAWR front
GAWR rear
Tire and loading information
Payload rating
For the actual real-world weight, use a public scale or CAT scale. That is the only way to know what your truck weighs after adding passengers, accessories, fuel, tools, tonneau cover, tires, and cargo.
Final Answer
A Ram 1500 usually weighs about 4,800 to 6,400 pounds, depending on configuration.
A common Crew Cab 4×4 Ram 1500 is usually around 5,000 to 5,600 pounds. A lighter work-truck configuration may be under 5,000 pounds, while loaded luxury, off-road, or performance versions can approach 6,000 pounds or more.
For towing or payload planning, check the exact truck’s door sticker, not just a general online estimate.

Which Jeep is better, Rubicon or Wrangler?
Which Jeep Is Better, Rubicon or Wrangler?
The better choice depends on what you mean, because Rubicon is not a separate model from Wrangler. The Jeep Wrangler Rubicon is a trim level of the Jeep Wrangler.
The simple answer is this: if you want the best Jeep for serious off-roading, the Rubicon is better. If you want the best Jeep for daily driving, price, comfort, or basic adventure use, another Wrangler trim may be better.
A Wrangler Sport, Sport S, Willys, Sahara, or Rubicon all belong to the Wrangler family. The Rubicon is the factory-built trail specialist.
Rubicon vs Wrangler: What’s the Difference?
A Jeep Wrangler is the model. Rubicon is one version of it.
Think of it like this:
A Wrangler is the SUV.
A Rubicon is the most off-road-focused Wrangler trim.
The Wrangler lineup gives you the classic Jeep formula: removable roof, removable doors, available 4×4, rugged styling, and strong off-road heritage. The Rubicon takes that formula and adds hardware designed for more difficult trails.
Jeep positions the Wrangler as its open-air 4×4 SUV, while Jeep Canada explains that the Rubicon’s Rock-Trac 4×4 system is built around a heavy-duty transfer case with a 4:1 low-range gear ratio for more controlled off-road torque.
Why the Rubicon Is Better Off-Road
The Rubicon is better off-road because it comes with equipment that standard Wrangler trims may not have.
Depending on model year, a Rubicon can include:
Tru-Lok electronic locking differentials.
Rock-Trac 4×4 system.
Lower crawl gearing.
Heavy-duty axles.
Electronic front sway bar disconnect.
Rock rails.
More aggressive off-road tires.
Stronger trail protection.
That equipment matters when you are climbing rocks, driving through ruts, crossing uneven ground, or crawling slowly over technical terrain. Stellantis has described Rubicon models with Rock-Trac 4×4, a 4:1 low-range ratio, Tru-Lok locking differentials, skid plates, and rear tow hooks as part of the Wrangler’s trail-focused capability.
Why a Regular Wrangler May Be Better
A regular Wrangler trim may be better if you do not need hardcore off-road equipment.
For most people, a Wrangler Sport, Sport S, Willys, or Sahara is already capable enough for snow, dirt roads, camping trails, beach driving, light off-roading, and everyday adventure use.
The Rubicon costs more because you are paying for serious trail hardware. If you never use lockers, sway bar disconnect, low-range crawl gearing, or rock rails, you may be spending money on features you do not need.
For daily use, a Sahara or Sport S may make more sense because it can feel more practical, less expensive, and easier to live with.
Rubicon vs Wrangler Sport
The Wrangler Sport is usually the basic Wrangler. The Rubicon is the serious off-road Wrangler.
Choose the Wrangler Sport if you want the lowest price, classic Jeep style, and a blank canvas for upgrades.
Choose the Rubicon if you want factory off-road capability without building the Jeep yourself.
The Sport is a good choice for daily driving and light trails. The Rubicon is the better choice for rock crawling and technical off-road driving.
Rubicon vs Wrangler Sahara
The Sahara is the comfort-focused Wrangler. The Rubicon is the trail-focused Wrangler.
Choose the Sahara if you want a nicer daily driver, more comfort features, a polished look, and good road manners.
Choose the Rubicon if you care more about off-road hardware than road comfort.
A Sahara is better for pavement-heavy driving. A Rubicon is better for trail-heavy driving.
Is the Rubicon Worth the Extra Money?
Yes, the Rubicon is worth it if you actually use what it gives you.
If you go off-road often, drive difficult trails, want stronger factory hardware, or plan to keep the Jeep long term, the Rubicon makes sense. It can also hold value well because off-road buyers recognize the equipment.
If you mostly drive to work, run errands, and occasionally hit a gravel road, the Rubicon may be more Jeep than you need.
For local shoppers, compare used Jeep inventory by trim, mileage, modifications, and service history. If you want newer Wrangler options with warranty coverage, check current new Jeep inventory.
Final Answer: Which One Is Better?
The Rubicon is the better Wrangler for serious off-roading.
A regular Wrangler is better for buyers who want lower cost, daily comfort, and casual adventure capability.
So the real answer is:
Buy the Rubicon if you want the toughest factory trail setup.
Buy another Wrangler trim if you want the Jeep look, open-air freedom, and 4×4 capability without paying extra for hardcore off-road equipment.
When Should You Clean the Air Filters on a Ram 1500?
You should check the air filters on a Ram 1500 at every oil change and replace them when they are dirty, restricted, damaged, or at the mileage interval listed in the owner’s manual.
The simple answer is this: inspect the engine air filter every 10,000 to 15,000 miles, replace it around 15,000 to 30,000 miles under normal driving, and replace it sooner if you drive in dust, construction zones, wildfire smoke, dirt roads, off-road trails, or heavy traffic. Many Ram service references list engine and cabin air filter replacement around 10,000 miles in severe conditions and 15,000 to 30,000 miles in normal use. Larry H. Miller Dodge Boise
Engine Air Filter vs Cabin Air Filter
Your Ram 1500 has two different air filters.
The engine air filter cleans the air going into the engine. A dirty engine air filter can reduce airflow, hurt throttle response, lower efficiency, and make the engine work harder.
The cabin air filter cleans the air coming through the HVAC system. A dirty cabin filter can reduce A/C airflow, create musty smells, make the fan louder, and allow more dust or pollen into the cabin.
They do different jobs, but both should be checked regularly.
Should You Clean or Replace the Engine Air Filter?
For most Ram 1500 owners, replace the engine air filter instead of cleaning it.
Most factory-style paper engine air filters are not designed to be washed or reused. You can gently tap out loose dust during inspection, but once the filter is visibly dirty, clogged, wet, oil-soaked, torn, or packed with debris, replace it.
Reusable performance filters are different. If your Ram has a washable aftermarket filter, follow that filter brand’s cleaning and oiling instructions exactly. Over-oiling a reusable filter can cause sensor problems.
When to Replace the Engine Air Filter
Under normal driving, a Ram 1500 engine air filter often lasts around 15,000 to 30,000 miles.
Replace it sooner if you drive in:
Dusty roads.
Construction zones.
Off-road trails.
Desert conditions.
Heavy pollen.
Wildfire smoke.
Farm or jobsite use.
Frequent towing.
Long idle periods.
Severe service can shorten the interval to around 10,000 miles, especially if the truck sees dirt roads or dusty work conditions. Courtesy Chrysler Jeep Dodge Ram
When to Replace the Cabin Air Filter
The cabin air filter is commonly replaced around 15,000 miles, or once a year for many drivers.
If you drive in Los Angeles-area traffic, dusty roads, wildfire smoke, or heavy pollen, replacing it sooner makes sense. A dirty cabin filter can make the A/C feel weak even when the system itself is working properly.
Some service schedules list cabin air filter replacement every 15,000 miles, while others allow up to 30,000 miles depending on driving conditions. Firestone Complete Auto Care
Signs Your Ram 1500 Needs an Air Filter
Your engine air filter may need replacement if you notice weaker acceleration, lower fuel economy, rougher engine response, dirty filter pleats, debris in the air box, or a check engine light related to airflow.
Your cabin air filter may need replacement if you notice weak vent airflow, dusty cabin air, musty smell, louder blower fan noise, foggy windows that clear slowly, or allergy symptoms getting worse inside the truck.
Do not wait for major symptoms. Filters are cheap compared with the systems they protect.
Can a Dirty Air Filter Hurt a Ram 1500?
Yes, especially if it is severely restricted.
A dirty engine air filter can reduce airflow to the engine. Modern Ram engines can adjust fuel delivery, but the truck may still feel less responsive and less efficient. Dirt getting past a damaged filter is worse because it can increase engine wear.
A dirty cabin air filter will not damage the engine, but it can make the HVAC system work harder and make the cabin less comfortable.
Best Practical Schedule
For most Ram 1500 owners:
Every oil change: inspect engine and cabin air filters.
Every 10,000 miles: replace sooner if driving in dust or severe conditions.
Every 15,000 miles: replace cabin air filter for cleaner airflow.
Every 15,000 to 30,000 miles: replace engine air filter under normal use.
Immediately: replace any filter that is wet, torn, oil-soaked, moldy, or packed with debris.
Final Answer
You should check your Ram 1500 air filters at every oil change.
Replace the engine air filter about every 15,000 to 30,000 miles, or around 10,000 miles in dusty or severe conditions.
Replace the cabin air filter about every 15,000 miles or once a year, especially if you drive in traffic, smoke, dust, or pollen.
The safest rule is simple: inspect often, replace when dirty, and follow the owner’s manual for your exact Ram 1500 model year.
How Much Do You Have to Pay a Month for a Jeep Wrangler?
A Jeep Wrangler monthly payment usually ranges from about $575 to $1,100+ per month, depending on the price, down payment, credit score, interest rate, loan term, taxes, fees, and trim.
The simple answer is this: a lower-trim Jeep Wrangler Sport may land around $600 to $750 per month with normal financing, while a Wrangler Willys, Sahara, Rubicon, 4xe, or 392 can easily push payments into the $800 to $1,200+ range. Jeep lists the 2026 Wrangler starting at $36,035 MSRP, while higher trims like Sahara, Rubicon, and Rubicon X start much higher. Jeep Wrangler
Quick Monthly Payment Estimate
Here is a realistic estimate using a 72-month loan, about 7% APR, and roughly estimated taxes and fees. Actual payments can be higher or lower.
$36,000 Wrangler: about $615 to $700/month
$45,000 Wrangler: about $760 to $875/month
$55,000 Wrangler: about $930 to $1,070/month
$65,000 Wrangler: about $1,100 to $1,260/month
$75,000+ Wrangler 392: about $1,275 to $1,500+/month
This assumes little to moderate money down. A larger down payment or trade-in can lower the payment. A higher APR can raise it fast.
Wrangler Price by Trim
Jeep’s official 2026 Wrangler page lists starting MSRPs such as:
Sport: from $36,035
Sport S: from $39,685
Willys: from $43,755
Sahara: from $48,910
Rubicon: from $45,815
Rubicon X: from $55,765 Jeep Wrangler
Those are starting prices before taxes, registration, dealer fees, accessories, packages, and finance charges. A real Wrangler on the lot can cost much more once options are added.
What Affects Your Jeep Wrangler Payment?
The biggest factors are:
Vehicle price: A Rubicon costs much more per month than a Sport.
Down payment: More money down lowers the amount financed.
Trade-in equity: Positive equity can reduce your payment.
Credit score: Better credit usually means a lower APR.
Loan term: Longer terms lower monthly payments but increase total interest.
Taxes and fees: California taxes and registration can add thousands to the financed amount.
Add-ons: Warranties, protection products, accessories, and lift packages can raise the payment.
New vs Used Wrangler Monthly Payment
A used Wrangler may not always be dramatically cheaper because Wranglers hold value well.
A clean used Wrangler can still have a strong price, especially if it is a Rubicon, Willys, 4xe, or low-mileage Unlimited. That said, used can still be the better monthly-payment move if you choose the right year, mileage, and trim.
For LA and Simi Valley shoppers, compare used Jeep inventory against new Jeep inventory before deciding. Sometimes the new-car incentives make a new Wrangler closer in payment than expected.
Best Way to Lower the Payment
The cleanest ways to lower a Wrangler payment are:
Choose a lower trim like Sport, Sport S, or Willys.
Put more money down.
Use trade-in equity.
Improve credit before applying.
Avoid unnecessary add-ons.
Compare new and used options.
Choose a realistic loan term.
A longer loan can make the payment look easier, but do not stretch the term too far just to afford a higher trim. The total cost matters.
Final Answer
Most Jeep Wrangler payments fall around $600 to $1,100 per month.
A basic Wrangler Sport may be close to $600 to $750/month with typical financing. A Wrangler Willys, Sahara, Rubicon, or 4xe may be closer to $800 to $1,100/month. A Wrangler 392 or heavily optioned model can go well above $1,200/month.
The only accurate number comes from the exact Wrangler, your credit, down payment, trade value, taxes, fees, and approved APR.
Jeep Compass Reliability
Jeep Compass Reliability
The Jeep Compass is reasonably reliable, but it is not the top reliability pick in the compact SUV class. The simple answer is this: newer Jeep Compass models are generally average to slightly above average for reliability, while older Compass years, especially early first-generation models and some 2018 to 2020 models, need more careful inspection.
RepairPal gives the Jeep Compass a 4.0 out of 5.0 reliability rating, ranking it 11th out of 26 compact SUVs, with an average annual repair cost of $526. J.D. Power gives the 2024 Compass a Quality & Reliability score of 81/100, while Consumer Reports describes the 2025 Compass as having about average reliability compared with other vehicles from the same model year.
Is the Jeep Compass Reliable?
Yes, the Jeep Compass can be reliable if it is maintained properly and you choose the right model year.
It is not as proven as some compact SUVs like the Toyota RAV4, Honda CR-V, Mazda CX-5, or Subaru Forester, but it is also not a vehicle you should automatically avoid. The Compass makes the most sense for buyers who want Jeep styling, available 4×4 capability, compact size, and a lower price than larger Jeep models.
The key is choosing carefully. A clean, newer Compass with service records is much safer than an older, neglected one with warning lights, transmission issues, or poor maintenance history.
Best Jeep Compass Years for Reliability
The safer Jeep Compass years are generally the newer models, especially 2021, 2022, 2023, 2024, and 2025.
The 2024 and 2025 models are especially worth considering because they benefit from the newer 2.0L turbo engine and updated packaging. The 2024 Compass also earns a strong J.D. Power Quality & Reliability score of 81/100, which puts it in the “Great” range by J.D. Power’s scoring system. J.D. Power
For used buyers, a 2021 to 2024 Compass with clean history, good maintenance records, no open recalls, and no transmission complaints is usually the best target.
Jeep Compass Years to Be Careful With
Be more careful with early Compass models and some 2018 to 2020 examples.
CarComplaints lists 2007 as the worst Compass model year overall, with engine problems being the worst problem category. It also notes that the worst Compass years for engine complaints include 2018, 2016, and 2007. CarComplaints engine problems
That does not mean every Compass from those years is bad. It means you should inspect them more carefully and avoid examples with poor service records, oil consumption issues, overheating history, rough shifting, stalling complaints, or unresolved recalls.
Common Jeep Compass Problems
Common Jeep Compass problems can include engine complaints, electrical issues, transmission concerns, infotainment glitches, suspension wear, and occasional oil or coolant-related problems depending on year.
Some older models have more complaints than newer ones. Certain 2019 and 2020 Compass SUVs were also investigated for engine shutdown complaints. The Associated Press reported that NHTSA closed its investigation without a recall after finding the failure rate was low and that affected vehicles could usually be restarted immediately. AP News
That kind of history is why a pre-purchase inspection matters, especially on used Compass models from the late 2010s.
Is the Newer 2.0L Turbo Compass Better?
The newer 2.0L turbocharged Compass is stronger and more competitive than the older 2.4L Compass.
The old 2.4L engine was serviceable, but it was not especially exciting. The newer turbo engine gives the Compass better power and a more modern driving feel. Reliability data is still developing, but early ratings for recent Compass years are generally average to good, not alarming.
If you are shopping newer, the 2024 or 2025 Compass is more appealing than many older versions because it feels more modern, quicker, and better equipped.
Jeep Compass Maintenance Cost
The Compass is not extremely expensive to maintain.
RepairPal lists the average annual repair cost at $526, which is lower than many vehicles and reasonable for a compact SUV. RepairPal
Normal ownership costs include oil changes, tires, brakes, battery, filters, fluids, wheel alignments, spark plugs, and occasional suspension or electrical repairs. Four-wheel-drive models may also need transfer case, rear differential, or drivetrain fluid service depending on use.
The Compass is cheaper to maintain than a Wrangler or Grand Cherokee, but it still needs regular service.
Is the Jeep Compass Good for High Mileage?
A Jeep Compass can reach high mileage if maintained well, but it is not the compact SUV I would buy blindly at high mileage.
A well-kept Compass can last 150,000 miles or more, but condition matters heavily. If the vehicle has skipped oil changes, transmission issues, coolant problems, electrical faults, or a rough idle, walk away.
For high-mileage Compass shopping, focus on:
Service records.
Clean title.
No overheating history.
Smooth transmission behavior.
No warning lights.
No major oil leaks.
Good tire wear.
Completed recalls.
Clean underbody.
A cheaper Compass with poor maintenance is not a good deal.
Jeep Compass vs Other Compact SUVs
The Compass is better for buyers who want Jeep styling, available 4×4, and a compact SUV with rugged design cues.
It is not the best choice if reliability is your only priority. A Toyota RAV4, Honda CR-V, Mazda CX-5, or Subaru Forester may be stronger choices for long-term dependability and resale value.
But the Compass has its own appeal. It is smaller than the Grand Cherokee, more affordable than a Wrangler, easier to park than a Gladiator, and more Jeep-like than many regular crossovers.
Used Jeep Compass Buying Tips
Before buying a used Compass, check the VIN for recalls on the NHTSA recall lookup. NHTSA says recalls are issued when a manufacturer or NHTSA determines that a vehicle or equipment creates an unreasonable safety risk or fails to meet minimum safety standards. NHTSA
Also test drive it carefully. Make sure the engine starts cleanly, idles smoothly, shifts properly, tracks straight, brakes evenly, and has no warning lights. Test the infotainment system, backup camera, heat, A/C, 4×4 system if equipped, and all power features.
For local shoppers, compare available used Jeep inventory by year, trim, mileage, service history, and condition. If you want a newer Compass with warranty coverage, check current new Jeep inventory.
Final Verdict: Is the Jeep Compass Reliable?
The Jeep Compass is average to good for reliability, depending on year and condition.
The best Compass models to buy are newer examples from 2021 to 2025, especially clean 2024 and 2025 models with warranty coverage and service records. Be more careful with older Compass years, especially 2007, 2016, 2018, 2019, and 2020, because complaint history and age-related issues become more important.
The expert answer is simple: a newer, well-maintained Jeep Compass can be a solid compact SUV, but it is not the class leader for reliability. Buy based on condition, service history, recalls, and model year, not the Jeep badge alone.
BlueDevil Rear Main Sealer: A Mechanic’s Perspective
BlueDevil Rear Main Sealer can be worth trying if you have a small rear main seal leak and the vehicle is not worth tearing apart immediately. But from a mechanic’s perspective, it should be treated as a temporary or low-cost attempt, not the same thing as replacing the rear main seal.
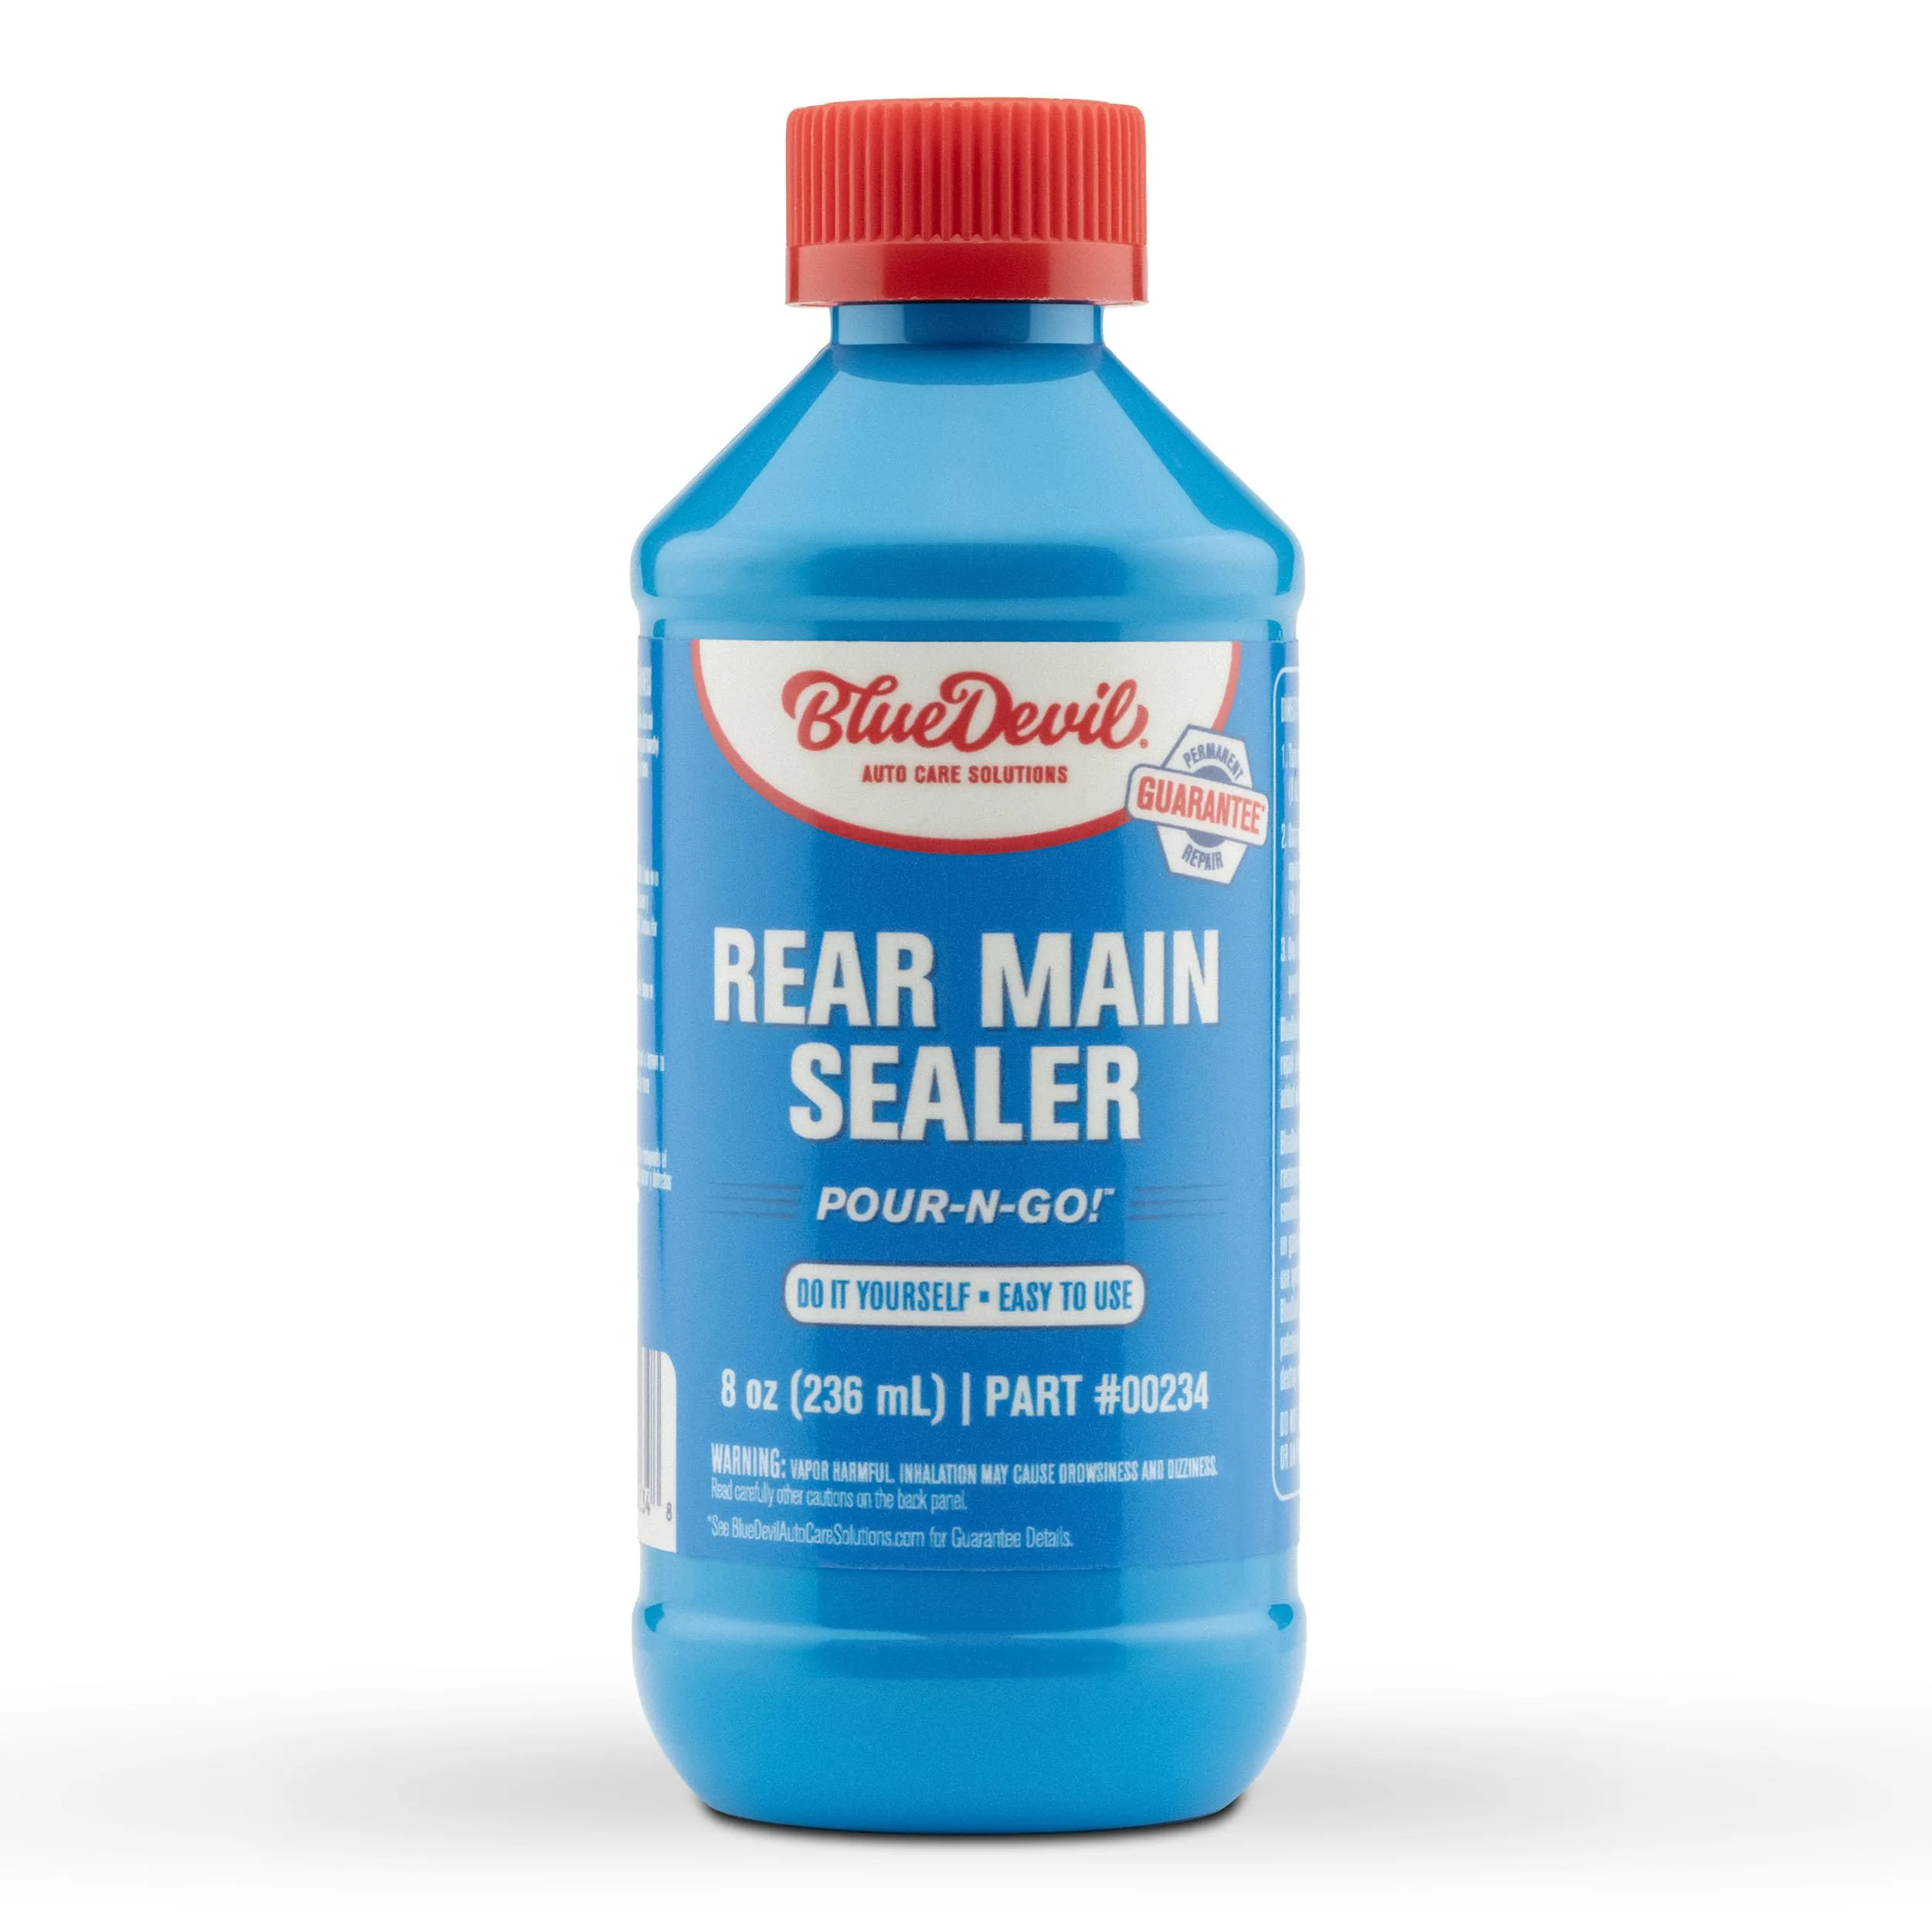
The simple answer is this: BlueDevil may help if the leak is caused by an old, dried, or slightly shrunken rubber seal. It will not fix a torn seal, damaged crankshaft surface, clogged PCV system, major oil leak, overfilled engine, or oil leak coming from somewhere else. BlueDevil says its Rear Main Sealer is designed for gas and diesel engines and works by restoring dried, cracked, or shrunken rubber seals.
What Is BlueDevil Rear Main Sealer?
BlueDevil Rear Main Sealer is an oil additive made to reduce or stop leaks from the rear main seal and certain other engine oil seals.
The rear main seal sits at the back of the engine where the crankshaft exits toward the transmission. When it leaks, oil can drip from the area between the engine and transmission. That is why the repair can be expensive. Access usually requires removing the transmission or separating major drivetrain parts.
That is exactly why products like BlueDevil are popular. A bottle costs far less than a rear main seal job.
How Does It Work?
BlueDevil is designed to condition rubber seals.
As seals age, they can dry out, harden, shrink, or lose flexibility. A seal conditioner attempts to soften and swell the rubber enough to help it seal again. This can reduce seepage if the seal is still physically intact.
That is the key point: it works best on an old seal that has shrunk slightly, not on a seal that is destroyed.
If the rear main seal lip is ripped, the crankshaft sealing surface is grooved, the engine has excessive crankcase pressure, or the leak is actually from the oil pan, valve cover, or intake area, an additive will not solve the real problem.
A Mechanic’s Honest Take
A mechanic would usually see BlueDevil as a gamble with limits.
It is not snake oil in the sense that seal conditioners can sometimes reduce small leaks. But it is also not a proper mechanical repair. The proper fix for a confirmed rear main seal leak is replacing the seal and inspecting the crankshaft surface, oil pan area, PCV system, and related gaskets.
The reason mechanics hesitate is simple: many “rear main seal leaks” are misdiagnosed.
Oil can run down from valve cover gaskets, oil pressure sensors, intake gaskets, oil filter housings, oil cooler seals, oil pan gaskets, or timing cover leaks and end up dripping near the bellhousing. That makes it look like a rear main leak when it is not.
Before using any sealer, confirm the leak source.
When BlueDevil Rear Main Sealer Is Worth Trying
BlueDevil is most worth trying when the leak is small and the vehicle is older.
It makes sense if:
The leak is a slow drip or seep.
The oil level is not dropping quickly.
The engine runs normally.
The vehicle is older or high mileage.
You want to delay an expensive repair.
The rear main seal leak has been properly diagnosed.
You understand it may not work.
It is especially reasonable on an older daily driver where a $1,000-plus repair may not make financial sense right away. Rear main seal repair costs can be high because the labor is intensive, and some estimates place the job around hundreds to well over $1,000 depending on the vehicle. Endurance notes rear main seal replacement can range from about $600 to $1,200+, while some vehicle-specific repairs can be higher.
When You Should Not Use It
Do not rely on BlueDevil if the leak is major.
Skip the additive and diagnose properly if:
Oil is pouring out.
The vehicle leaves large puddles.
The clutch is slipping from oil contamination.
The transmission bellhousing is soaked.
The engine oil level drops quickly.
There is blue smoke from oil burning.
The PCV system is clogged.
The engine has excessive blow-by.
The leak started after recent repair work.
The engine is already low on oil pressure.
A bottle of sealer is not a substitute for repairing a serious oil leak.
Use Clean Oil First
For best results, use it with clean engine oil.
Hot Rod recommends making sure the engine has clean oil and the correct oil specification before using BlueDevil or any rear main seal stop-leak product. That advice makes sense. Dirty, old oil filled with fuel dilution, sludge, or contaminants is not the best carrier for any additive.
If the oil is due for a change, change the oil and filter first, then add the product according to the directions.
How to Use BlueDevil Rear Main Sealer
Follow the instructions on the bottle.
BlueDevil’s directions commonly state to add one 8 oz bottle directly into the engine oil, with one bottle treating up to 8 quarts. The product is designed to stay in the oil while you drive. Highline Warren lists the basic direction as turning off the engine and pouring one 8 oz bottle into the engine oil.
Do not overfill the crankcase. If your oil level is already at the full mark and you are adding 8 oz, it is usually smart to leave enough room or drain a small amount if necessary.
Overfilled oil can create foaming, pressure issues, leaks, and other problems.
How Long Does It Take to Work?
Do not expect instant results.
Many seal conditioners need driving time and heat cycles to work into the rubber. You may need to drive for several days or a few hundred miles before deciding whether it helped.
If the leak gets slightly better, keep monitoring the oil level and the leak area. If nothing changes after a reasonable period, the seal may be too damaged or the leak may not be from the rear main seal.
Will It Hurt the Engine?
Used correctly, it usually should not hurt a healthy engine.
The risk comes from using too much, using it in an engine with the wrong oil level, ignoring a serious leak, or using additives as a replacement for maintenance. Any oil additive changes the oil mixture slightly, so I would not use it casually in a new engine, performance engine, warranty vehicle, or engine with known oiling issues.
For an older high-mileage vehicle with a small leak, the risk is usually more acceptable.
Will It Fix Every Oil Leak?
No.
BlueDevil Rear Main Sealer is meant for rubber seal-related oil leaks. It is not a universal repair for every gasket and sealing surface.
It will not properly fix:
Oil pan gasket leaks.
Valve cover gasket leaks.
Cracked covers.
Bad oil filter housing gaskets.
Loose drain plugs.
Bad oil pressure sensors.
Damaged timing covers.
Crankshaft groove damage.
Improperly installed seals.
Excessive crankcase pressure.
Misdiagnosis is the biggest issue. If the leak source is wrong, the product cannot work.
Rear Main Seal Leak Symptoms
A rear main seal leak usually shows up as oil at the back of the engine.
Common signs include oil dripping between the engine and transmission, oil on the lower bellhousing, oil spots after parking, burning oil smell if oil contacts hot exhaust, and gradual oil loss.
But those symptoms can overlap with other leaks. That is why cleaning the engine and using UV dye can help confirm the leak path before spending money.
Mechanic’s Diagnostic Advice
Before using BlueDevil, clean the oily area first.
Then drive the vehicle and recheck where fresh oil appears. If needed, add UV dye to the engine oil and inspect with a UV light. This can help identify whether the oil is truly coming from the rear main seal or running down from above.
Also check the PCV system. A clogged PCV valve or crankcase ventilation issue can increase crankcase pressure and force oil past seals. If the pressure problem remains, a sealer may not hold.
BlueDevil vs Rear Main Seal Replacement
BlueDevil is cheap and easy.
Rear main seal replacement is expensive and labor-intensive.
That is the tradeoff. BlueDevil is worth trying when the alternative repair cost does not make sense yet. But if the vehicle is valuable, the leak is severe, or you plan to keep the car long term, replacing the seal is the correct repair.
A sealer is a shortcut. A seal replacement is the fix.
Is It Good for Trucks?
It can be used in gas and diesel engines if compatible with the oil system and directions.
That includes many older trucks, SUVs, and high-mileage vehicles. But trucks often work harder, tow more, and run hotter. If a truck is leaking badly, diagnose it properly before relying on a bottle.
For Ram, Jeep, Dodge, Chevy, GMC, Ford, Toyota, and Nissan trucks, the same rule applies: confirm the leak source first.
Should You Use It Before Selling a Car?
Be careful.
Using a sealer to hide a known leak from a buyer is unethical. If you use it and sell the vehicle, disclose the leak history if asked. A small leak treatment on an older vehicle is one thing. Concealing a serious rear main seal issue is another.
For dealership or professional use, proper disclosure and diagnosis matter.
Final Verdict
BlueDevil Rear Main Sealer is not a miracle, but it can be useful in the right situation.
From a mechanic’s perspective, it is a reasonable low-cost attempt for a minor, confirmed rear main seal leak on an older or high-mileage vehicle. It is not the right answer for a major leak, torn seal, oil-soaked clutch, damaged crankshaft surface, clogged PCV system, or misdiagnosed oil leak.
Use it with clean oil, follow the directions, do not overfill the crankcase, and monitor the result. If the leak continues, the vehicle needs real mechanical repair.
is 2017 jeep wrangler a jk or jl

Is a 2017 Jeep Wrangler a JK or JL?
A 2017 Jeep Wrangler is a JK, not a JL.
The simple answer is this: every 2017 Jeep Wrangler belongs to the JK generation. The JL generation arrived for the 2018 model year, which is why 2018 is the confusing year. In 2018, Jeep sold both the outgoing Wrangler JK and the newer Wrangler JL. But if the Jeep is a 2017 model, it is a JK.
The official 2017 Jeep Wrangler specifications list the Wrangler and Wrangler Unlimited lineup with the 3.6L Pentastar V6, body-on-frame construction, Command-Trac or Rock-Trac 4×4 systems, and the familiar JK-generation layout. 2017 Jeep Wrangler specifications
What Generation Is the 2017 Jeep Wrangler?
The 2017 Jeep Wrangler is part of the Jeep Wrangler JK generation.
The JK generation ran from the 2007 model year through 2018, but 2018 was a split year because both JK and JL versions existed. That is why parts searches, used listings, and forums often separate 2018 Wrangler JK from 2018 Wrangler JL.
For 2017, there is no split. It is JK only.
That matters if you are buying parts, checking specs, comparing reliability, ordering accessories, or researching common problems. A 2017 Wrangler needs JK-specific parts, not JL parts.
What Is the Jeep Wrangler JK?
The Jeep Wrangler JK was the third modern Wrangler generation after the YJ and TJ.
It introduced the four-door Wrangler Unlimited body style that helped turn the Wrangler from a niche off-road SUV into a mainstream lifestyle vehicle. The JK kept Jeep’s classic removable roof, removable doors, rugged 4×4 systems, upright shape, and trail-focused capability, but made the Wrangler more usable for families and daily driving.
By 2017, the JK was near the end of its production run, which is one reason many used shoppers like it. Late-generation models often benefit from years of refinement.
What Engine Does the 2017 Wrangler JK Have?
The 2017 Jeep Wrangler JK uses the 3.6L Pentastar V6.
The official 2017 specs list the 3.6L Pentastar V6 as standard on all 2017 Wrangler models. 2017 Jeep Wrangler specifications
That engine is commonly rated at 285 horsepower and 260 lb-ft of torque in the 2017 Wrangler. Kelley Blue Book lists the 2017 Wrangler with 285 horsepower, while Edmunds notes that every 2017 Wrangler uses a 3.6L V6 with a six-speed manual or five-speed automatic transmission.
For used buyers, the 3.6L JK is generally more desirable than the older 3.8L V6 used in earlier 2007 to 2011 JK models.
2017 Wrangler JK vs 2018 Wrangler JL
The easiest way to remember it:
2017 Wrangler = JK
2018 Wrangler = could be JK or JL
2019 and newer Wrangler = JL
The 2018 model year is where shoppers get confused. Jeep sold the old JK alongside the new JL for a period of time. The JL introduced more modern styling, better tech, updated interior design, available turbocharged engine options, and other improvements.
A 2017 Wrangler does not have those JL updates. It is the previous-generation JK.
How to Tell a JK From a JL
If you are looking at a Jeep and want to confirm whether it is a JK or JL, check the model year first.
A 2017 is automatically a JK.
For 2018 models, look at details like front fender lights, grille shape, door handles, vent styling, interior dashboard layout, windshield fold mechanism, taillights, and badging. JL models have a more modern interior, updated lighting, and different body details.
But again, for 2017, you do not need to decode much. It is a JK.
Why This Matters for Parts and Accessories
This question matters because JK and JL parts are not always interchangeable.
Lift kits, bumpers, fenders, headlights, taillights, grilles, soft tops, hardtops, floor mats, doors, mirrors, wiring, suspension components, and interior accessories can differ between generations.
If you order JL parts for a 2017 Wrangler, they may not fit.
When shopping online, use terms like:
2017 Jeep Wrangler JK parts.
2017 Wrangler JK accessories.
JK Wrangler lift kit.
JK Wrangler bumper.
JK Wrangler soft top.
JK Wrangler Rubicon parts.
That will usually lead you to the right fitment.
Is the 2017 Jeep Wrangler JK Reliable?
The 2017 Wrangler JK is generally one of the better JK years because it came late in the generation.
It still needs proper inspection, especially if buying used. Wranglers are often modified, off-roaded, lifted, or exposed to hard use. Condition matters more than mileage alone.
Edmunds described the 2017 Wrangler as behind the times for technology but still one of the best go-anywhere vehicles money could buy. Edmunds 2017 Wrangler review
That is a fair summary. The 2017 JK is not the most refined SUV, but it is one of the most honest and capable.
What to Check Before Buying a 2017 Wrangler JK
Before buying a 2017 Jeep Wrangler JK, inspect it carefully.
Check for rust underneath, especially on frame areas, skid plates, suspension mounts, and body seams. Look for roof leaks, worn tires, uneven tire wear, steering wobble, suspension wear, oil leaks, coolant leaks, and 4WD operation.
Also inspect modifications. A stock Wrangler with service records is usually safer than one with a cheap lift kit, poor wiring, oversized tires, and unknown off-road use.
For Southern California shoppers, compare used Jeep inventory by year, trim, mileage, drivetrain, and modification history. If you want a newer JL-generation Wrangler, check current new Jeep inventory.
2017 Wrangler JK Trims
The 2017 Wrangler JK was available in familiar trims such as Sport, Sport S, Sahara, Rubicon, and special editions depending on body style and market.
The Sport is the basic, simple Wrangler.
The Sahara is more comfort-focused.
The Rubicon is the trail-focused version with stronger off-road hardware.
The Wrangler Unlimited is the four-door version, while the standard Wrangler is the two-door version.
If you want the most capable stock 2017 JK, the Rubicon is the trim to consider. If you want a better daily driver, a Sahara or Sport S may make more sense.
FAQs About the 2017 Jeep Wrangler JK
Is a 2017 Jeep Wrangler a JK?
Yes. A 2017 Jeep Wrangler is a JK.
Is a 2017 Jeep Wrangler a JL?
No. The JL generation started for the 2018 model year.
What years are Jeep Wrangler JK?
The Wrangler JK generation ran from 2007 through 2018, though 2018 also included the newer JL.
Why is 2018 confusing for Wrangler generations?
Because Jeep sold both the outgoing Wrangler JK and the new Wrangler JL during the 2018 model year.
What engine is in the 2017 Jeep Wrangler JK?
The 2017 Wrangler JK uses the 3.6L Pentastar V6.
Are JK and JL parts interchangeable?
Some small items may interchange, but many major parts do not. Always buy parts specifically listed for JK if you own a 2017 Wrangler.
Final Thoughts: 2017 Means JK
A 2017 Jeep Wrangler is a JK-generation Wrangler.
It is not a JL. The JL arrived for 2018, and that year is the only one that creates real confusion because both JK and JL versions were sold.
If you own or are shopping for a 2017 Wrangler, search for JK parts, JK accessories, JK specs, and JK reliability information. That will give you the right fitment and the right buying advice.
The Most Accurate Car Value Websites of 2026
The most accurate car value websites in 2026 are Kelley Blue Book, Edmunds, J.D. Power/NADA, CarGurus, Cars.com, Autotrader, and Consumer Reports. But the real answer is this: no single car value website is perfect. The most accurate number comes from comparing multiple sources, checking live local listings, and adjusting for mileage, condition, trim, accident history, location, and demand.
For most shoppers, the best starting point is Kelley Blue Book because it offers trade-in, private-party, and retail value estimates. But if you want a stronger real-world number, compare that with Edmunds appraisals, J.D. Power values, CarGurus Instant Market Value, and current local used-car listings.
Why Car Values Are Hard to Pin Down
Used car values change fast.
A vehicle’s value depends on location, condition, mileage, trim, color, accident history, service records, title status, demand, fuel prices, interest rates, inventory levels, and even seasonality. A clean Jeep Wrangler in Southern California may bring stronger money than the same Wrangler in a slower market. A used hybrid may spike when gas prices rise. A truck may hold value better in areas where towing and work use are common.
That is why a website can give a good estimate but still miss the exact market price.
The best value is not one number. It is a range.
Best Overall: Kelley Blue Book
Kelley Blue Book is still the most recognizable car value website for everyday shoppers.
KBB is useful because it gives different value types, including trade-in value, private-party value, and typical listing price. That matters because your car is not worth the same amount in every situation.
A dealer trade-in value will usually be lower than a private-party sale price. A retail listing price will usually be higher than both.
KBB is best for:
Quick vehicle value checks.
Trade-in estimates.
Private-party price ranges.
Retail price guidance.
Mainstream used vehicles.
KBB should not be your only source, but it is one of the best places to start.
Best for Real-World Appraisals: Edmunds
Edmunds is one of the strongest tools for real-world used car values.
Edmunds is useful because it focuses heavily on vehicle-specific details, including year, make, model, trim, mileage, condition, options, and ZIP code. It can also help shoppers understand the difference between trade-in, private-party, and dealer retail pricing.
Edmunds market reports also show how used values move over time. In its Q2 2025 used-car report, Edmunds reported that average transaction prices for 3-year-old used vehicles increased year over year, while days-to-turn also rose. That is exactly why current market data matters when valuing a car.
Edmunds is best for:
Detailed appraisals.
Used car shoppers.
Trade-in research.
Private-party pricing.
Comparing used vs new value.
Best Dealer-Grade Reference: J.D. Power/NADA
J.D. Power is the modern home of NADA-style vehicle values.
This is important because NADA values have historically been used by dealers, lenders, insurance companies, and automotive professionals. J.D. Power values can be especially useful when you want a more industry-facing reference instead of only a consumer estimate.
J.D. Power Valuation Services also publishes used vehicle market updates, which can help explain broader pricing trends.
J.D. Power/NADA is best for:
Dealer-style value checks.
Loan and finance reference.
Trade-in discussions.
Industry pricing context.
Trucks, SUVs, and mainstream vehicles.
Best for Live Market Pricing: CarGurus
CarGurus is useful because it is built around live listing data.
CarGurus Instant Market Value estimates retail pricing based on real-time data from millions of car listings. That makes it especially useful when you want to know what similar vehicles are actually listed for right now.
This is different from a pure valuation guide. A valuation guide estimates what the car should be worth. A marketplace tool shows what sellers are currently asking.
CarGurus is best for:
Live retail price comparison.
Seeing whether a listing is overpriced.
Checking local market competition.
Buyer-side research.
Dealer listing comparisons.
Best for Listing Comparisons: Cars.com
Cars.com is another strong tool for checking real used-car listings.
It is not just about calculating one value. It helps you compare similar vehicles in your area, which is critical when pricing a trade, buying used, or selling privately.
If ten similar cars are listed between $22,000 and $24,000, your $27,000 asking price may be unrealistic unless your vehicle has lower miles, better condition, rare options, or warranty coverage.
Cars.com is best for:
Local listing research.
Comparing asking prices.
Dealer inventory checks.
Understanding market supply.
Used vehicle shopping.
Best for Trade-In Shopping: Autotrader
Autotrader is useful because it connects valuation research with active vehicle listings.
It can help sellers understand what similar vehicles are listed for and help buyers compare asking prices across dealers and private sellers.
Autotrader is especially useful for popular models with many listings because it gives you enough market examples to understand price spread.
Autotrader is best for:
Trade-in research.
Private sale pricing.
Listing comparisons.
Dealer retail comparison.
Finding similar vehicles nearby.
Best for Reliability Context: Consumer Reports
Consumer Reports is not the best pure pricing tool, but it is very useful for understanding whether a used car is worth the price.
A car’s value is not only about mileage and market demand. Reliability matters too. A vehicle with strong reliability, safety, and owner satisfaction may justify a higher price than a similar vehicle with known problems.
Consumer Reports is best for:
Used-car reliability research.
Model-year problem history.
Safety and ownership context.
Avoiding bad used-car buys.
Comparing long-term ownership risk.
Use Consumer Reports alongside KBB, Edmunds, J.D. Power, and live listings.
Best Auction and Wholesale Reference: Manheim
Most consumers cannot use Manheim the same way dealers do, but wholesale auction data affects the whole used-car market.
Dealers often pay close attention to wholesale values because those values help determine trade-in offers and retail pricing. When wholesale prices rise, retail prices often follow. When wholesale demand softens, trade-in offers and retail prices may move down.
For normal shoppers, you do not need direct Manheim access. But market updates from Cox Automotive and Manheim can help explain why trade values feel higher or lower than expected.
Which Website Is Most Accurate?
The most accurate website depends on what you are trying to do.
For a quick value, use Kelley Blue Book.
For a detailed appraisal, use Edmunds.
For a dealer-style value, use J.D. Power/NADA.
For live market pricing, use CarGurus, Cars.com, and Autotrader.
For reliability context, use Consumer Reports.
For wholesale market direction, watch Manheim and Cox Automotive updates.
The most accurate value comes from combining them.
How to Get the Most Accurate Car Value
Use this process:
Check KBB trade-in and private-party value.
Check Edmunds appraisal.
Check J.D. Power/NADA value.
Search local listings on CarGurus, Cars.com, and Autotrader.
Compare only similar trims, mileage, drivetrain, options, and condition.
Subtract for accidents, worn tires, bad brakes, cosmetic damage, or missing records.
Add value for clean history, low miles, new tires, warranty, rare options, or strong service records.
Get a real dealer trade offer if you plan to trade.
That gives you a realistic value range instead of relying on one website.
Trade-In Value vs Private-Party Value
Trade-in value is what a dealership may offer for your car.
Private-party value is what you might get selling it yourself.
Retail value is what a dealer may list a similar car for after inspection, reconditioning, marketing, paperwork, and profit margin.
These numbers are different for a reason.
If KBB says your car has a private-party value of $18,000, that does not mean a dealer will offer $18,000 on trade. The dealer still has to inspect it, recondition it, handle risk, and resell it.
Why Your Trade Offer May Be Lower Than Online Value
A trade offer may be lower than an online estimate because the vehicle needs work.
Common deductions include:
Worn tires.
Brake wear.
Accident history.
Paint damage.
Interior stains.
Warning lights.
Open recalls.
Bad windshield.
Missing second key.
Poor service records.
Smog or emissions issues.
High mileage.
Title concerns.
Online tools depend on accurate condition input. Many owners overrate their vehicle’s condition, which creates a gap between the online estimate and real offer.
Used Car Value in Los Angeles
Los Angeles used-car values can differ from national averages.
Fuel-efficient cars, hybrids, trucks, SUVs, Jeeps, and commuter-friendly vehicles can have strong demand. California smog rules, registration costs, local fuel prices, and insurance costs can also influence what buyers are willing to pay.
For Los Angeles-area shoppers, use national value tools first, then confirm with live local listings. If you are comparing trade or purchase options, review current used inventory to see how similar vehicles are priced nearby. You can also use a trade-in valuation tool to start the appraisal process.
Common Mistakes When Using Car Value Websites
The biggest mistake is using only one website.
Other mistakes include choosing the wrong trim, ignoring options, entering the wrong mileage, overrating condition, ignoring accident history, comparing dealer retail to private-party value, and using national values without checking local listings.
Another common mistake is assuming listed price equals selling price. Some vehicles sell below asking price. Others sell quickly at asking if demand is high.
A value estimate is a guide. The market decides the final number.
Best Website for Selling Your Car
If you want to sell your car privately, use KBB, Edmunds, CarGurus, Cars.com, and Autotrader together.
Price your vehicle slightly above your minimum acceptable number, but not so high that it gets ignored. Include service records, clean photos, VIN, mileage, trim, options, title status, and honest condition notes.
If you want less hassle, get dealer trade offers or instant cash offers and compare them.
Private sale may bring more money. Trade-in is usually easier.
Best Website for Buying a Used Car
If you are buying, use CarGurus, Cars.com, Autotrader, KBB, and Edmunds.
Marketplaces show live inventory. KBB and Edmunds help you judge whether the price is fair. Consumer Reports helps you avoid unreliable models.
Before buying, compare the vehicle history report, inspection results, tires, brakes, warranty, title status, and total out-the-door price.
The cheapest car is not always the best value.
Final Answer
The most accurate car value websites of 2025 are:
Kelley Blue Book for quick values.
Edmunds for detailed appraisals.
J.D. Power/NADA for dealer-style values.
CarGurus for live market pricing.
Cars.com for listing comparisons.
Autotrader for retail and trade research.
Consumer Reports for reliability context.
The best approach is to use at least three valuation tools, then compare real local listings. That gives you the most accurate value range and keeps you from overpaying, underpricing, or accepting a weak trade offer.
Connect with us


