


(Avoid Fines, Fires, and Environmental Catastrophes)
How to Dispose of Old Gasoline Safely: A Step-by-Step Guide
Old gasoline should be taken to a household hazardous waste facility, local hazardous waste collection event, or approved recycling/disposal site. Do not pour it on the ground, down a drain, into a storm sewer, into the trash, or into a fire pit.
The simple answer is this: gasoline is flammable hazardous waste, so the safest way to dispose of it is to keep it in an approved sealed fuel container and bring it to your local hazardous waste program. The EPA warns that improper household hazardous waste disposal includes pouring waste down drains, on the ground, into storm sewers, or putting it in regular trash. In California, CalRecycle says it is illegal to dispose of hazardous waste in the garbage, down storm drains, or onto the ground.
Why Old Gasoline Is Dangerous
Gasoline is not like old water, oil, or windshield washer fluid.
It is highly flammable, gives off vapors, and can contaminate soil and water if dumped incorrectly. Even small amounts can create a fire risk if poured into trash, left in an open container, or mixed with other chemicals.
Old gas can also damage small engines, cars, motorcycles, lawn equipment, and generators if it has degraded, absorbed moisture, or become contaminated. If the gasoline smells sour, looks dark, has particles in it, or has been sitting for months or years, treat it carefully.
Step 1: Do Not Pour It Anywhere
The first rule is simple: do not dump old gasoline.
Do not pour it down a sink. Do not pour it into a toilet. Do not pour it into a storm drain. Do not pour it on weeds. Do not dump it into soil. Do not throw it in the garbage.
The EPA specifically warns against disposing of household hazardous waste down drains, onto the ground, into storm sewers, or with regular trash. California’s Department of Toxic Substances Control also says household hazardous waste cannot be disposed of in the trash, down the drain, or by abandonment.
Gasoline needs a proper hazardous waste disposal route.
Step 2: Check If the Gasoline Is Actually Bad
Before disposing of gasoline, confirm whether it is old, contaminated, or still usable.
Fresh gasoline is usually clear or lightly amber and has the normal sharp gasoline smell. Bad gasoline may look darker, smell varnish-like or sour, contain sediment, or separate if water contamination is present.
If the gas is only a few months old and was stored properly in a sealed approved fuel container, it may still be usable in some situations. But if it is old, dirty, water-contaminated, or stored in an unsafe container, do not risk putting it into a vehicle.
When in doubt, dispose of it properly.
Step 3: Keep It in an Approved Fuel Container
Gasoline should be stored and transported only in an approved gasoline container.
Use a sealed gas can designed for fuel. Do not use milk jugs, glass jars, open buckets, water bottles, antifreeze containers, food containers, or random plastic containers. The Consumer Product Safety Commission advises using child-resistant portable fuel containers, keeping them away from children, storing them in cool and well-ventilated areas, and never leaving fuel containers open.
If the gasoline is in a leaking, rusty, swollen, cracked, or unsafe container, do not try to transport it casually. Call your local hazardous waste program or fire department for guidance.
Step 4: Do Not Mix Gasoline With Other Fluids
Do not mix old gasoline with motor oil, antifreeze, brake fluid, paint thinner, diesel, cleaning chemicals, pesticides, or anything else.
The EPA warns that mixing household hazardous wastes can cause products to react, ignite, explode, or become unrecyclable. Gasoline should stay in its own properly labeled container.
This matters because many hazardous waste facilities have different handling processes for gasoline, oil, antifreeze, and solvents. Mixing fluids can make disposal more dangerous and more expensive.
Step 5: Find a Household Hazardous Waste Drop-Off Site
The best place to dispose of old gasoline is your local household hazardous waste facility.
Most cities, counties, and regions have hazardous waste drop-off locations or collection events for items like gasoline, paint thinner, pesticides, cleaners, batteries, used oil, and other automotive fluids.
Use your city or county website first. Search for “household hazardous waste gasoline disposal” plus your city or county name. You can also use the Earth911 recycling search to look up disposal options by material and ZIP code.
If you are in California, start with your county household hazardous waste program. CalRecycle explains that household hazardous waste must be handled through proper disposal programs, not regular garbage or drains.
Step 6: Call Before You Go
Always call or check online before bringing gasoline to a disposal site.
Some facilities only accept gasoline on certain days. Some require appointments. Some limit the amount you can bring. Some require fuel to be in an approved container. Some will not return your gas can after drop-off.
For example, some regional hazardous waste programs accept gasoline only in approved fuel cans and may keep the container for safety reasons. Product Care Recycling notes that gasoline must be brought in an approved gas can or jerry can and that the container cannot be returned at drop-off.
Rules vary by location, so confirm before loading fuel into your vehicle.
Step 7: Transport It Safely
When transporting old gasoline, keep the container upright, sealed, and secured.
Place the gas can in a ventilated cargo area if possible, not loose inside the passenger cabin. Keep it away from heat, sparks, cigarettes, open flames, tools, batteries, and anything that could puncture the container.
Do not leave gasoline sitting in a hot vehicle. Drive directly to the disposal site and unload it according to the facility’s instructions.
If you smell strong fumes while driving, stop safely, ventilate the vehicle, and inspect the container from a safe distance.
Step 8: Ask About Container Return
Do not assume you will get your gas can back.
Some hazardous waste programs empty containers and return them. Others keep the container because of contamination, safety procedures, or facility policy. This is especially common if the gasoline is old, dirty, mixed, or in a questionable container.
If you need the container back, ask before you go. If they cannot return it, use an old approved gas can you are willing to give up.
Can You Put Old Gas in a Car?
Only if it is clean, fairly fresh, and not contaminated.
If gasoline is slightly old but still clean, some people dilute it with fresh gas and use it in small amounts. But this is not a good idea if the gas smells bad, looks dark, contains water, has debris, or has been sitting for a long time.
Bad gasoline can cause hard starting, poor running, clogged injectors, fuel pump strain, and engine problems. For modern vehicles, the risk usually is not worth saving a few dollars.
If you are not sure, dispose of it through a hazardous waste program.
Can You Let Old Gasoline Evaporate?
No. Do not intentionally leave gasoline open to evaporate.
Gasoline vapors are flammable and harmful to breathe. Leaving gasoline open also creates fire risk and air pollution. Keep it sealed and dispose of it properly.
Can You Burn Old Gasoline?
No. Do not burn old gasoline to get rid of it.
Gasoline vapors can ignite explosively. Pouring it onto a fire, brush pile, burn barrel, or outdoor pit is dangerous. It can cause serious injury, property damage, and environmental contamination.
Dispose of it as hazardous waste.
What If Gasoline Spilled in Your Garage?
If gasoline spills, act carefully.
Remove ignition sources immediately. Do not smoke. Do not start vehicles nearby. Ventilate the area if you can do so safely. Keep children and pets away. Use absorbent material designed for fuel spills if available.
Do not wash gasoline into a drain or street. Contaminated absorbent may also need hazardous waste disposal.
For a large spill, strong fumes, or fire risk, call your local fire department or emergency services.
How to Store Gasoline So It Does Not Go Bad
The best way to avoid old gasoline disposal is to store fuel properly in the first place.
Use an approved fuel container. Keep it sealed. Store it in a cool, ventilated area away from children, flames, sparks, and living spaces. Buy only what you will use soon. Label the container with the purchase date.
If gasoline will sit for seasonal equipment, consider using a fuel stabilizer according to the product directions. Stabilizer works best when added to fresh gasoline, not after the gas has already gone bad.
How Long Does Gasoline Last?
Gasoline can start degrading in a few months, especially if stored poorly.
Heat, air exposure, moisture, ethanol content, and container quality all affect shelf life. Gasoline stored in a sealed approved container in a cool place lasts longer than gas left in a vented tank, open can, or hot garage.
If the fuel is old enough that you cannot remember when you bought it, inspect it carefully before using it.
Where to Dispose of Old Gasoline Near You
The safest disposal location depends on where you live.
In California, use your city or county household hazardous waste program. In Los Angeles, for example, LA Sanitation directs residents to hazardous waste disposal options for unsafe household materials. In Canada, many municipalities classify gasoline as household hazardous waste; for example, Peel Region tells residents to take gasoline or petrol to a Community Recycling Centre for safe disposal.
Search your local government waste site first because rules change by city, county, province, and state.
FAQs About Disposing of Old Gasoline
How do I dispose of old gasoline safely?
Take old gasoline to a household hazardous waste facility, hazardous waste collection event, or approved recycling/disposal site. Keep it in an approved sealed fuel container and do not mix it with other fluids.
Can I pour old gasoline on the ground?
No. Never pour gasoline on the ground. It can contaminate soil and water and may be illegal.
Can I pour old gasoline down the drain?
No. Never pour gasoline down a drain, toilet, storm sewer, or sink. The EPA warns against disposing of hazardous waste this way.
Can I throw old gasoline in the trash?
No. Gasoline is flammable hazardous waste and should not go in regular trash.
Can old gasoline be recycled?
In some areas, yes. Some hazardous waste programs can recycle or process gasoline safely, but you need to use your local approved program.
What container should I use for old gasoline?
Use an approved gasoline container or fuel can with a secure cap. Do not use food containers, glass jars, milk jugs, or open buckets.
Can I mix old gasoline with used motor oil?
No. Do not mix gasoline with motor oil or other fluids. Mixing hazardous wastes can create fire risk, chemical reactions, and disposal problems.
Final Thoughts: Treat Old Gasoline Like Hazardous Waste
Old gasoline is dangerous because it is flammable, toxic, and environmentally harmful when dumped incorrectly.
The safe process is simple: keep it sealed, do not mix it, do not pour it anywhere, find your local household hazardous waste program, call ahead, and transport it carefully in an approved container.
A few minutes of proper disposal is much safer than risking a fire, damaging your vehicle, contaminating soil or water, or breaking local disposal rules.

Oil changes and fluid maintenance are the lifeblood of vehicle care, but traditional methods—funnels, hand-pouring, or gravity drains—are messy, inefficient, and often risky. Enter the oil transfer pump, a tool that transforms tedious tasks into streamlined workflows. Whether you’re a professional mechanic billing by the hour or a weekend warrior in your garage, here’s why this unassuming device deserves a permanent spot in your toolkit:
1. Eliminates Messy, Hazardous Spills
- Problem: Pouring oil manually often leads to drips, spills, and contaminated workspaces. A single quart of spilled oil can pollute 250,000 gallons of water (EPA).
- Solution: Pumps like the Thorstone 200cc create a sealed transfer system, reducing spills by 90% and keeping toxins off your skin and garage floor.
2. Saves Time (and Money) on Complex Jobs
- For Mechanics: Extract transmission fluid or differential oil in minutes vs. disassembling panels. A shop charging $150/hour can bill 2+ extra jobs daily.
- For DIYers: Refill tight spaces (e.g., motorcycle forks, power steering reservoirs) without costly dealer visits.
3. Handles Multiple Fluids with Precision
Modern pumps aren’t just for oil. Use them to:
- Transfer gear oil (75W-90) without dripping.
- Extract brake fluid from master cylinders.
- Refill ATVs, boats, or lawnmowers in awkward positions.
- Drain hydraulic fluid without disconnecting lines.
4. Beats Manual Methods in Tight Spaces
Imagine refilling a differential on a lifted truck:
- Old Way: Jug + funnel = back strain, spills, and wasted fluid.
- Pump Way: Thread the hose into the fill port and pump—no lifting, no guesswork.
5. Cost-Effective Over Time
- A $12 manual pump (like the Thorstone) pays for itself in 1–2 uses vs. buying disposable turkey basters or funnels.
- Electric pumps (e.g., $45 EWK 6L) save hours on fleet maintenance.
6. Reduces Environmental and Safety Risks
- Compliance: OSHA mandates spill containment in professional shops. Pumps help avoid fines.
- DIY Safety: Avoid burns from hot oil or slips on slick floors.
Real-World Scenarios Where a Pump Shines
- Brake Bleeding: Flush old fluid without air bubbles.
- Winterization: Drain fuel from lawn equipment cleanly.
- Marine Use: Change lower unit oil on a boat without tilting the engine.
Bottom Line: An oil transfer pump isn’t just a tool—it’s an upgrade to your entire maintenance process. For less than the cost of a oil change, it delivers cleaner workspaces, faster jobs, and peace of mind.
Next, let’s dissect the Thorstone 200cc Fluid Extractor Pump to see if it’s the right fit for your needs. 🛠️🔧
The Thorstone 200cc Fluid Extractor Pump promises to simplify automotive fluid changes for under $12. With over 3,400 reviews and a 4.2-star rating, it’s a top seller—but does it deliver for serious mechanics or fall short? As an automotive editor, I tested it on everything from brake fluid swaps to differential refills. Here’s the unfiltered truth.
Key Features & Specifications
- Capacity: 200cc (7 oz) per cycle.
- Construction: Nickel-plated spring steel body, PVC-coated gloves, dual rubber seals.
- Included: 2 rigid tubes (40cm extended), 1 silicone connector, 1 pair oil-resistant gloves.
- Compatibility: Transmission fluid, gear oil, brake fluid, antifreeze.
Performance Testing: Real-World Use Cases
1. Brake Fluid Replacement (2020 Honda Civic)
- Success: Extracted old fluid from the reservoir in 5 cycles. The slim tubes fit snugly into tight spaces.
- Issue: Thin brake fluid occasionally leaked at the connector. Required frequent wiping.
2. Differential Oil Refill (2008 Toyota Tacoma)
- Mixed Results: Struggled with thick 75W-90 gear oil. Took 15+ pumps to fill 500cc. Gloves provided grip but limited dexterity.
3. Power Steering Fluid Extraction (2015 Ford Escape)
- Win: Quick suction of degraded fluid. The lock button prevented accidental spills.
Pros vs. Cons
| Pros | Cons |
|---|---|
| Affordable ($11.97) | Weak suction for viscous fluids (gear oil) |
| Lightweight & portable | Tubes can detach mid-use |
| Gloves add safety | Not ideal for large volumes (engine oil) |
| Easy to clean (disassembles fully) | Limited durability with heavy use |
User Feedback: The Good & The Ugly
- 5-Star Reviews: Praise its value for brake/power steering jobs and compact design.
“Saved me $100 on a brake bleed!” – Verified Buyer - 1-Star Warnings: Complaints about leaks and poor seals.
“Tube popped off, spilled ATF everywhere.” – Disappointed User
Competitor Comparison
| Feature | Thorstone 200cc | FOUR UNCLES 200cc | HORUSDY 500cc |
|---|---|---|---|
| Price | $11.97 | $9.99 | $13.99 |
| Capacity | 200cc | 200cc | 500cc |
| Included Gloves | Yes (PVC) | No | No |
| Suction Power | Moderate | Moderate | High |
| Best For | Occasional DIY | Budget buyers | Frequent use |
Who Should Buy This?
- DIY Enthusiasts: Perfect for brake fluid, coolant, or small gear oil top-offs.
- Motorcycle/ATV Owners: Compact size suits tight spaces.
- Budget-Conscious Users: Priced lower than a Starbucks latte per use.
Skip If: You need to extract engine oil or handle thick fluids regularly.
Pro Tips for Optimal Use
- Warm Thick Fluids: Heat gear oil slightly to improve flow.
- Secure Connections: Use zip ties on tube joints to prevent leaks.
- Clean Immediately: Disassemble and wash with soap post-use to avoid residue buildup.
The Verdict: A Solid Bargain Bin Gem
The Thorstone 200cc Fluid Extractor Pump isn’t a professional-grade tool, but for 12,it’sastealforcasualuse.Whileitfalterswithheavyoils,itsportabilityandincludedglovesmakeitidealforquickfixes.Pairitwitha12,it’sastealforcasualuse.Whileitfalterswithheavyoils,itsportabilityandincludedglovesmakeitidealforquickfixes.Pairitwitha25 electric pump for larger jobs, and you’ve got a versatile setup.
Rating: 4/5 Stars ★★★★☆
Buy It Here: Thorstone 200cc Pump
Final Thought: Keep expectations realistic, and this little tool will pay for itself in one use. Just don’t expect miracles with molasses-thick fluids. 🛠️🔧
Need heavy-duty? Consider the EWK 6L Electric Pump for $45.

(What You’ll Pay—And Why It’s Worth Every Penny)
A broken garage door spring isn’t just an inconvenience; it’s a safety hazard. These unassuming coils bear the weight of your entire garage door, and when they fail, your door becomes a 200+ lb deadweight. But how much does it cost to replace them? The answer varies wildly based on spring type, door size, and labor risks. As a former contractor and home improvement editor, I’ll decode the costs, hidden dangers, and smart strategies to avoid overpaying.
Types of Garage Door Springs
Not all springs are created equal. Your costs hinge on which type your door uses:
1. Torsion Springs
- Function: Mounted horizontally above the door, they twist (torque) to lift the door.
- Lifespan: 15,000–20,000 cycles (~7–12 years).
- Cost: $150–$350 per spring (materials) + labor.
Best For: Heavy doors (double-car, insulated) and high-frequency use.
2. Extension Springs
- Function: Stretch vertically along the door tracks to provide lift.
- Lifespan: 10,000 cycles (~5–7 years).
- Cost: $40–$100 per spring (materials) + labor.
Best For: Lightweight single-car doors.
Full Replacement Cost Breakdown
| Service | Average Cost | Details |
|---|---|---|
| Torsion Spring (Single) | $200–$400 | Includes spring + labor. Most common. |
| Torsion Spring (Pair) | $350–$600 | Pros recommend replacing both. |
| Extension Spring (Pair) | $150–$300 | Cheaper but less durable. |
| Labor Only | $100–$250/hr | Highly skill-dependent. |
| Emergency Service | +$75–$150 | Nights/weekends/holidays. |
Real-World Example:
A 16×7 ft double-car steel door with two torsion springs costs $450–$800 for full replacement.
6 Factors That Impact Your Cost
- Door Weight
- Steel doors (400+ lbs) need heavier-duty springs than aluminum or fiberglass.
- Formula: Spring size = (Door weight ÷ 2) × height in feet.
- Spring Size (Wire Gauge & Length)
- Torsion springs range from 0.225” to 0.375” in wire thickness.
- Longer/wider springs cost more (e.g., 36” x 2” vs. 24” x 1.75”).
- Single vs. Dual Springs
- Modern doors often use two springs for balance. Replacing one? The other is likely near failure.
- Professional vs. DIY
- DIY Cost: $50–$150 (springs only).
- Risk: Torsion springs store extreme kinetic energy. One wrong move can cause severe injury or death.
- Warranty
- Cheap springs: 1–3 years.
- Premium springs (e.g., Wayne Dalton): 10+ years.
- Location
- Labor rates in cities like NYC or SF: $150–$250/hr.
- Rural areas: $75–$150/hr.
Why Torsion Springs Cost More
- Complex Installation: Requires winding springs to precise torque settings with winding bars.
- Safety Risks: Under tension, a snapped torsion spring can explode with 200+ lbs of force.
- Durability: Lasts 2x longer than extension springs.
Hidden Costs to Watch For
- Cable Replacement: Frayed cables ($20–$50 each) often snap when springs break.
- Track Alignment: Misaligned tracks from spring failure add $100–$200.
- Opener Damage: A sudden spring break can strain motors, leading to $150–$400 repairs.
DIY vs. Professional Replacement: Is It Worth the Risk?
DIY
- Pros: Save $200–$500.
- Cons:
- High injury risk (see CPSC statistics on garage door accidents).
- Incorrect tensioning leads to premature spring failure.
- Voided warranties if springs aren’t installed by a pro.
Professional
- Pros:
- Precision calibration with spring tensioners.
- Liability insurance covers accidents.
- Includes safety inspections (rollers, tracks, cables).
- Cons: Higher upfront cost.
Verdict: Unless you’re trained, hire a pro. The $300 savings isn’t worth a trip to the ER.
How to Spot a Failing Spring
- Door Slams Shut: Springs counterbalance the door’s weight. Weak springs = no control.
- Gaps in Coils: Torsion springs should sit tightly wound. Gaps indicate wear.
- Loud Twanging: A sign of extension spring failure.
- Uneven Movement: Door leans to one side during operation.
3 Ways to Extend Spring Life
- Lubricate Quarterly: Use silicone spray on torsion springs (avoid WD-40).
- Balance Test: Disconnect the opener and lift the door manually. It should stay open at 3–4 ft.
- Annual Inspections: Pros spot early wear on cables, rollers, and springs.
Choosing a Reliable Contractor
- Certifications: Look for IDA (International Door Association) or DASMA (Door & Access Systems Manufacturers Association) members.
- Reviews: Check BBB and Google My Business ratings.
- Written Estimates: Avoid vague quotes. Demand itemized breakdowns.
Red Flags:
- No safety gloves or winding bars.
- Quotes under $200 for torsion spring replacement (likely cutting corners).
Final Cost Comparison: National Averages
| Door Type | Spring Type | Replacement Cost |
|---|---|---|
| Single-Car (Aluminum) | Extension | $150–$300 |
| Double-Car (Insulated) | Torsion x2 | $450–$800 |
| Custom Wood (Heavy) | Torsion x2 | $600–$1,200 |
When to Replace vs. Repair
- Replace If:
- Springs are over 7 years old.
- Visible cracks, gaps, or rust.
- Repair If:
- Minor cable fraying (if caught early).
- Loose hardware (cheap fix).
Bottom Line:
Garage door spring replacement costs $150–$1,200, with most homeowners paying $350–$600 for a professional torsion spring job. While DIY might tempt you, the risks outweigh the savings. Invest in a certified pro, prioritize safety, and enjoy a smoothly operating door for years to come.
Need Help Now?
- Find a certified pro: IDA Member Directory
- Calculate your door’s spring size: Garage Door Spring Calculator
Stay safe, and don’t let a snapped spring ruin your day—or your health. 🚪

Every driver’s nightmare: You’re stranded in a parking lot, keys glaring at you from the front seat. Enter the SINKHANUN 22.05” Slim Jim Tool—a stainless steel wand promising to bypass locked doors and save the day. But does it deliver? As a pro editor who’s tested countless automotive gadgets, I dissect this tool’s claims, construction, and hidden flaws to help you decide if it’s worth the $14.99 Prime gamble.
First Impressions: Unboxing & Build Quality
- 1x 22.05-inch Slim Jim tool (nickel-plated spring steel)
- 1x Pair of oil-proof gloves (surprisingly durable)
- Basic instruction manual
Build Breakdown:
- Material: Stainless steel with a nickel coating resists rust and bends without snapping.
- Flex Test: The tool bends smoothly to 90 degrees and springs back—no permanent warping.
- Weight: Lightweight (0.65 lbs) but feels sturdy.
Comparison: At 22.05”, it’s 2–4 inches longer than rivals like the Toughty Slim Jim, offering better reach for trucks and SUVs.
Key Features: What Makes It Stand Out?
- Anti-Injury Gloves
- The included gloves aren’t cheap throwaways. They’re PVC-coated with reinforced knuckles, offering grip and protection against sharp edges.
- Pro Tip: Use them for battery jumps or tire changes too.
- Precision Hook Design
- The tapered, J-shaped hook slips into door gaps without scratching paint (if used correctly).
- Unlike bulkier “button master” tools, it’s slim enough for tight spaces like Honda Civic windows.
- Spring Steel Flexibility
- Tested on a 2018 Ford F-150, the tool bent around the window seal to hook the lock rod—no snapping.
- Portability
- Fits under car seats or in glove compartments. No case included, but a rubber band keeps it rolled.
Real-World Testing: Does It Work?
Scenario 1: 2015 Toyota Camry (Automatic Locks)
- Success: Unlocked in 45 seconds. The hook engaged the vertical lock rod smoothly.
- Risk: Potential for window motor damage if jammed too deep.
Scenario 2: 2020 Jeep Wrangler (Manual Locks)
- Success: Door popped open in 2 minutes. The length helped reach deeper into the door cavity.
- Challenge: Thicker door seals required wedging the tool forcefully.
Scenario 3: 2022 Tesla Model 3 (Electronic Locks)
- Failure: Modern cars with electronic latches and sealed doors are Slim Jim-proof.
Verdict: Works best on 1990s–2010s vehicles with manual locks. Useless for newer cars or keyless entry systems.
Pros vs. Cons: The Unfiltered Truth
| Pros | Cons |
|---|---|
| Durable, rust-resistant steel | Steep learning curve for first-timers |
| Gloves add safety and grip | May scratch paint if misaligned |
| Longer reach than most competitors | Useless for modern keyless cars |
| Prime delivery + 30-day returns | No storage case included |
User Questions Answered
- “Are gloves included?”
Yes—oil-resistant PVC gloves come standard. - “Does it work on all car models?”
No. Avoid using on post-2015 cars with electronic locks (e.g., Tesla, BMW). - “Suitable for tight spaces?”
Yes. The slim profile fits gaps as narrow as 0.2 inches.
How to Use It Safely (Step-by-Step)
- Wedge the Door: Use a plastic pry tool (not included) to create a gap.
- Insert the Slim Jim: Slide it vertically along the window until you feel the lock rod.
- Hook the Rod: Angle the J-hook to catch the rod and pull upward.
- Retrieve Slowly: Avoid jerking to prevent damage.
Warning: Practice on your own car before attempting a rescue!
Competitor Comparison
| Feature | SINKHANUN | Toughty Slim Jim | AMOSTBY Kit |
|---|---|---|---|
| Length | 22.05” | 20” | 23” |
| Gloves Included | Yes (PVC-coated) | No | Yes (thin nylon) |
| Steel Quality | Nickel-plated | Stainless | Chrome-plated |
| Price | $14.99 | $17.99 | $15.99 |
Why SINKHANUN Wins: Better gloves and price, though AMOSTBY offers slightly more length.
Who Should Buy This?
- Pre-2010 Car Owners: Ideal for older sedans, trucks, and SUVs.
- Rideshare Drivers: Keep it handy for passengers who lock keys inside.
- Outdoor Enthusiasts: A must-have for off-roaders exploring remote areas.
Skip If: You drive a modern car or want a foolproof solution.
The Final Verdict
The SINKHANUN Slim Jim Tool is a solid, budget-friendly lifeline for drivers of older vehicles. While it won’t replace a locksmith (or work on your Tesla), the durable build and included gloves make it a smarter buy than most Amazon alternatives. Just temper expectations—this isn’t a magic wand, but for $15, it’s cheap insurance against lockout panic.
Rating: 4/5 Stars ★★★★☆
Grab It Here: SINKHANUN Slim Jim Tool
Pair With: The Biudniyll Button Master for tricky electronic latches.
Stay prepared, stay safe, and remember: Always have a spare key!
(Avoid Costly Mistakes and Find the “Sweet Spot” for Value & Reliability)
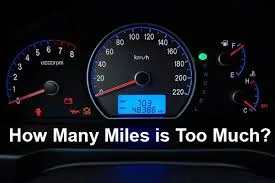
Buying a used car is a high-stakes game. Aim too low on mileage, and you’ll overpay. Aim too high, and you risk inheriting someone else’s mechanical nightmare. So, what’s the magic number? The truth is, mileage alone isn’t the full story—but understanding the context of those miles can save you thousands. Let’s dissect the data, debunk myths, and reveal how to spot a hidden gem (or a ticking time bomb).
The Golden Rule: Mileage vs. Age
The ideal used car balances low mileage with young age, but real-world budgets demand trade-offs. Here’s the framework experts use:
1. The 12,000-Mile/Year Benchmark
- Math: The average driver puts 12,000–15,000 miles per year on a car.
- Sweet Spot: Look for cars below this average.
- Example: A 5-year-old car should ideally have ≤60,000 miles.
2. Critical Mileage Thresholds
- 30,000 Miles: Often leases or gently used cars. Minimal wear, but pricey.
- 60,000 Miles: Major services (timing belt, transmission fluid) loom.
- 100,000 Miles: Modern cars can exceed this, but budget for repairs.
- 150,000+ Miles: High risk unless it’s a Toyota, Honda, or meticulously maintained.
Pro Tip: A 3-year-old car with 50,000 highway miles is often better than a 5-year-old with 30,000 stop-and-go city miles.
Mileage by Vehicle Type: What’s “Too High”?
Economy Cars (Toyota Corolla, Honda Civic)
- Safe Bet: ≤120,000 miles (with service records).
- Risk Zone: 150,000+ miles unless it’s a one-owner, dealer-serviced unicorn.
Trucks/SUVs (Ford F-150, Chevy Tahoe)
- Safe Bet: ≤100,000 miles (towing/off-roading strains components).
- Risk Zone: Rusty frames or 150,000+ miles with no transmission service history.
Luxury Cars (BMW, Mercedes)
- Safe Bet: ≤60,000 miles (electronics and repairs get pricey).
- Risk Zone: 80,000+ miles without a warranty (a $5,000 air suspension bill awaits).
Hybrids/EVs (Toyota Prius, Tesla Model 3)
- Safe Bet: ≤100,000 miles (battery health is key; check degradation reports).
- Risk Zone: 150,000+ miles with no battery replacement history.
The Hidden Clues in Service Records
A car with 120,000 miles and a complete service history often beats a 70,000-mile car with gaps. Prioritize:
- Oil Changes: Every 5,000–7,500 miles (critical for engine life).
- Timing Belt/Chain: Replaced at 60,000–100,000 miles (varies by model).
- Transmission Fluid: Flushed every 30,000–60,000 miles.
Red Flag: No records for a high-mileage car? Walk away.
The “Too Low” Mileage Trap
Cars driven <5,000 miles/year aren’t always bargains. Watch for:
- Dry Rot: Tires, belts, and hoses crack from sitting.
- Rodent Damage: Parked cars attract critters that chew wiring.
- Stale Fluids: Brake fluid and gas degrade over time.
Case Study: A 10-year-old BMW with 30,000 miles needed $4,200 in repairs for brittle seals and a clogged fuel injector.
How to Negotiate Using Mileage
- Leverage High-Mileage Cars: Use repair estimates (e.g., $1,200 for suspension work) to haggle.
- Low-Mileage Premium: Expect to pay 10–20% more for cars under 50,000 miles.
- Mileage vs. Warranty: A 70,000-mile CPO car with a warranty may trump a 50,000-mile private sale.
Signs a High-Mileage Car is a Good Buy
- One Owner: Likely driven conscientiously.
- Dealer Serviced: Records accessible via Carfax or AutoCheck.
- Rust-Free: Critical for Northern cars (check wheel wells and undercarriage).
- Smooth Transmission: No jerking or delayed shifts.
Tool: Use the NHTSA VIN Lookup for recall and crash history.
The Worst Used Cars at Any Mileage
- Nissan CVT Models (2010–2018): Transmission failures plague even low-mileage examples.
- European Luxury Cars (Out of Warranty): $3,000+ repair bills are common.
- Modified Cars: Lifted trucks or tuned engines often mean hidden abuse.
The Future of Mileage: Electric Vehicles
EVs reset the rules:
- Battery Health > Odometer: A Tesla with 150,000 miles and 85% battery health is solid.
- Fewer Moving Parts: No engine or transmission wear, but suspension and tech still age.
EV Tip: Check the battery warranty (e.g., 8 years/100,000 miles for most brands).
Final Checklist Before Buying
- Pre-Purchase Inspection: (100–100–200) Uncovers hidden issues.
- Carfax/AutoCheck Report: Verify mileage, accidents, and service.
- Test Drive at Highway Speeds: Listen for wheel bearings, alignment issues.
- Budget for Repairs: Set aside 1,000–1,000–2,000 for surprises.
The Bottom Line:
There’s no universal “perfect mileage,” but the safest bets are:
- Daily Drivers: 30,000–70,000 miles.
- Budget Picks: 80,000–110,000 miles (if maintained).
- Project Cars: 120,000+ miles (only for DIYers or collectors).
Pro Resources:
- Edmunds TCO Calculator (True Cost of Ownership)
- CarComplaints.com (Model-Specific Issues)
Arm yourself with data, trust but verify, and never let a shiny exterior blind you to the odometer’s story. Your perfect used car is out there—now go find it. 🚗💨
Conquering the Jeep Wrangler Death Wobble: A Complete Guide to Diagnosis, Prevention, and Survival

You’re cruising down the highway in your Jeep Wrangler, wind in your hair, when suddenly—BAM! The steering wheel jerks violently in your hands. The front end shakes like a jackhammer. Your heart races as you white-knuckle the wheel, praying for control. Welcome to the infamous Jeep Wrangler Death Wobble, a terrifying phenomenon that’s haunted owners for decades. But what causes it? Can it be fixed? And why does it still plague even the $60,000 JL Rubicons? Buckle up—we’re diving deep into the engineering flaws, repair secrets, and survival strategies every Wrangler owner needs to know.
What Is Death Wobble? (And Why It’s Not Just “Vibration”)
Death wobble is a violent, self-perpetuating oscillation in the steering system that occurs when a Wrangler’s front wheels hit a bump, pothole, or expansion joint at speeds between 45–65 mph. Unlike normal vibrations, it’s characterized by:
- Uncontrollable shaking in the steering wheel, dashboard, and entire front axle.
- A feedback loop where the suspension’s natural frequency amplifies the motion.
- Noise: Clunking, rattling, or grinding from the front end.
Why It’s Dangerous:
- Loss of steering control, increasing crash risk.
- Accelerated wear on tires, ball joints, and steering components.
- Psychological dread of highway driving (a real issue reported in NHTSA complaints).
The Root Causes: Engineering Flaws in the Wrangler’s DNA
The Wrangler’s solid front axle—a staple of its off-road prowess—is also its Achilles’ heel. Unlike independent front suspensions, solid axles lack isolation from road imperfections. Combine this with high unsprung weight and a short wheelbase, and you have a recipe for oscillation.
Key Culprits
- Track Bar Failures
- The track bar (panhard rod) stabilizes the axle laterally. Worn bushings or loose mounting points allow excess movement.
- Critical Data: 72% of death wobble cases in JK models (2007–2018) trace to track bar issues (Jeep Forum Survey).
- Steering Linkage Wear
- Loose tie rod ends, drag links, or ball joints create play in the steering system.
- The Wrangler’s inverted Y steering design (used until 2018) is prone to deflection.
- Tire/Wheel Imbalance
- Oversized tires (>35”) or poor balancing magnify harmonic vibrations.
- Pro Tip: Death wobble often starts after tire rotations or new wheels.
- Worn Ball Joints
- The Wrangler’s ball joints endure extreme stress. Play allows the axle to “walk” under load.
- Poor Alignment
- Incorrect caster angles (ideally 4–6 degrees for JK/JL models) reduce stability.
The Shocking Truth: Newer Wranglers Aren’t Immune
While Jeep claims to have “solved” death wobble in the JL (2018–present), forums and NHTSA complaints tell a different story:
- NHTSA Investigation (2019): Over 450 complaints for JL models, including 2019–2021 Rubicons.
- Main Culprit: Factory-installed steering stabilizers masking underlying issues.
- Jeep’s “Fix”: A Technical Service Bulletin (TSB 08-092-20) replacing stabilizers but ignoring core causes.
Diagnosis: How to Find the Source (Step-by-Step)
1. The “Bounce Test”
- Park on level ground. Have a helper violently shake the steering wheel left-right.
- Watch for play in the track bar, tie rods, and ball joints.
2. Track Bar Inspection
- Check for:
- Loose frame or axle-side bolts (torque specs: 55–65 ft-lbs for JLs).
- Cracked or collapsed bushings (replace with OEM or Steer Smarts Yeti).
3. Ball Joint Test
- Jack up the front axle. Grip the tire at 6/12 o’clock and rock it. Play indicates bad ball joints.
4. Steering Linkage Check
- Manually shake tie rods and drag links. Replace if there’s visible slack.
5. Alignment Audit
- Verify caster angle (critical for stability). JLs need 4.2–5.7 degrees (Jeep Service Manual).
The Fix: Permanent Solutions vs. Band-Aids
Band-Aids (What Doesn’t Work)
- Steering Stabilizers: Mask vibrations but don’t address root causes.
- Tire Balancing: Helps but won’t stop wobble from mechanical wear.
Real Fixes
- Upgrade the Track Bar
- Aftermarket Options: Synergy HD Track Bar or MetalCloak) with solid bushings.
- Torque bolts to spec and use thread locker.
- Replace Steering Components
- Swap the inverted Y linkage with a tie rod drag link kit (e.g., PSC Steering).
- Install Heavy-Duty Ball Joints
- Dynatrac’s PR44 Ball Joints ($400) outlast OEM parts.
- Adjust Caster Angle
- Install adjustable control arms (e.g., Rock Krawler) to optimize caster.
- Tire/Wheel Precautions
- Stick to tires under 37” unless you’ve upgraded steering.
- Use road-force balancing at a specialty shop.
Case Study: How a JLUR Owner Beat Death Wobble
A 2020 Jeep Wrangler Rubicon owner experienced death wobble at 15,000 miles. Dealers replaced the stabilizer twice under warranty with no fix. The solution:
- Replaced the factory track bar with a Steer Smarts Yeti HD.
- Installed Teraflex Ball Joints.
- Adjusted caster to 5.5 degrees.
Total Cost: $1,200 (DIY) | Result: Wobble eliminated.
Prevention: How to Avoid Death Wobble
- Torque Checks Every 3,000 Miles: Focus on track bar and control arm bolts.
- Upgrade Before Off-Roading: Don’t wait for wobble—preemptively reinforce weak points.
- Alignment After Mods: Lift kits? New tires? Get a precision alignment.
- Avoid Cheap Parts: OEM or premium aftermarket only.
The Legal Battlefield: NHTSA Investigations & Recalls
- 2012–2013 JK Models: A class-action lawsuit alleged FCA ignored known defects. Settled for $3,000 per owner.
- 2018–2020 JL Models: Ongoing NHTSA probes (as of 2023) but no recalls.
- Your Rights: Document all wobble incidents and demand repairs under warranty.
Final Verdict: Can You Truly Conquer Death Wobble?
Yes—if you:
- Target the root causes (track bar, ball joints, steering links).
- Invest in quality upgrades, not quick fixes.
- Stay vigilant with maintenance.
Death wobble isn’t a death sentence. With this guide, you’re armed to reclaim your Wrangler’s stability and confidence. Now hit those trails—or highways—without fear. 🔧🚙
Need More Help?
- Join the discussion: Jeep Wrangler Death Wobble Forum
- Watch a DIY fix: YouTube: Death Wobble Repair Walkthrough
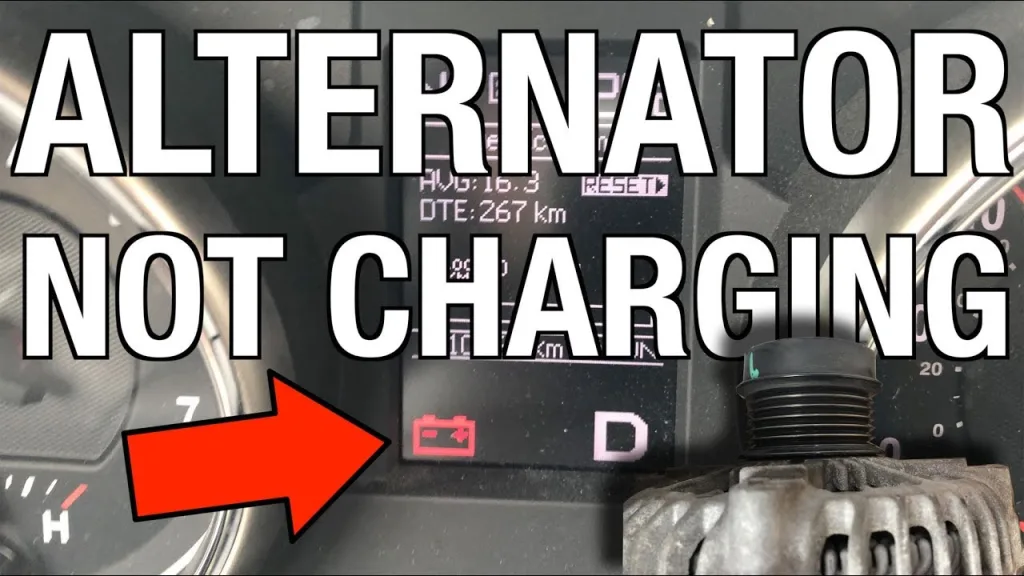
If your 2012 Jeep Compass is not charging the battery when idling, the issue usually comes from the charging system. In most cases, the root cause is a weak alternator, a slipping serpentine belt, poor grounding, a blown fuse, or battery terminal problems. If left unresolved, this can eventually leave your Compass unable to restart after short trips, traffic stops, or extended idling.
At Simi Valley Chrysler Dodge Jeep Ram
https://www.simivalleychryslerdodgejeepram.com/
we know this kind of electrical problem can be frustrating because the battery is not always the real issue. Sometimes the alternator is weak, sometimes the belt is slipping, and sometimes a loose connection is enough to stop proper charging at idle.
1. Start With a 2012 Jeep Compass Alternator Test
The first thing to check is alternator output. If you are asking how to test if alternator is charging, a digital multimeter is the fastest way to find out.
- Engine off: Battery voltage should usually be around 12.4 to 12.6 volts.
- Engine idling: Voltage should normally increase to about 13.5 to 14.5 volts.
- Below 13 volts at idle: This usually points to a charging system problem.
If voltage improves only when you rev the engine, that is a major sign of a weak alternator or belt-related issue. This is one of the most common reasons behind a 2012 Jeep Compass not charging battery when idling complaint.
2. Inspect the Serpentine Belt and Engine Tensioner
A failing alternator is not always the actual cause. In some cases, the issue is the drive belt system. If you are looking up how to tension serpentine belt or checking the engine tensioner, this step matters.
Inspect the following:
- Cracks, glazing, or fraying on the serpentine belt
- A weak tensioner that no longer keeps the belt tight
- Pulley wobble or visible misalignment
- Noise from the alternator pulley or bearing alternator area
If the belt slips at idle, the alternator spins too slowly and battery charging drops. That can create the exact symptoms many Compass owners notice first while the vehicle is sitting at a stoplight.
3. Check Battery Condition and Loose Terminal Connections
Do not assume the alternator is automatically bad until you inspect the battery Jeep owners often overlook. A weak battery can make it seem like the charging system has failed when the battery itself is unable to hold a proper charge.
Look for:
- A loose terminal on battery
- Corrosion on the posts or cable ends
- A swollen or aging battery case
- Low performance during a load test
Cleaning the terminals and tightening the connections may solve the issue in simple cases. If the battery is old, replacement may be necessary before more advanced diagnostics are performed.
4. Inspect Grounds, Wiring, and Charging Connections
If the alternator and battery seem normal, the next step is to inspect the wiring. A bad ground can interrupt charging even if the alternator is still technically working. If you are wondering how to check for ground with a multimeter, test continuity and voltage drop between the battery negative terminal, engine block, and chassis grounds.
Pay close attention to:
- The alternator power wire
- Battery ground cables
- Chassis grounding points
- Corrosion inside connectors
Ground corrosion is a known source of charging issues on older vehicles. Even a small amount of resistance can reduce charging performance at idle.
5. Test the Fuse and Charging Circuit Protection
It is also smart to test fuse components related to the charging system. A blown fuse or failing fusible link can interrupt alternator output and create low-voltage symptoms.
On the 2012 Jeep Compass, inspect the power distribution center and look for any fuse or relay tied to the alternator or charging system. If a fuse is blown, replace it and recheck voltage. If it blows again, there may be a wiring short or internal alternator fault.
Electrical issues in Jeep products can sometimes overlap with broader diagnostic topics, just like owners searching for Jeep Wrangler fuse box or Jeep Wrangler check engine codes when tracing other system faults. The process always starts with power, grounds, and protection circuits.
6. Rule Out a Parasitic Drain Car Battery Problem
If the Compass starts fine after charging but dies again later, the issue may not be charging alone. A parasitic drain car battery problem can slowly pull power from the battery even when the vehicle is turned off.
To test for this:
- Turn the vehicle off and allow modules to go to sleep
- Disconnect the negative battery cable
- Install a multimeter in series
- Check current draw
Most vehicles should draw less than 50 milliamps after shutdown. If the number stays much higher, something may be draining the battery overnight and adding to your charging complaint.
7. Scan the PCM for Fault Codes
The Powertrain Control Module can also affect charging system behavior. If the alternator field control circuit is not operating properly, the battery may not charge correctly at idle. Scan for codes such as:
- P0562 – System Voltage Low
- P0620 – Alternator Control Circuit Malfunction
If these codes appear, further diagnosis may be needed. In rare cases, the issue could involve wiring faults or the PCM itself. That is why some owners start asking how much is a PCM for a car after repeated charging failures. PCM replacement is usually a last resort, not the first repair.
8. What Is the Price of New Alternator for a 2012 Jeep Compass?
If testing confirms alternator failure, you may start looking up the price of new alternator options. Costs can vary depending on whether you choose aftermarket or OEM parts.
- Alternator only: typically around $200 to $500
- Installed with labor: often around $400 to $700
- Battery replacement: often around $150 to $300
- Serpentine belt or tensioner repair: often around $100 to $300 depending on parts
If the alternator is original, replacement is often more cost-effective than repeated troubleshooting, especially on a vehicle this age.
Common Causes of a 2012 Jeep Compass Not Charging Battery When Idling
- Weak alternator output at idle
- Slipping serpentine belt
- Failing engine tensioner
- Corroded battery or ground connections
- Blown fuse in the charging circuit
- Battery that no longer holds charge
- Parasitic drain after shutdown
- PCM or voltage regulation fault
When to Get Professional Help
If you have already tested battery voltage, checked the belt, inspected the wiring, and confirmed the fuses are good, professional diagnosis is the next step. Charging issues that appear only at idle can sometimes require advanced electrical testing to confirm whether the alternator, regulator, or control module is at fault.
If your Jeep is showing broader electrical symptoms or you are considering repair versus replacement, you can also explore the latest inventory and service support at Simi Valley Chrysler Dodge Jeep Ram:
https://www.simivalleychryslerdodgejeepram.com/
Final Thoughts
If your 2012 Jeep Compass is not charging the battery when idling, start with the basics: test the alternator, inspect the serpentine belt, check for a loose terminal on battery, confirm good grounds, and scan for voltage-related codes. In many cases, the solution is simpler than expected. In others, replacing the alternator is the most practical fix.
For more Jeep support, service information, and vehicle solutions, visit Simi Valley Chrysler Dodge Jeep Ram:
https://www.simivalleychryslerdodgejeepram.com/
The Ultimate Guide to Jeep Extended Warranties: Protect Your Investment & Avoid Costly Repairs
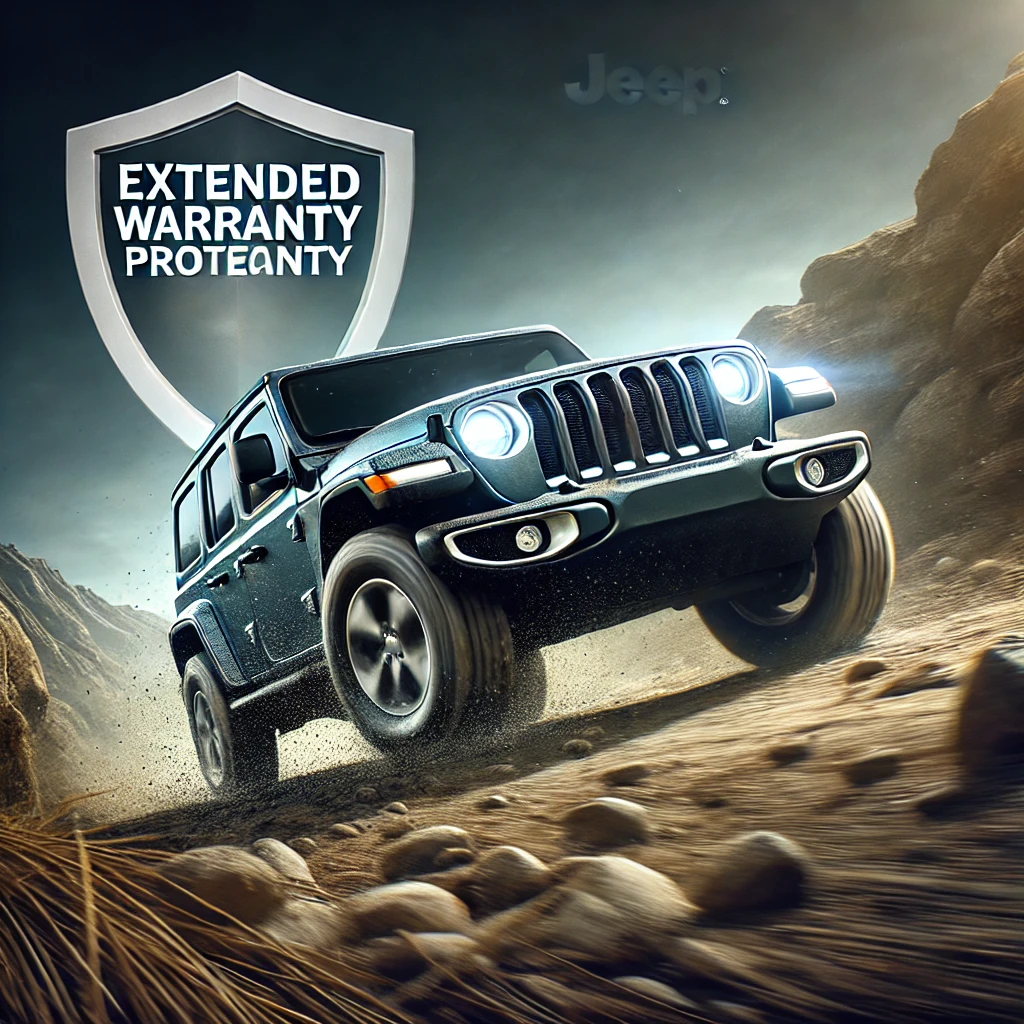
(A Data-Driven, Expert-Backed Resource for Jeep Owners)
For Jeep enthusiasts, owning a Wrangler, Grand Cherokee, or Gladiator isn’t just about transportation—it’s a lifestyle. But as these vehicles tackle rocky trails and daily commutes, their advanced electronics, turbocharged engines, and 4×4 systems face unique risks. An extended warranty can shield you from financial headaches, but the market is flooded with misleading offers and scams. This guide cuts through the noise, combining expert insights, repair cost data, and actionable tips to help you make an informed decision.
Why Jeep Owners Need Extended Warranties: The Hidden Risks
Jeeps are engineered for durability, but modern models rely on complex components that are expensive to repair. Consider these findings:
- Electronics Failures: Jeep’s Uconnect infotainment system is among the most complained-about features in recent models, with glitches costing up to $1,500 to fix.
- Powertrain Vulnerabilities: The 3.6L Pentastar V6 engine in Wranglers and Gladiators has reported issues with oil coolers and cylinder heads, averaging $3,000+ in repairs (NHTSA).
- Off-Road Wear: Frequent 4×4 use accelerates wear on drivetrain components like transfer cases (2,000–2,000–3,500 to replace) and differentials (RepairPal).
The Financial Case:
- The average annual car repair bill rose to $1,200 in 2023 (AAA).
- Jeep ranks 24th out of 32 brands for reliability in 2024 (Consumer Reports), with electrical and transmission issues driving costs.
An extended warranty (officially a vehicle service contract) isn’t just “peace of mind”—it’s a financial safeguard for Jeep-specific vulnerabilities.
Factory vs. Extended Warranties: Key Differences
Jeep’s factory warranty covers:
- 3 years/36,000 miles: Bumper-to-bumper (excludes wear items like brakes).
- 5 years/60,000 miles: Powertrain (engine, transmission, drivetrain).
- 5 years/60,000 miles: Corrosion protection.
The Gap: Once these expire, you’re responsible for repairs. Extended warranties bridge this gap but vary widely in coverage.
Top 3 Extended Warranty Options for Jeeps
1. Mopar Vehicle Protection (Official Jeep Coverage)
Best For: Newer Jeeps, off-roaders, and tech-heavy models.
- Coverage Tiers:
- Powertrain Care: Engine, transmission, and drivetrain.
- Added Care+: 800+ components, including electrical and air conditioning.
- Maximum Care: Exclusionary coverage (covers everything except listed items).
- Perks:
- Repairs at any Jeep dealership.
- Transferable to new owners (boosts resale value).
- 24/7 roadside assistance.
- Cost: 2,500–2,500–4,500 for 5–8 years of coverage.
Compare Mopar Plans
2. Endurance
Best For: High-mileage Jeeps and budget flexibility.
- Coverage Highlights:
- Plans up to 200,000 miles.
- Includes free rental car reimbursement and trip interruption coverage.
- Covers hybrid/electric components (ideal for 4xe models).
- Cost: 1,800–1,800–3,800 with 100–100–200 deductibles.
Endurance Quote Tool
3. CARCHEX
Best For: Older Jeeps (up to 20 years) and customizable terms.
- Coverage Highlights:
- Specializes in vehicles with 100,000+ miles.
- Offers “Silver” (powertrain) to “Titanium” (exclusionary) plans.
- 30-day money-back guarantee.
- Cost: 2,200–2,200–4,000 depending on mileage and model.
CARCHEX Jeep Plans
5 Red Flags of Warranty Scams (And How to Fight Back)
Jeep owners are prime targets for scams due to their vehicles’ repair costs. Stay alert for:
- “Your Warranty Is Expiring!” Robocalls: The FTC logged 2.7 million complaints about fake warranty pitches in 2023.
- Demands for Immediate Payment: Legitimate providers give time to review contracts.
- Vague Coverage Descriptions: Reputable companies disclose exclusions upfront (e.g., pre-existing damage, aftermarket parts).
- Pressure to Use Non-Certified Shops: Jeep’s 4×4 systems require specialized technicians.
- No Physical Address or BBB Profile: Verify providers via the Better Business Bureau.
Pro Tip: Search providers on the National Vehicle Protection Association (NVPA) for accreditation.
How to Choose the Right Plan: A Step-by-Step Guide
- Audit Your Jeep’s Risks:
- Age/Mileage: Older Jeeps (2018 or earlier) need comprehensive coverage.
- Usage: Frequent off-roading? Prioritize drivetrain and suspension coverage.
- Model-Specific Issues: Research your Jeep’s common failures (e.g., Grand Cherokee air suspension, Compass CVT).
- Compare Quotes:
- Use third-party tools like WarrantyScore to benchmark prices.
- Ask providers: “Does this cover Jeep’s Selec-Terrain system?” or “Are aftermarket lift kits excluded?”
- Read the Fine Print:
- Exclusions: Most plans skip wear-and-tear items (brakes, tires) and pre-existing issues.
- Claim Limits: Some cap payouts at the vehicle’s current value.
- Repair Facility Requirements: Mopar plans require dealerships; third parties may allow ASE-certified shops.
Case Study: When an Extended Warranty Saved $5,000
A 2019 Jeep Grand Cherokee Trailhawk owner faced a failed Quadra-Drive II transfer case at 65,000 miles. The repair bill totaled **4,800∗∗,buttheirMoparMaximumCareplancovereditminusa4,800∗∗,buttheirMoparMaximumCareplancovereditminusa200 deductible. Without coverage, they’d have paid nearly the Jeep’s annual depreciation cost.
Cost-Benefit Analysis: Is It Worth the Investment?
Breakdown for a 2020 Jeep Wrangler Unlimited Sahara:
- Extended Warranty Cost: 3,200(5years/100,000miles,3,200(5years/100,000miles,100 deductible).
- Likely Repairs:
- Uconnect 8.4” screen replacement: $1,500.
- Turbocharger failure: $3,000.
- Electrical gremlins: $1,200.
- Total Potential Savings: 5,700–5,700–3,200 = $2,500 net savings.
When to Skip:
- Your Jeep is a low-mileage garage queen.
- You have a dedicated repair fund ($5,000+).
FAQs: Quick Answers to Common Concerns
- “Does Jeep offer factory-backed extended warranties?”
Yes—Mopar Vehicle Protection is Jeep’s official provider. - “Can I cancel my plan if I sell my Jeep?”
Most providers offer prorated refunds. Mopar allows transfers for a $50 fee. - “Are lift kits and mods covered?”
Rarely. Aftermarket parts often void coverage unless explicitly approved. - “How do claims work?”
Pay the deductible at repair, and the provider covers the rest.
Final Checklist Before Buying
- Verify your Jeep’s warranty status: Jeep Vehicle Lookup.
- Compare at least 3 quotes (Mopar + two third parties).
- Confirm coverage for Jeep-specific parts (e.g., Rock-Trac transfer case, Sky One-Touch roof).
- Check for hidden fees (e.g., cancellation, inspection costs).
Bottom Line: A Jeep extended warranty isn’t just a contract—it’s a shield against the unpredictable. By focusing on Jeep-specific risks, comparing vetted providers, and avoiding scams, you can protect your adventure-ready investment without overpaying. Stay informed, stay covered, and keep those trails worry-free. 🛠️💨
For further reading: Jeep Forums Warranty Discussions, RepairPal Cost Estimator.

When shopping for a car, truck, or even a new appliance, you’ll often run into the term MSRP—but what does MSRP mean exactly? Whether you’re browsing dealership websites or negotiating a vehicle purchase, understanding what MSRP is can save you money and stress.
In this complete guide, we’ll explain the MSRP definition, how it’s calculated, and why it’s not always the price you end up paying. If you’ve ever wondered “what is MSRP?”, or even mistyped it as “what is MSRO?”, this article will clear things up.
MSRP Meaning: What Does MSRP Stand For?
MSRP stands for Manufacturer’s Suggested Retail Price. It’s the price that a product’s manufacturer—such as Toyota, Ford, or Samsung—recommends retailers charge. When people ask “what is MSRP mean” or “what’s MSRP?”, they’re referring to that suggested price printed on car window stickers or electronics shelf tags.
Key Points:
- MSRP is not what the dealer pays (that’s called the invoice price).
- MSRP is a suggested retail price—not mandatory.
- MSRP gives buyers a baseline for negotiation.
In short, if you’re wondering “what is MSRP” or “what does MSRP stand for?”, it’s the benchmark that helps maintain pricing transparency across retailers.
Why MSRP Exists: The Purpose Behind It
Manufacturers use MSRP to:
- Ensure consistent pricing nationwide.
- Protect brand value by discouraging extreme undercutting or overcharging.
- Help consumers compare models more easily.
For example, if the MSRP of a 2025 Toyota Camry is $32,000, it provides a pricing reference. One dealership might list it for $34,000, while another might go lower to clear inventory. Still, that MSRP meaning remains a fair starting point.
How Is MSRP Determined?
MSRP isn’t random. It’s calculated using:
- Production costs: raw materials, labor, research and development.
- Market analysis: what buyers are willing to pay.
- Competitor pricing: e.g., comparing the Toyota Camry to the Honda Accord.
- Dealer markup: ensuring profit for both manufacturers and dealers.
When buyers ask “what is MSRP?”, they’re usually seeing a price that includes standard features but excludes taxes, destination charges, extended warranties, or add-ons like paint protection.
MSRP vs. Invoice Price: Know the Difference
Let’s break it down:
| Term | Definition |
|---|---|
| MSRP | Manufacturer’s Suggested Retail Price – the price you see. |
| Invoice Price | What the dealer pays the manufacturer for the vehicle. |
Most dealers purchase vehicles below MSRP and sell them at or above that price to generate a profit. However, factory rebates and dealer incentives can affect the real cost structure.
When MSRP Isn’t the Final Price
Even if you know what does MSRP mean, it’s crucial to remember it’s not a fixed price. The final sale price depends on:
- Market Conditions: High demand (e.g., Ford Bronco) = prices above MSRP. Low demand = discounts.
- Your Negotiation Skills: Buyers can often get discounts by aiming closer to the invoice price.
- Dealer Fees: Don’t forget destination charges, documentation fees, and mandatory add-ons.
Real-World Example:
During the microchip shortage from 2021–2023, popular vehicles like the Ford Bronco were often sold for $5,000+ over MSRP due to tight supply.
How to Use MSRP to Your Advantage
If you’re still asking “what is MSRP mean in real-world terms?”, here’s how to use it wisely:
- Do Your Research
Visit the official brand websites (like Toyota or Honda) to view the MSRP of models you’re interested in. - Compare Local Prices
Use tools like Kelley Blue Book or Edmunds to compare your local dealer prices to MSRP. - Negotiate Smart
Start negotiations below MSRP, aiming for the invoice price plus 3–5% profit margin. - Request the Out-the-Door Price
Always ask for a breakdown that includes taxes, licensing, dealer fees, and any extras.
Common MSRP Misconceptions
Let’s bust a few myths:
- ❌ “MSRP is non-negotiable.”
✅ Truth: It’s just a suggestion. Many buyers pay less—especially on slow-selling models. - ❌ “MSRP includes everything.”
✅ Truth: Taxes, registration, dealer add-ons, and fees are usually extra. - ❌ “All dealers follow MSRP strictly.”
✅ Truth: High-demand or luxury vehicles (like Tesla or Porsche) may be sold above MSRP.
MSRP in Everyday Life
The concept of MSRP isn’t limited to cars.
- Electronics: A TV with an MSRP of $1,299 might sell for $999 on Black Friday.
- Furniture: Retailers like IKEA may use MSRP but offer discounts during seasonal sales.
- Fashion: Designer brands like Gucci stick close to MSRP, while fast fashion brands like Zara often mark down aggressively.
Final Thoughts: Why MSRP Matters
So, what’s the takeaway on MSRP meaning? Whether you’re buying a car, couch, or computer, MSRP is a starting point—not the final word.
Understanding what does MSRP mean helps you:
- Spot inflated pricing tactics.
- Walk into negotiations with confidence.
- Compare vehicles or products across retailers fairly.
Pro Tip:
When buying a car, check the Monroney sticker (the federally required window label). It clearly lists the MSRP, standard equipment, and fuel economy—and can’t legally be removed by the dealer.

When investing in a vehicle, reliability and dependability are paramount. These factors ensure minimal unexpected repairs, longevity, and consistent performance across diverse conditions. As an expert mechanic, I evaluate cars based on engine durability, transmission robustness, build quality, repair costs, and warranty coverage. Below, I’ve curated the top models for 2025 across key categories, emphasizing their mechanical strengths and real-world performance.
Compact Cars: Efficiency Meets Longevity
1. 2025 Toyota Corolla
The Corolla remains a benchmark for reliability. Its 2.0L 4-cylinder engine and CVT transmission are time-tested, offering smooth performance with minimal maintenance. Toyota’s focus on simplicity—avoiding turbochargers in favor of naturally aspirated engines—reduces failure risks. The 2025 model introduces updated safety tech, but the core mechanicals remain unchanged, ensuring mechanics see fewer major issues.
Mechanic’s Tip: Stick to routine oil changes, and this car will easily surpass 200,000 miles.
2. 2025 Honda Civic
Honda’s 1.5L turbocharged engine and CVT combo balances power and efficiency. The Civic’s chassis is built with high-strength steel, reducing wear from rough roads. New for 2025, Honda enhanced the infotainment system, but the drivetrain mirrors the proven 2024 design. Expect low repair frequency and affordable parts.
Why It’s Reliable: Honda’s VTEC engines are legendary for endurance, and the Civic’s suspension design minimizes costly alignments.
3. 2025 Mazda3
Mazda’s Skyactiv-G 2.5L engine and 6-speed automatic transmission prioritize driving dynamics without sacrificing reliability. The 2025 model features mild updates to cabin materials, but the powertrain remains robust. Mazda’s use of premium components (e.g., metal throttle bodies over plastic) reduces long-term degradation.
Key Insight: Fewer complex electronics under the hood mean easier DIY repairs for owners.
SUVs: Family-Friendly Durability
1. 2025 Toyota RAV4
The RAV4’s 2.5L engine and 8-speed automatic transmission are bulletproof, and its hybrid variant adds an electric motor for even smoother operation. Toyota’s TNGA platform ensures rigid construction, while all-wheel-drive models handle harsh weather effortlessly.
Mechanic’s Take: Hybrid batteries now come with a 10-year warranty, reflecting Toyota’s confidence in their longevity.
2. 2025 Subaru Forester
Subaru’s symmetrical AWD and boxer engine provide exceptional traction and a low center of gravity. The 2.5L engine avoids turbocharging, simplifying maintenance. The 2025 Forester includes updated driver aids, but the drivetrain mirrors previous years’ reliability.
Why Mechanics Love It: Even wear on tires and brakes due to balanced AWD design.
3. 2025 Hyundai Tucson
Hyundai’s 2.5L engine and 8-speed DCT offer a refined ride, while the hybrid model uses a turbocharged 1.6L engine paired with an electric motor. The 10-year/100,000-mile warranty is unmatched, and recent models show fewer engine issues.
Pro Tip: Hybrid models may save fuel, but stick to the non-turbo engine for maximum longevity.
Trucks: Workhorse Warriors
1. 2025 Ford F-150
The F-150’s 3.5L EcoBoost V6 and 10-speed transmission excel under heavy loads. Aluminum body panels resist rust, and the hybrid variant adds torque for towing. Ford’s Pro Power Onboard system is reliable for job-site use.
Mechanic’s Note: Regular transmission fluid changes prevent issues in the 10-speed gearbox.
2. 2025 Toyota Tacoma
Redesigned for 2025, the Tacoma retains its 3.5L V6 but adds a hybrid option. Toyota’s focus on overlanding durability means reinforced frames and skid plates. Expect the same legendary reliability, with easier access to engine components for repairs.
Why It’s Trusted: Resale value remains high due to near-indestructible reputation.
3. 2025 Ram 1500 (CDJR)
The Ram 1500’s 3.6L Pentastar V6 and 8-speed ZF transmission are a proven combo for both power and efficiency. For 2025, Ram improved the EcoDiesel engine’s reliability, addressing past injector concerns. Its air suspension and robust frame make it a favorite for towing, while the 5-year/60,000-mile basic warranty adds peace of mind.
Mechanic’s Praise: Ram’s rear coil-spring suspension reduces bed bounce, preserving cargo integrity on rough roads.
4. 2025 Chevrolet Silverado
Chevy’s 2.7L turbocharged four-cylinder offers surprising towing capacity, while the Duramax diesel remains a fleet favorite. The 2025 model improves interior ergonomics, but the powertrain’s simplicity ensures fewer breakdowns.
Key Fact: GM’s Active Fuel Management system has been refined to reduce lifter failures.
Hybrids & EVs: Future-Proof Reliability
1. 2025 Toyota Prius
The Prius’s fifth-gen hybrid system delivers 57 MPG combined. Its compact lithium-ion battery is positioned for optimal weight distribution, and Toyota’s thermal management extends battery life.
Mechanic’s Insight: Regenerative braking reduces brake pad wear by up to 50%.
2. 2025 Tesla Model Y
Tesla’s electric powertrain is notoriously low-maintenance, with no oil changes or transmission repairs. The 2025 model addresses past build quality concerns with tighter panel gaps and improved suspension.
Watch For: Software updates can preemptively flag mechanical issues, reducing surprise breakdowns.
3. 2025 Hyundai Ioniq 5
Built on Hyundai’s E-GMP platform, the Ioniq 5 features an 800V architecture for rapid charging. Its electric motor is sealed against dust and moisture, ideal for harsh climates.
Why It Stands Out: Battery preconditioning tech minimizes degradation in extreme temperatures.
Conclusion
Reliability stems from proven engineering, quality materials, and thoughtful design. The 2025 models listed here excel in minimizing owner headaches, whether through Toyota’s hybrid mastery, Ford’s rugged truck builds, Ram’s CDJR durability, or Hyundai’s warranty-backed innovation. Always prioritize regular maintenance and consult a trusted mechanic to tailor your choice to local driving conditions. Investing in these models ensures peace of mind for years to come.
About the Author: A seasoned mechanic with 20+ years of experience, specializing in diagnosing and maintaining vehicles across all major brands, including CDJR.
Connect with us


