



Simi Valley Chrysler Dodge Jeep Ram

Blog

All Jeep General Ram Dodge Questions Car Buying Guides Chrysler Simi Valley Chrysler Dealer Simi Valley Used Cars
Fuel and Exhaust Cleaner

Fuel and Exhaust Cleaner: Whether They Actually Work

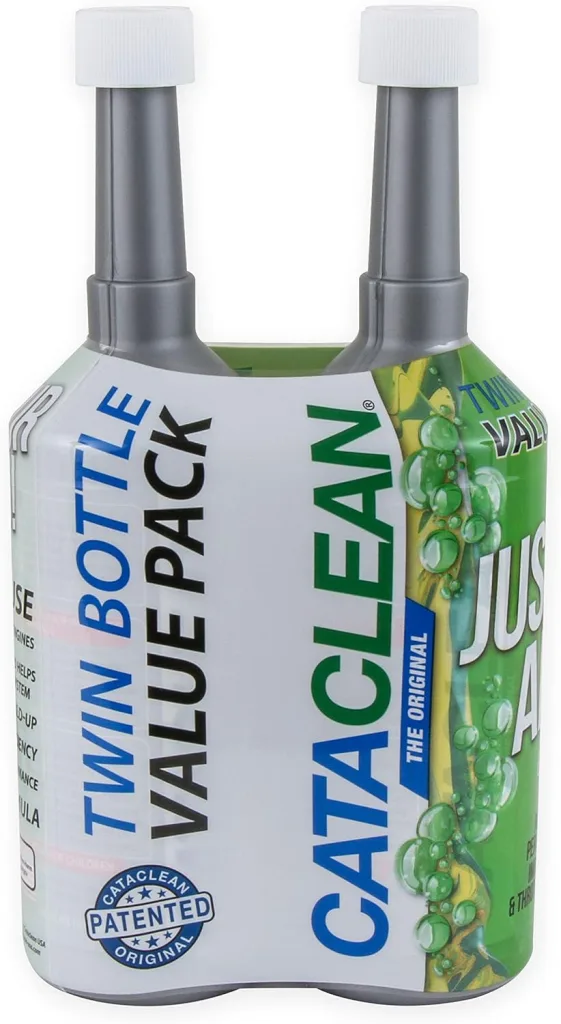
When people search for a fuel and exhaust cleaner, they are usually trying to solve one of a few frustrating problems: a rough idle, reduced fuel economy, sluggish throttle response, a failed emissions test, or a check engine light related to catalyst efficiency. That is why products like Cataclean fuel and exhaust system cleaner, fuel exhaust and emissions system cleaner, and Rislone Cat Complete fuel exhaust and emissions system cleaner have become so popular. They sit in a very specific category of automotive chemicals: they are not ordinary injector cleaners, and they are not miracle bottles that can repair a mechanically failed catalytic converter. They are marketed as system cleaners designed to address carbon buildup and contamination across parts of the fuel, combustion, and exhaust path. Manufacturer descriptions for Cataclean and Rislone both frame these products around cleaning carbon and deposits from components like injectors, oxygen sensors, EGR-related areas, and the catalytic converter itself. ( Cataclean) That distinction matters. A fuel and exhaust system cleaner is best understood as a maintenance or symptom-reduction product, not a hard-parts replacement. If your converter is melted, physically broken, contaminated by severe oil burning, or your engine has an unresolved misfire, no bottle is going to permanently fix that. But if deposits, incomplete combustion, and contamination are contributing to poor performance or marginal emissions behavior, the right cleaner may help. That is why these products keep coming up in searches such as does Cataclean fuel and exhaust system cleaner work and how to use Cataclean fuel and exhaust system cleaner. For anyone shopping one now, here is the link you provided: BUY NOW: https://amzn.to/3OKXVdl What a fuel and exhaust cleaner is actually supposed to do A true emissions-system cleaner is marketed as more than just a gasoline additive. Basic fuel system cleaners generally target injectors and intake-side deposits. A fuel and exhaust cleaner goes further in its claims. Cataclean describes its product as a cleaner for the fuel and exhaust system and says it targets carbon buildup in areas including valves, injectors, oxygen sensors, the EGR valve, and the catalytic converter. Rislone’s Cat Complete similarly says it is formulated to scrub contaminants, soot, carbon buildup, and oily residue from the injectors, combustion chambers, turbo, EGR, catalytic converter, oxygen sensors, and exhaust system. ( Cataclean) That marketing language lines up with how modern emissions systems work. Vehicles are designed around tightly controlled combustion, sensor feedback, and aftertreatment. EPA guidance explains that emission standards focus on pollutants such as carbon monoxide, hydrocarbons, nitrogen oxides, and particulate matter, while catalytic converters and onboard diagnostics are central parts of that control system. EPA also notes sulfur in gasoline can inhibit catalytic converter effectiveness, which shows how sensitive emission-control systems are to contamination and fuel quality. ( US EPA) In practical terms, when deposits build up or combustion quality worsens, several things can start happening at once. Fuel injectors may not atomize as cleanly. Combustion can become less complete. Sensors can respond to less-than-ideal exhaust chemistry. The catalytic converter may have to work harder. In some cases, the vehicle computer begins to see efficiency readings that edge toward fault thresholds. This is where products like Cataclean and Rislone Cat Complete are positioned: they are sold as cleanup tools for the system before the owner jumps straight to expensive parts replacement. ( Rislone) Why these products are so commonly searched now The reason cataclean fuel and exhaust system cleaner has strong search interest is simple: catalytic converter-related problems are expensive, and emissions faults are stressful. A modern converter replacement can cost far more than most people want to spend just to “see if it helps.” The same goes for professional diagnosis. When a check engine light comes on and the car still drives, many owners understandably look for the least invasive path first. Products in this category appeal to drivers dealing with: Catalyst-efficiency fault codes Slightly rough performance Lower-than-normal fuel mileage Hesitation or incomplete combustion symptoms Emissions-test anxiety Preventive maintenance on higher-mileage vehicles Rislone explicitly markets Cat Complete as helping clean dirty catalytic converters, clear common OBD check engine light codes, help pass emissions testing, and improve overall fuel-system health. Cataclean markets its cleaner around reducing emissions, improving fuel economy, restoring performance, and helping maintain the catalytic converter. ( Rislone) This is also why people often confuse them with “converter repair in a bottle.” That is not the right way to think about them. What these cleaners can realistically help with The best-case scenario for a product like this is not magic. It is cleanup. That might sound underwhelming, but cleanup matters in a system where efficiency depends on clean combustion and clean sensor/converter operation. A good fuel exhaust and emissions system cleaner may help when: Deposits are contributing to less efficient combustion Injectors are dirty enough to affect fuel delivery The converter is contaminated by soot and carbon rather than physically damaged The car has seen lots of short trips, poor fuel quality, or long maintenance intervals The check engine light is related to marginal efficiency rather than catastrophic failure You can think of it the same way you think about cleaning a throttle body or intake tract. Cleaning does not rebuild worn hardware, but it can improve the function of parts that are dirty. That said, there is a line these products cannot cross. If the real issue is an ignition problem, severe oil consumption, coolant entering the combustion chamber, broken substrate in the converter, or a dead oxygen sensor, then a cleaner may do little or nothing. That is why some drivers swear by these products and others say they did not work. The product may not have been the issue. The diagnosis was. Cataclean fuel and exhaust system cleaner: what it claims Cataclean positions itself as a cleaner that treats carbon buildup in the fuel and exhaust system. Its product pages state that it can improve fuel economy, reduce emissions, restore performance, and help protect and maintain the catalytic converter, while also cleaning areas including valves, injectors, oxygen sensors, the EGR valve, and the catalytic converter. Cataclean also states on its site that one treatment is added to roughly a quarter tank, about 15 litres, then the vehicle should be driven for around 15 to 20 minutes before refueling. Its FAQ further recommends periodic use every 3,000 miles or 3 months for ongoing maintenance. ( Cataclean) That dosing method is important because it is different from generic “dump it into a full tank” fuel additives. Cataclean is designed to run in a more concentrated treatment ratio before refueling. That concentrated-use pattern is one reason so many people search how to use Cataclean fuel and exhaust system cleaner. How to use Cataclean fuel and exhaust system cleaner Based on Cataclean’s official directions, the standard use pattern is straightforward. Add one 500 ml bottle to about a quarter tank of fuel, approximately 15 litres, drive the vehicle for roughly 15 to 20 minutes, and then refuel as needed. Cataclean also recommends repeated maintenance use at regular intervals rather than only using it when the vehicle already has a major problem. ( Cataclean) In real-world terms, the process looks like this: Step 1: Start with a relatively low fuel level Do not pour it into a nearly full tank if you want to follow the manufacturer’s intended concentration. The product is meant to be used with roughly a quarter tank. Step 2: Add the full treatment Use the bottle size intended for the application. For the standard automotive treatment, Cataclean’s directions refer to a 500 ml dose. Step 3: Drive the vehicle normally Drive for at least 15 to 20 minutes so the treated fuel works through the fuel and combustion system. A gentle highway run or sustained mixed driving is usually more meaningful than just idling in a driveway. Step 4: Refill the tank After the treatment cycle, refill when needed. Step 5: Reassess symptoms If the issue was deposit-related, this is where you would expect improvement in smoothness, response, or emissions readiness. If nothing changes, the vehicle may have an underlying mechanical or sensor fault. That is the correct answer to how to use Cataclean fuel and exhaust system cleaner according to the brand’s own instructions. ( Cataclean) Does Cataclean fuel and exhaust system cleaner work? This is the question almost everyone really wants answered. The honest answer is: it can work in the right situation, but it is not a guaranteed fix for every emissions or converter problem. Cataclean’s own positioning is that it removes harmful carbon buildup and can improve economy, reduce emissions, and restore performance. Rislone makes similar claims for its Cat Complete cleaner. That means the manufacturers themselves are presenting these as deposit-removal and system-cleanup products, not replacements for failed hard parts. ( Cataclean) So does it work? It can, if: Your injectors or combustion system are dirty Your converter is loaded with deposits rather than physically destroyed Your emissions issue is mild or developing The vehicle does not have deeper faults causing the same symptoms It probably will not work, or will only provide temporary improvement, if: The converter substrate is damaged or melted The engine is burning oil heavily You have a persistent misfire There is a vacuum leak, sensor failure, or wiring issue The check engine light is caused by something other than deposits and combustion contamination The most accurate way to frame it is this: Cataclean may help restore performance in a dirty system, but it cannot reverse physical failure. Rislone Cat Complete fuel exhaust and emissions system cleaner The other major product in this search category is Rislone Cat Complete fuel exhaust and emissions system cleaner. Rislone markets it very aggressively toward the exact pain points consumers care about: cleaning dirty catalytic converters, addressing common check engine light issues, helping pass emissions testing, and improving fuel-system health. The company’s product information also says the formula removes soot, carbon buildup, contaminants, and oily residue from injectors, combustion chambers, turbo components, the EGR system, catalytic converters, oxygen sensors, and the exhaust system. It also advertises benefits around codes such as P0420 and reduced emissions. ( Rislone) Compared with Cataclean, Rislone Cat Complete is positioned a little more directly as a check-engine-light and emissions-test support product. That does not necessarily make it better or worse. It just means the branding is slightly more diagnostic-problem oriented. Fuel and exhaust cleaner vs regular fuel system cleaner A regular injector cleaner and a fuel and exhaust cleaner are not the same category, even if they overlap. A basic fuel-system cleaner typically focuses on: Injectors Fuel rail contamination Intake-valve deposits in some cases Combustion chamber cleanliness A more emissions-focused product targets or claims to target: Injectors Combustion quality Oxygen sensors EGR-related contamination Catalytic converter deposits Exhaust-side contamination That difference is why emissions-system cleaners usually cost more than standard injector cleaners. They are marketed as broader, heavier-duty chemical treatments. Signs a cleaner might be worth trying before bigger repairs If your vehicle still runs decently and the problem appears moderate rather than catastrophic, trying a reputable cleaner can be a rational first step. It is especially reasonable when: The check engine light appeared recently The vehicle has high mileage and lots of short-trip driving There is no severe misfire There is no rattling converter Fuel economy has slipped gradually You want to attempt a low-cost maintenance intervention before expensive parts replacement On the other hand, if the vehicle is obviously running badly, consuming oil, overheating, misfiring, or making rattling exhaust noises, a bottle is not where you start. That is when proper diagnosis matters more than chemicals. What a cleaner cannot fix This part is critical because too many buyers expect the wrong thing. A fuel and exhaust system cleaner cannot: Rebuild a broken catalytic converter Repair a cracked manifold Fix an oxygen sensor wiring fault Stop oil burning caused by engine wear Cure a misfire caused by plugs, coils, or compression loss Replace damaged emissions hardware EPA emissions systems rely on functioning hardware, sensors, diagnostics, and converter efficiency. When the hardware is bad, cleaning chemistry is not a substitute. ( US EPA) How to decide whether Cataclean or Rislone Cat Complete makes more sense If you are deciding between Cataclean fuel and exhaust system cleaner and Rislone Cat Complete fuel exhaust and emissions system cleaner, the practical answer is to look at your use case. Choose the Cataclean-style route if you want: A known concentrated-treatment process A product positioned strongly around fuel economy, emissions reduction, and carbon cleanup A maintenance-oriented approach with recurring use guidance Choose the Rislone-style route if you want: A product marketed more directly toward catalyst-efficiency and CEL concerns A broader “fuel, exhaust, and emissions” cleaner message A formula positioned around passing emissions tests and addressing common code scenarios Both brands are clearly targeting deposit-related emissions and catalyst-performance issues rather than claiming to physically rebuild damaged parts. ( Rislone) Best practices when using any fuel and exhaust cleaner If you want the best chance of seeing results, a few rules matter. First, follow the manufacturer’s directions exactly. More is not always better. Second, use the product in a vehicle that is otherwise mechanically capable of benefiting from it. Third, drive the car long enough after treatment for the system to fully heat-cycle. Catalytic converters do not do their best work on repeated 3-minute trips. Fourth, do not ignore other maintenance. Dirty air filters, bad spark plugs, weak coils, and old oxygen sensors can all contribute to poor emissions performance. And finally, be realistic. If a product helps, great. If it does nothing, do not keep pouring bottles in while ignoring a deeper engine issue. Is it worth buying? For many drivers, yes, as a first-line attempt or preventive treatment. A quality fuel and exhaust cleaner makes sense when the alternative is jumping immediately to expensive diagnosis or converter replacement without first addressing possible contamination. It is relatively low-risk when used as directed, especially if the vehicle’s symptoms are mild and deposit-related. But it is not a substitute for diagnosis when the problem is severe. That is the most useful way to think about these products: Good for cleanup Potentially helpful for mild emissions issues Not a replacement for failed parts Most effective when used early, not after major failure Final verdict The category of fuel and exhaust cleaner exists for a reason. Modern engines and emissions systems are deposit-sensitive, and products like Cataclean fuel and exhaust system cleaner and Rislone Cat Complete fuel exhaust and emissions system cleaner are built around that reality. Official product information from both brands emphasizes carbon and contaminant cleanup across injectors, combustion-related areas, oxygen sensors, EGR-related components, catalytic converters, and the exhaust path. ( Rislone) So, does Cataclean fuel and exhaust system cleaner work? It can, when deposits are the problem. How to use Cataclean fuel and exhaust system cleaner? Use it the way the manufacturer specifies: with roughly a quarter tank, drive it, then refuel. ( Cataclean) If your goal is maintenance, mild symptom reduction, or giving a borderline emissions system a cleanup attempt before spending serious money, this category can be worth trying. If your converter is physically dead or your engine has deeper faults, no bottle will save you. BUY NOW: https://amzn.to/3OKXVdl

Best Brakes and Rotors

Best Brakes and Rotors: Expert Reviewed

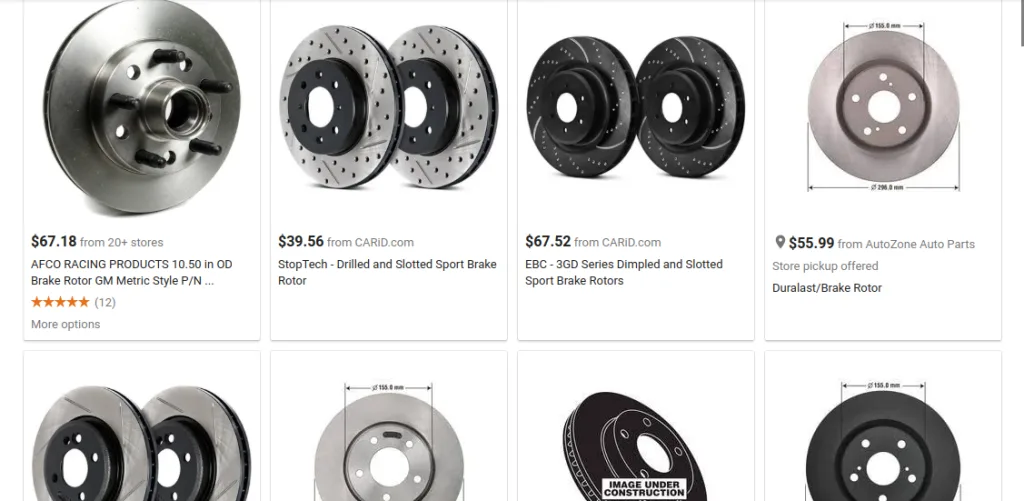
Best Brake Pads & Rotors Proven Quality If you are shopping for the best brakes and rotors, the biggest mistake you can make is buying based on hype instead of fit, driving style, and material quality. A brake kit that feels excellent on one vehicle can be completely wrong for another. A lightweight commuter sedan, a half-ton pickup, and a towing SUV all stress their brake systems differently. That is why the best brakes and rotors are not simply the most expensive ones or the most aggressive-looking drilled and slotted kits. The best setup is the one that matches how your vehicle is actually used. For many buyers, the challenge starts on Amazon or other marketplaces. You search “ best brakes and rotors” and instantly see thousands of results. Some products emphasize ceramic pads, some push drilled and slotted rotors, some claim truck-and-tow performance, and others focus on OE-style daily driving comfort. Brands like PowerStop, Detroit Axle, and ACDelco show up often, and at first glance many kits can look similar. But once you understand rotor types, pad materials, vehicle fitment, and what really matters in real-world braking, choosing the right kit becomes much easier. If you want to check current pricing and availability for a popular option, here is the buy link: Buy Now: https://amzn.to/3OKXVdl Why brakes and rotors matter more than most drivers think A lot of car owners wait until their brakes start squealing, grinding, vibrating, or pulling before paying attention. By then, the problem may already be bigger than just worn pads. Rotors may be heat-spotted, scored, warped, or too thin to reuse. Caliper hardware may be sticking. Brake fluid may be old. Tire wear or suspension issues might also be contributing to bad stopping feel. Your brake system is not just about stopping distance. It affects: Pedal feel Driver confidence Heat resistance Noise levels Dust buildup on wheels Rotor and pad longevity Towing safety Emergency braking stability The right brake kit can restore a vehicle’s original confidence, reduce maintenance headaches, and in some cases significantly improve performance under load. Best Brake Pads & Rotors Proven Quality What you are really buying when you choose a brake kit When you shop for brakes and rotors, you are usually choosing one of the following: 1. Pads only This is the cheapest route, but it only makes sense if your rotors are still in excellent condition and thick enough to be resurfaced or reused. In many cases, especially on higher- mileage vehicles, replacing pads without addressing the rotors is false economy. 2. Rotors only Rotor-only replacement is less common unless the pads are relatively fresh and still wearing evenly. Most people replace both pads and rotors together. 3. Front kit This typically includes two front rotors and one set of front brake pads. Front brakes usually do most of the stopping, so front kits are very common. 4. Front and rear kit This is the best option when you want a full reset of braking feel, balanced wear, and predictable performance. Many buyers prefer this route because labor is simplified and the entire system feels more consistent afterward. Understanding the major rotor types One reason buyers get confused is because rotor design is marketed aggressively. Drilled. Slotted. Cross-drilled. Geomet coated. Semi-coated. OE replacement. Performance upgrade. Truck and tow. These phrases sound technical, but you need to understand what they mean in practical terms. OE-style blank rotors These are the standard plain-surface rotors found on most vehicles from the factory. Best for: Daily commuting Quiet operation Lower cost Predictable pad wear Normal city and highway use Pros: Usually the smoothest and quietest Lower pad wear in many cases Often closest to factory feel Typically more affordable Cons: Less aggressive bite under repeated hard braking Can look plain if appearance matters to you For most daily drivers, high-quality OE-style rotors remain one of the smartest choices. Drilled rotors These have holes drilled through the rotor face. Best for: Buyers who want a sportier look Some lighter-duty performance applications Pros: Attractive appearance behind open wheels Can help vent gases and water in certain conditions Cons: May be more prone to cracking under repeated heavy heat cycling if quality is poor Can wear pads differently Sometimes noisier Drilled rotors look great, but they are not automatically better for every vehicle. Slotted rotors These have machined channels on the rotor face. Best for: Heavier vehicles More aggressive driving Some towing or hauling applications Pros: Good pad bite Can help clear debris and gases Often better for repeated braking load than basic blanks Cons: Can create more pad wear Sometimes more audible than plain rotors Drilled and slotted rotors This is the most aggressively marketed style online and often the one buyers associate with “upgraded brakes.” Best for: Drivers who want visual appeal plus stronger bite Trucks and SUVs using premium matched kits Some performance-oriented builds Pros: Sporty appearance Stronger initial bite in many setups Often bundled with ceramic pads in upgrade kits Cons: Not always necessary for normal commuting Can cost more Quality matters a lot A cheap drilled-and-slotted kit is not automatically better than a well-made OE-style setup from a more reputable brand. Best Brake Pads & Rotors Proven Quality Pad material matters just as much as the rotors Many shoppers focus on the rotor design and ignore the brake pad compound. That is a mistake. The pad compound affects stopping feel, dust, noise, longevity, and rotor wear. Ceramic brake pads These are among the most popular options today and show up in many Amazon kits. Best for: Daily drivers Low dust preference Quiet braking Balanced street performance Pros: Usually quieter than metallic pads Lower dust Smooth braking feel Long-lasting in many normal driving conditions Cons: May not offer the same cold bite or heavy-load performance as more aggressive compounds in extreme use Ceramic pads are often the sweet spot for normal drivers. Semi-metallic brake pads These use metal fibers in the compound. Best for: Heavier vehicles Towing Drivers who brake hard regularly Pros: Strong braking performance Good heat handling Often better suited for demanding use Cons: More dust Can be noisier Can wear rotors faster Carbon-fiber ceramic or performance street compounds These are usually marketed for trucks, towing, or performance upgrades. Best for: Trucks Large SUVs Repeated load Drivers wanting stronger bite Pros: Better thermal performance Stronger feel in harder use Often bundled in premium kits Cons: Higher cost Sometimes overkill for a commuter car The biggest mistake buyers make: ignoring vehicle fitment This is where many bad reviews come from. Not because the brake kit itself is terrible, but because the buyer ordered a kit that technically seemed compatible yet did not match the exact trim, rotor size, drivetrain configuration, towing package, or production year split. Before buying any brake kit, verify: Exact year Make Model Trim Engine Drivetrain Front vs rear rotor size Number of wheel lugs Towing package or heavy-duty brake package Whether your vehicle uses different rotor sizes depending on trim A brake kit for a Ram 1500, for example, may not fit every Ram 1500 configuration. The same applies to Silverado, Tahoe, Camry, Civic, Altima, and nearly everything else. What the popular brands generally represent Based on the kinds of products commonly shown in search results, here is how buyers often think about the leading names. PowerStop PowerStop is one of the most recognizable names in aftermarket brake kits. Many of its listings combine rotors and ceramic pads in vehicle-specific sets, and the brand often offers both OE-replacement style kits and upgraded drilled/slotted kits. Why buyers like it: Strong brand recognition Broad fitment coverage Lots of ceramic pad kits Popular truck-and-tow offerings Good balance of performance and convenience Best for: People who want a complete matched kit Truck and SUV owners Drivers who want an upgrade over stock without going race-oriented Detroit Axle Detroit Axle is often attractive because it offers extensive fitment coverage and competitive pricing. Its kits are common across sedans, SUVs, and trucks. Why buyers like it: Wide selection Good value pricing Vehicle-specific full kits Common availability for older and newer applications Best for: Budget-conscious buyers DIY replacements Drivers looking for decent all-in-one kit value ACDelco ACDelco is especially appealing for GM owners who want something closer to OE replacement. Why buyers like it: Familiar OEM-adjacent reputation Straightforward replacement parts Often a safer pick for factory-style feel Best for: Stock-style replacements GM applications Drivers who prioritize original-type behavior over flashy upgrades How to choose the best brakes and rotors for your driving style For normal commuting If your driving is mostly school runs, work commutes, errands, and highway cruising, you probably do not need an aggressive drilled-and-slotted performance kit. Look for: OE-style or lightly upgraded rotors Ceramic pads Anti-noise shims Coated rotors if you live in a rust-prone area This type of setup usually gives you quiet, clean, reliable braking. For SUVs and family haulers Larger vehicles place more demand on brakes simply because of weight. Even if you do not tow, an SUV loaded with passengers and cargo can benefit from a stronger pad and rotor package. Look for: Quality matched front and rear kit Ceramic or premium hybrid pad compound Rotors with corrosion resistance Good reviews for noise control For trucks and towing This is where buying the cheapest kit can backfire. Trucks generate more heat, especially when towing trailers, carrying loads, or descending hills. Look for: Truck-and-tow specific kits More heat-resistant pad compounds Larger heavy-duty rotor options where available Proven brand reputation Hardware included if possible If you tow regularly, prioritize thermal stability over appearance. For aggressive daily drivers If you drive fast, brake hard, or live in mountainous areas, a stronger performance street kit can make sense. Look for: Slotted or drilled-and-slotted rotors from reputable brands Performance-oriented ceramic or carbon-fiber ceramic pads High-temp tolerance Consistent pedal feel after repeated stops For rust-belt drivers If you live where roads are salted, rotor coating matters more than many buyers realize. Look for: Geomet-coated or semi-coated rotors Rust-resistant hats and edges Quality finish on non-friction surfaces These coatings do not prevent all corrosion forever, but they help preserve appearance and reduce premature rotor ugliness. Is a full front-and-rear kit worth it? In many cases, yes. A full kit makes sense when: The vehicle has high mileage You are already feeling inconsistent braking Rear brakes are near service life too You want one labor cycle instead of two You want balanced braking feel A front-only kit can still be perfectly reasonable if the rear setup is healthy. But if both ends are aging, replacing everything together often saves hassle. Signs your current brakes and rotors need replacement You should seriously inspect or replace your brakes if you notice: Squealing or grinding Steering wheel vibration while braking Pulsation in the brake pedal Longer stopping distance Vehicle pulling under braking Visible scoring or grooves on rotors Blue heat spots on the rotor face Brake warning light Uneven pad wear Excessive dust or burnt smell after driving These symptoms do not always mean both pads and rotors are bad, but they are signs you should not ignore. DIY vs professional installation Brake kits are popular with DIYers because they can save significant labor cost. That said, brakes are not a casual repair if you are inexperienced. DIY may be reasonable if you: Have basic tools Understand torque specs Know how to compress calipers correctly Can inspect hardware and brake fluid condition Can safely lift and support the vehicle Professional installation is smarter if: You are unsure about fitment The vehicle has electronic parking brakes You suspect caliper or hose issues You do not know how to bed in pads You are working on a heavy truck or SUV Rust has seized the old components badly Brakes are safety-critical. Saving money is good. Guessing is not. Why some brake kits get bad reviews even when the product is decent A lot of negative feedback comes down to installation or expectation problems, not necessarily the product itself. Common causes include: Wrong fitment ordered Old hardware reused Caliper slide pins not lubricated Pads not bedded in properly Cheap kits used on towing vehicles beyond their intended use Rotor surfaces contaminated during install Wheel lug torque done incorrectly Suspension issues mistaken for brake vibration This is why reading reviews alone can be misleading. A kit with mixed reviews may still be a solid choice if it matches your vehicle and is installed properly. What matters more than flashy marketing When comparing brake kits, prioritize these factors in order: Exact fitment Pad material quality Rotor quality and finish Suitability for your vehicle weight and use Brand reputation Included hardware Noise and dust characteristics Price Appearance That last point surprises people. Appearance should be one of the least important factors unless you are building a visual project car. Best value mindset when shopping brakes and rotors The true value option is not always the cheapest listing. Real value means: Correct fitment Complete parts included Good service life Low chance of return headaches Stable braking performance Fewer complaints about noise or dust Confidence in emergency stops A cheap kit that wears quickly, squeals constantly, or performs badly under heat is not a bargain. It is just cheap. Who should buy OE-style brakes and rotors OE-style kits are ideal if you: Drive mostly in town and on highways Want quiet operation Prefer smoother pedal feel Do not tow Do not care about aggressive visual styling Want to restore factory-like braking behavior This is the smartest category for a large percentage of drivers. Who should buy drilled and slotted kits A drilled-and-slotted kit makes sense if you: Drive a heavier SUV or truck Want stronger bite Tow occasionally or regularly Live in hilly terrain Want a more performance-oriented appearance Are buying from a reputable brand with proper vehicle-specific engineering Just do not assume the most aggressive-looking rotor is automatically the safest or longest-lasting choice. A practical buying checklist before you order Before clicking buy, confirm all of the following: Vehicle year, make, model, trim Rotor position: front, rear, or both Rotor size and package-specific fitment Pad compound type Rotor design type Whether hardware is included Warranty details Whether the kit is for normal driving, performance, or towing Whether your vehicle has special brake package differences Whether you need brake cleaner, grease, fluid, or tools too Final thoughts The best brakes and rotors are the ones that match your vehicle, your budget, and your real-world use. For a commuter car, a quality ceramic OE-style kit may be the best answer. For a truck or SUV, a premium drilled-and-slotted or truck-and-tow kit may be worth the extra money. For buyers who want simplicity, complete vehicle-specific kits from well-known brands are usually the easiest and safest route. Do not buy based on looks alone. Do not assume all ceramic pads feel the same. Do not ignore fitment details. And do not forget that proper installation matters just as much as the kit itself. If you are ready to check a popular option, here is the link again: Buy Now: https://amzn.to/3OKXVdl

manifold_gasket

Exhaust Manifold Gasket : Diagnosis, Replacement, and Failure Prevention

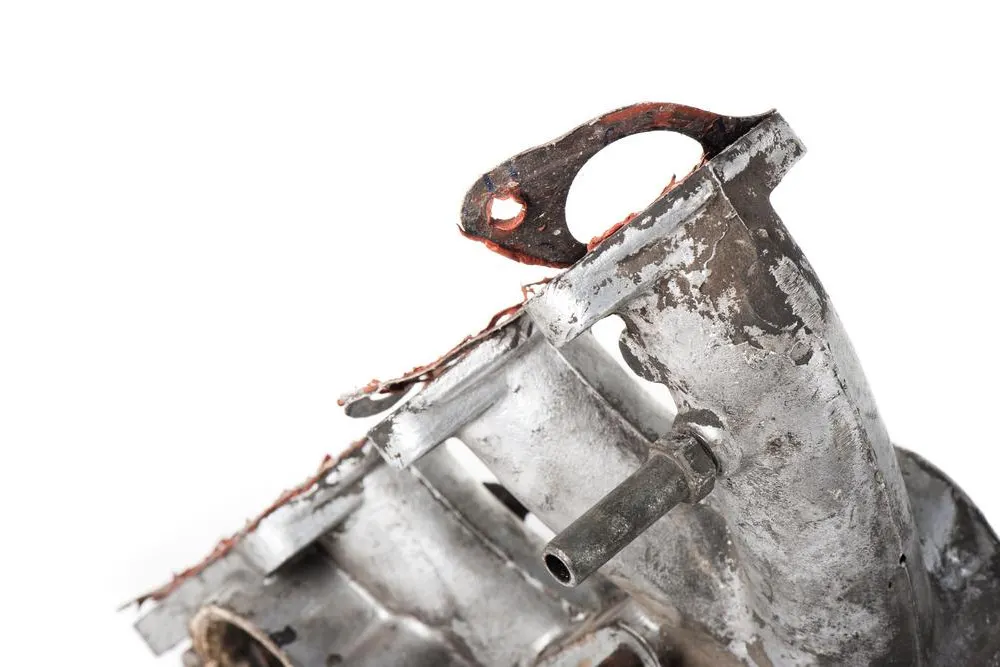
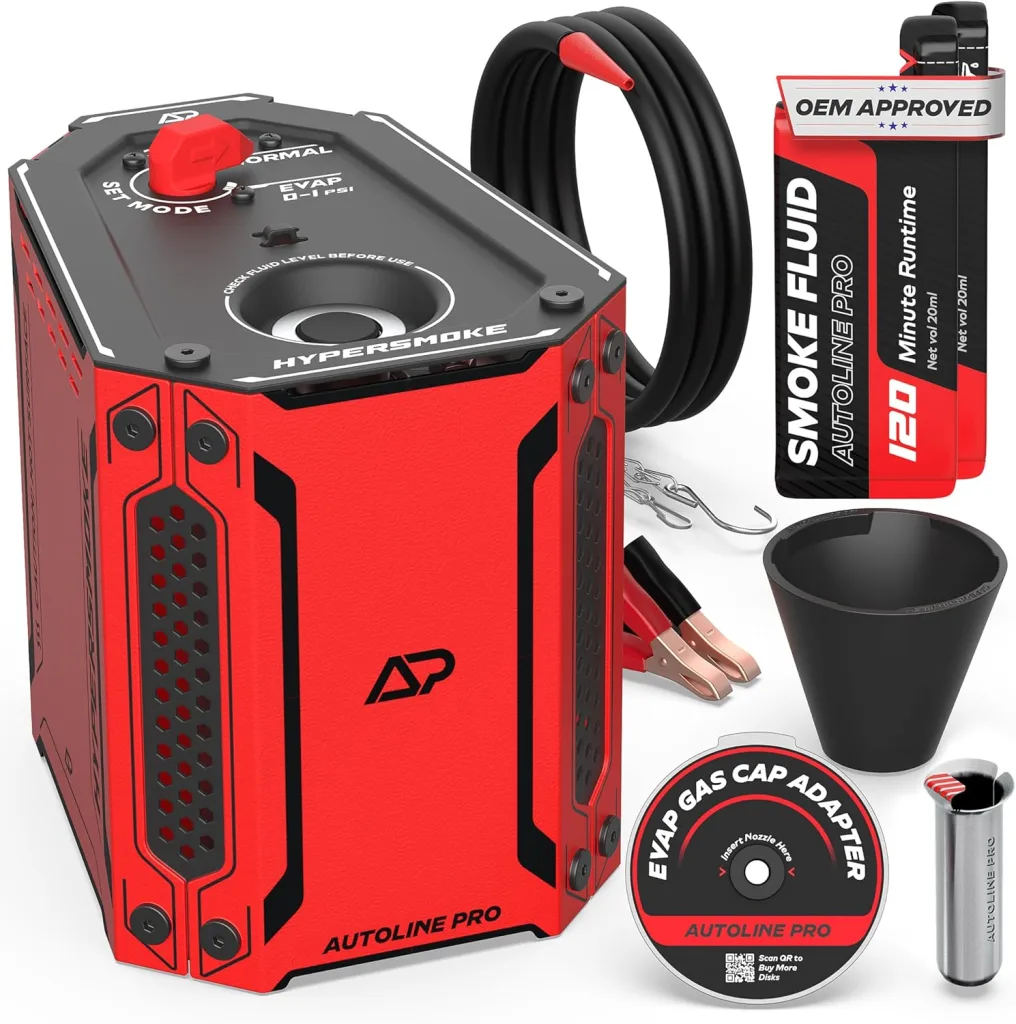
The exhaust manifold gasket is one of the most overlooked sealing components in an internal combustion engine. Yet when it fails, it can cause noise, performance loss, fuel economy issues, sensor faults, and even long-term engine damage. This in-depth guide covers: What an exhaust manifold gasket does How it fails Symptoms of a bad exhaust manifold gasket Diagnosis procedures Replacement process step-by-step Torque considerations Repair costs Prevention strategies Performance implications If you want a complete mechanical understanding, this is it. What Is an Exhaust Manifold Gasket? The exhaust manifold gasket seals the connection between: The engine cylinder head The exhaust manifold Its job is to: Prevent exhaust gas leaks Maintain proper exhaust flow Protect oxygen sensor readings Preserve backpressure balance Prevent hot gas escape into engine bay Exhaust gases leaving the combustion chamber can exceed 1,200°F (650°C). Without a proper seal, extreme heat and pressure escape through the weakest point — the gasket. Why the Exhaust Manifold Gasket Matters An exhaust manifold leak is not just a noise issue. It can cause: Incorrect air-fuel mixture readings Oxygen sensor faults Lean running conditions Reduced engine efficiency Increased emissions Cabin exhaust smell Carbon monoxide intrusion Because it sits upstream of oxygen sensors in many designs, a leak directly impacts engine management. How an Exhaust Manifold Gasket Works When the engine runs: Combustion occurs in the cylinder Exhaust valves open Exhaust gases exit through exhaust ports Gasket seals those ports Manifold collects gases into one pipe The gasket must maintain a perfect seal across multiple ports simultaneously. Even minor warping can cause leakage. Types of Exhaust Manifold Gaskets Different engines use different materials: 1. Multi-Layer Steel (MLS) Most common in modern engines High durability Excellent heat resistance 2. Graphite Composite Used in older engines Flexible Less durable under high heat 3. Copper Gaskets Common in performance builds Reusable in some cases High thermal conductivity 4. Metal Embossed Gaskets Designed for specific port shapes Often OEM-specific Choosing correct gasket type matters. Symptoms of a Bad Exhaust Manifold Gasket Here are the most common warning signs: 1. Ticking Noise on Cold Start This is the most recognizable symptom. When cold: Metal contracts Gap is larger Leak is louder As engine warms: Metal expands Noise may reduce This ticking often sounds like a lifter tap. 2. Exhaust Smell in Cabin Leaking exhaust gases can enter HVAC intake. Dangerous due to carbon monoxide. Never ignore this symptom. 3. Check Engine Light Common codes include: P0171 (lean condition) P0420 (catalyst efficiency) O2 sensor-related codes A leak upstream of oxygen sensor alters readings. 4. Reduced Engine Performance Loss of exhaust pressure balance affects scavenging. Results in: Sluggish acceleration Poor throttle response 5. Visible Soot Marks Black carbon deposits around manifold flange indicate leakage. Causes of Exhaust Manifold Gasket Failure Several factors contribute: 1. Heat Cycling Repeated expansion and contraction weakens gasket material. 2. Manifold Warping Cast iron manifolds can warp under extreme heat. Aluminum heads expand differently than iron manifolds. 3. Improper Torque Under-torqued bolts cause leaks. Over-torqued bolts cause distortion. 4. Broken Manifold Bolts Very common on older engines. When one bolt fails, gasket loses clamping force. 5. Engine Overheating Excessive temperature accelerates gasket breakdown. Diagnosing an Exhaust Manifold Gasket Leak Proper diagnosis is critical. Method 1: Visual Inspection Look for: Black soot trails Burn marks Cracks in manifold Method 2: Listen for Cold Start Tick Start engine cold. If ticking fades after warming, suspect gasket leak. Method 3: Smoke Test Introduce smoke into exhaust system. Observe leakage at manifold flange. Method 4: Soapy Water Test Spray mixture on suspected area. Look for bubbling during idle. Method 5: OBD Scan Check for lean codes or O2 sensor irregularities. Exhaust Manifold Gasket Replacement: Step-by-Step This process varies by engine layout, but general procedure includes: Step 1: Disconnect Battery Prevent electrical shorts. Step 2: Remove Heat Shields Access manifold bolts. Step 3: Spray Penetrating Oil Apply to manifold bolts. Let sit for 15–30 minutes. Critical step to avoid bolt breakage. Step 4: Remove Manifold Bolts Carefully Use proper socket. Work evenly. Avoid snapping studs. Step 5: Remove Manifold Inspect for: Warping Cracks Erosion Use straight edge to check flatness. Step 6: Clean Mating Surfaces Remove old gasket material. Use: Plastic scraper Brake cleaner Avoid gouging aluminum head surface. Step 7: Install New Exhaust Manifold Gasket Align ports precisely. Install manifold evenly. Step 8: Torque Bolts in Sequence Follow manufacturer torque spec. Usually between: 15–30 ft-lbs depending on engine Tighten in crisscross pattern. Step 9: Reinstall Components Reattach: Heat shields O2 sensors Exhaust pipes Step 10: Start Engine and Inspect Listen for leaks. Check for exhaust smell. Scan for codes. Torque Considerations Torque is critical. Too loose: Leak develops Too tight: Manifold warps Bolts stretch Always use torque wrench. Follow service manual specifications. Cost of Exhaust Manifold Gasket Replacement DIY Cost Gasket: $15–$80 Tools: if needed Total: $30–$150 Professional Repair Labor is main expense. Front-wheel-drive transverse engines require more labor. Typical cost: $300–$900 More if bolts break Broken studs significantly increase cost. What Happens If You Ignore It? Ignoring a leaking exhaust manifold gasket can lead to: Burned exhaust valves O2 sensor damage Catalytic converter damage Head warping Carbon monoxide exposure Long-term neglect increases repair costs. Exhaust Manifold Gasket vs Cracked Manifold Symptoms overlap. Difference: Gasket leak: Leak at flange Usually ticking Cracked manifold: Visible crack May worsen under load Proper inspection required. Preventing Future Exhaust Manifold Gasket Failure 1. Use OEM-Quality Gasket Cheap gaskets fail early. 2. Replace Bolts If Needed Stretched or rusted bolts lose clamping force. 3. Avoid Overheating Maintain cooling system. 4. Proper Torque Procedure Never guess torque value. 5. Check Manifold Flatness Machine if warped. Performance Impact A leaking exhaust manifold gasket disrupts exhaust scavenging. Effects include: Reduced torque Delayed turbo spool (turbo engines) Inconsistent AFR Turbocharged engines are particularly sensitive. Turbo Engines and Exhaust Manifold Gaskets In turbo applications: Leak before turbo reduces boost pressure. Symptoms include: Turbo lag Reduced boost Whistling noise Always inspect carefully. Is It Safe to Drive With a Leaking Exhaust Manifold Gasket? Short term: Possibly safe Long term: Not recommended Risk of carbon monoxide in cabin is serious. Repair promptly. Common Mistakes During Replacement Not cleaning surface properly Reusing damaged bolts Ignoring warped manifold Skipping torque sequence Installing gasket backward Precision matters. When to Replace Manifold Instead of Gasket Replace manifold if: Cracked Severely warped Flange eroded Machining may be possible in some cases. Final Thoughts The exhaust manifold gasket may seem like a simple sealing component, but it plays a critical role in: Engine performance Emissions compliance Cabin safety Long-term durability When it fails, symptoms escalate quickly. Early diagnosis, proper torque, quality gasket selection, and careful installation prevent repeated failure. If you hear a ticking noise at startup, smell exhaust inside the cabin, or see soot near the manifold — do not ignore it. Repairing an exhaust manifold gasket early is far cheaper than repairing engine damage later.

TPMS Scan Tool

TPMS Scan Tool: Tire Pressure Monitoring System

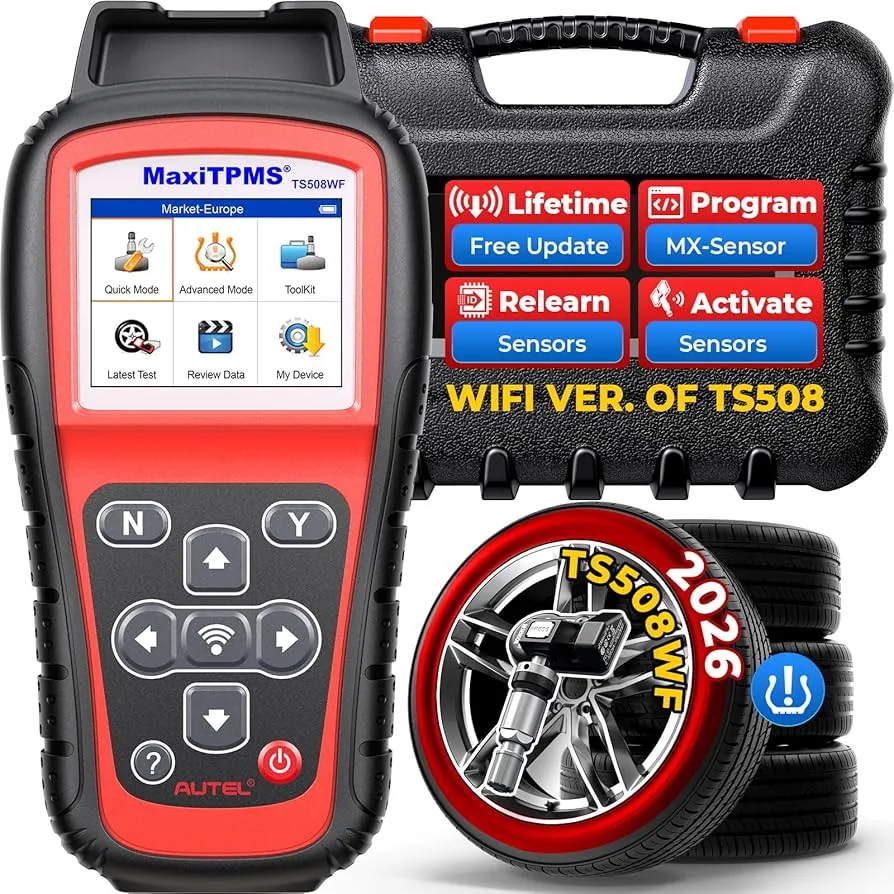
What Is a TPMS Scan Tool? A TPMS scan tool is a diagnostic device specifically designed to communicate with tire pressure monitoring sensors and the vehicle’s TPMS control module. Unlike a standard OBD-II scanner that reads engine codes, a scan tool for TPMS can: Activate tire pressure sensors Read individual sensor IDs Display live tire pressure and temperature Check sensor battery status Perform TPMS relearn procedures Register new sensors in the ECU Reset TPMS warning lights properly It works both wirelessly (via radio frequency activation) and through the vehicle’s OBD-II port. Not all scan tools support TPMS. This is a crucial distinction. Understanding How TPMS Works Before understanding the tool, you must understand the system. There are two types of TPMS systems: Direct TPMS Each wheel contains a battery-powered sensor that measures tire pressure and transmits data wirelessly to the vehicle. This system requires a TPMS scan tool for diagnostics and programming. Indirect TPMS Uses ABS wheel speed sensors to estimate tire pressure based on rotation differences. No physical pressure sensors inside the tires. Most modern vehicles use direct TPMS, especially in North America. How a TPMS Scan Tool Works A scan tool with TPMS capability operates in two modes: 1. RF Sensor Activation Mode The tool emits a low-frequency signal near the tire valve stem. This “wakes up” the sensor. The sensor then transmits: Tire pressure Internal temperature Sensor ID number Battery condition The tool displays this data instantly. 2. OBD-II Communication Mode After reading sensor data, the tool connects to the vehicle’s OBD-II port to: Write new sensor IDs into the ECU Perform relearn procedures Clear TPMS diagnostic trouble codes Confirm successful programming This two-way communication is what separates a true TPMS scan tool from a basic code reader. TPMS Scan Tool vs Standard OBD-II Scanner This is where many vehicle owners get confused. Standard OBD-II Scanner: Reads engine fault codes Clears check engine light Displays basic live engine data Cannot activate TPMS sensors Cannot program sensor IDs Scan Tool for TPMS: Activates sensors via RF Reads sensor IDs and pressure Performs relearn procedures Programs new sensors Diagnoses TPMS-specific faults If your tool does not have an RF antenna, it cannot properly service TPMS. What Is a Scan Tool With TPMS Capability? A true scan tool with TPMS functionality includes: RF antenna for sensor activation OBD-II programming ability Sensor relearn support Compatibility database by make/model Firmware updates Entry-level OBD scanners do not include these features. Can You Reset TPMS With Scan Tool? This is one of the most searched questions. Can you reset TPMS with scan tool? Yes — but only if the scan tool supports TPMS relearn functions. Simply clearing codes does not fix: Dead sensor batteries Unregistered new sensors ID mismatches after tire rotation A proper reset involves either: Relearn procedure Sensor reprogramming ID registration How to Reset TPMS With Scan Tool (Step-by-Step) Here is the professional process. Step 1: Connect the Tool Plug into the OBD-II port. Turn ignition to ON position. Step 2: Select Vehicle Information Choose: Make → Model → Year → TPMS System Step 3: Read Sensor Data Activate each sensor at the wheel using the RF antenna. Confirm: Pressure reading Sensor ID Battery status If a sensor does not respond, it may be dead. Step 4: Perform Relearn Procedure There are three common relearn types: Auto relearn (drive cycle) Stationary relearn OBD relearn Follow on-screen instructions. Step 5: Confirm Light Is Cleared If successful, the TPMS warning light will turn off. Can a Scan Tool Reset TPMS Without Replacing Sensors? If sensors are functional and IDs are correct, yes. If a sensor battery is dead, no tool can fix it. The sensor must be replaced and programmed. Toyota TPMS Scan Tool Guide Toyota vehicles often require OBD ID registration. This is why “tpms scan tool toyota” is frequently searched. Many Toyota models: Do not auto-learn new sensors Require manual ID entry via scan tool Use Techstream-compatible protocols A proper Toyota TPMS scan tool must support: OBD relearn Sensor ID registration Sensor cloning (if using universal sensors) Without OBD programming, Toyota TPMS reset may fail. Toyota TPMS Scan Tool Procedures Typical Toyota process: Activate each sensor and record IDs Replace defective sensors Connect scan tool to OBD Register new sensor IDs Confirm relearn completion Toyota systems are strict about ID matching. Can OBD II Scan Tool Cen-Tech Functions Reset TPMS? Another common question. Most basic Cen-Tech OBD-II tools: Read engine codes Clear engine codes They typically do not: Activate TPMS sensors Perform relearn Register new IDs Therefore, in most cases, no — a basic OBD II scan tool cannot properly reset TPMS. You need a scan tool with TPMS capability. Types of TPMS Relearn Procedures Understanding relearn methods is critical. 1. Auto Relearn Drive vehicle for 10–20 minutes at specified speed. ECU automatically detects sensors. Common in domestic vehicles. 2. Stationary Relearn Vehicle enters learn mode. Sensors activated in sequence (usually LF → RF → RR → LR). 3. OBD Relearn Scan tool writes sensor IDs directly into ECU. Common in Toyota and many Asian brands. Programming Aftermarket Universal TPMS Sensors Universal sensors must be programmed before installation. Steps: Use TPMS scan tool to read original sensor ID Clone ID into universal sensor Install new sensor Perform relearn If cloning is not supported, OBD ID registration is required. When You Actually Need a TPMS Scan Tool You need one if: TPMS light flashing Replaced a sensor Installed new wheels Rotated tires and light stays on Vehicle will not auto-relearn Multiple sensors replaced Modern vehicles make this tool almost mandatory for tire service. Common TPMS Problems Identified With a Scan Tool 1. Dead Sensor Battery Sensor does not respond during activation. 2. ID Not Registered Sensor transmits but ECU rejects ID. 3. Weak Signal Intermittent data, often due to aging battery. 4. Wrong Frequency 315 MHz vs 433 MHz mismatch. Scan tool reveals all these instantly. Sensor Frequency Considerations North America commonly uses: 315 MHz European imports often use: 433 MHz Your TPMS scan tool must support correct frequency range. How Long Do TPMS Sensors Last? Most sensors last 7–10 years. The battery is sealed inside and cannot be replaced. Scan tools help identify weak batteries before total failure. TPMS Fault Codes Explained Common TPMS diagnostic trouble codes include: No signal detected Sensor not learned Low battery Communication fault Receiver module failure A proper scan tool for TPMS decodes these clearly. Why TPMS Lights Flash A flashing TPMS light usually indicates: System fault Communication failure Multiple sensor malfunction Solid light usually indicates low tire pressure. Scan tool confirms which issue is present. Why Cheap TPMS Tools Fail Low-cost tools often: Lack full vehicle coverage Cannot perform Toyota OBD relearn Do not support cloning Have limited update capability Professional tools cost more because of software support and vehicle database access. TPMS Scan Tool Features to Look For When buying a scan tool with TPMS, ensure it includes: Wide vehicle coverage Toyota compatibility OBD relearn support Sensor cloning Battery voltage detection Live pressure and temperature data Regular software updates Avoid tools that only clear TPMS codes. Real-World Diagnostic Scenarios Scenario 1: TPMS Light After Tire Rotation Cause: Position mismatch. Fix: Perform stationary relearn with scan tool. Scenario 2: One Tire Shows 0 PSI Cause: Dead sensor battery. Fix: Replace sensor and register new ID. Scenario 3: TPMS Light Returns After Clearing Cause: Sensor ID not properly registered. Fix: Perform OBD relearn. Can You Drive With TPMS Light On? Yes, but it is not recommended. Risks include: Underinflated tire Reduced traction Increased tire wear Blowout risk Diagnose properly with scan tool. TPMS Scan Tool vs Dealer Software Dealer-level tools: Provide full factory access Cost significantly more Aftermarket professional TPMS tools: Provide 90% of capability More affordable Cover multiple brands Independent shops rely heavily on these. Final Thoughts: Is a TPMS Scan Tool Worth It? If you: Replace your own TPMS sensors Own multiple vehicles Operate a tire shop Work on Toyota vehicles Install aftermarket wheels Then yes. A tpms scan tool is no longer optional in modern automotive diagnostics. Without it, you cannot: Properly program sensors Diagnose TPMS faults accurately Complete relearn procedures Reset warning lights correctly As vehicles become more electronically integrated, TPMS servicing becomes more technical. A true scan tool with TPMS capability gives you complete control over tire pressure monitoring diagnostics.

Coolant Pressure Tester

Coolant Pressure Tester: Diagnosing Cooling System Leaks the Right Way

What Is a Coolant Pressure Tester? A coolant pressure tester is a hand-operated diagnostic tool that pressurizes your vehicle’s cooling system when the engine is off. By simulating operating pressure, it helps identify leaks in: Radiators Heater cores Hoses Water pumps Thermostat housings Intake manifolds Head gaskets A coolant system pressure tester kit typically includes: A hand pump with pressure gauge Multiple radiator cap adapters Expansion tank adapters Optional cap testing attachment Instead of waiting for the engine to overheat under load, a pressure tester lets you perform a coolant system pressure test in a controlled environment. Why a Coolant System Pressure Test Is Critical Your cooling system operates under pressure. Most modern vehicles run between 13 and 16 PSI, while some run higher. Pressure raises the boiling point of coolant, allowing the engine to operate safely at higher temperatures. When pressure drops due to a leak: Coolant boils sooner Engine temperature rises Air enters the system Internal damage risk increases A pressure tester for coolant system diagnostics allows you to: Detect external leaks Identify slow seepage Confirm internal head gasket issues Verify repairs Without proper testing, you are guessing. How a Coolant Pressure Tester Works A coolant system is sealed. When you connect a coolant system pressure tester, you: Attach the correct adapter Pump the system to rated pressure Monitor pressure stability If pressure drops, there is a leak. The Physics Behind It Cooling systems rely on: Thermal expansion Controlled pressure Sealed circulation When coolant heats up, it expands. The radiator cap regulates excess pressure. If the system cannot maintain pressure, coolant escapes or vaporizes. A proper coolant system pressure test replicates real-world operating conditions without running the engine. Coolant Pressure Tester Kit Components Explained A professional-grade coolant pressure tester kit includes: 1. Hand Pump Creates pressure manually. Should include a clear, easy-to-read PSI gauge. 2. Adapter Set Vehicles use different radiator necks and expansion tank designs. A complete kit includes: Japanese adapters European adapters Domestic adapters Quick-connect reservoir fittings 3. Radiator Cap Tester Allows testing the cap’s pressure relief function separately. 4. Extension Hoses For hard-to-reach locations. Cheap kits often fail due to inaccurate gauges or poor sealing. Accuracy matters. How to Use a Coolant Pressure Tester (Step-by-Step) Let’s answer the most searched question directly: How to use a coolant pressure tester properly Follow this exact process. Step 1: Engine Must Be Cold Never perform a coolant system pressure test on a hot engine. Hot coolant can cause severe burns. Wait at least 2–3 hours after driving. Step 2: Remove Radiator Cap or Reservoir Cap Depending on your vehicle design: Traditional system: remove radiator cap Modern system: remove expansion tank cap Inspect cap condition. Step 3: Select the Correct Adapter From your coolant pressure tester kit, choose the adapter that fits tightly. Improper adapter selection is a common DIY mistake. Step 4: Attach the Tester Secure the adapter and connect the pump assembly. Ensure: Tight seal No air gaps No cross-threading Step 5: Pump to Rated Pressure Check your radiator cap rating. Usually: 13 PSI 15 PSI 16 PSI Do not exceed the cap rating. Pump slowly until reaching the recommended PSI. Step 6: Monitor Pressure Let the system sit for 10–20 minutes. Healthy system: Pressure holds steady Leak present: Pressure drops If pressure drops: Inspect hoses Check radiator seams Inspect water pump Look under vehicle Step 7: Inspect for External Leaks Use a flashlight and inspect: Hose clamps Heater core lines Radiator tanks Drain plugs Thermostat housing If visible coolant appears, you found the leak. Step 8: If No External Leak Is Visible Possible internal leak: Head gasket Intake gasket Cracked head Cracked block Remove spark plugs and inspect for coolant contamination. How to Do a Coolant Pressure Test on a Sealed System Some vehicles lack a radiator cap. You must: Use reservoir adapter Pump through expansion tank Follow identical pressure monitoring steps Modern European vehicles almost always require expansion tank testing. How to Pressure Test a Coolant System After Repairs After replacing: Radiator Water pump Thermostat Hoses Always perform a coolant system pressure test before starting the engine. This confirms: Proper clamp seating No loose fittings No hidden cracks Professional shops never skip this step. How to Find a Coolant Leak Without a Pressure Tester Now let’s address another major search query: How to find a coolant leak without a pressure tester It is possible, but less precise. Method 1: Visual Inspection Look for: Crusty residue White/green deposits Damp hose ends Steam under hood Method 2: Cardboard Test Place cardboard under vehicle overnight. Identify drip location. Method 3: UV Dye Test Add UV coolant dye and use UV flashlight. Method 4: Combustion Leak Test Use block tester fluid to detect head gasket failure. Method 5: Engine Oil Inspection Milky oil = possible internal coolant leak. However, none of these methods match the accuracy of a pressure tester for coolant system diagnostics. Common Cooling System Failures Found During Pressure Testing 1. Radiator End Tank Cracks Plastic tanks crack under stress. 2. Hose Micro-Splits Under pressure, tiny splits leak. 3. Water Pump Weep Hole Failure Coolant appears under pulley area. 4. Heater Core Leaks Wet carpet on passenger side. 5. Head Gasket Failure Pressure drops with no external leak. Signs You Need a Coolant System Pressure Test Engine overheating Low coolant warning Sweet smell White exhaust smoke Bubbles in reservoir Frequent top-offs If you see these signs, test immediately. Testing the Radiator Cap Many cooling problems are caused by a failed cap. Using your coolant pressure tester kit, attach the cap tester. Pump and observe release pressure. If it opens below rated PSI, replace it. Advanced Diagnostic Techniques 1. Overnight Pressure Test Pressurize system and leave overnight. Morning drop = slow leak. 2. Cylinder Inspection Remove spark plugs after pressurizing. Coolant in cylinder confirms internal leak. 3. Cooling System Combustion Gas Test Use block tester alongside pressure test. Choosing the Best Coolant Pressure Tester Kit When selecting a kit, look for: Accurate gauge Metal pump assembly Wide adapter coverage Pressure release valve Cap testing function Avoid ultra-cheap kits with plastic fittings. Professional brands last years. Professional vs DIY Coolant System Pressure Test DIY Advantages: Saves money Immediate diagnosis Professional Advantages: Experience Combustion gas tools Smoke testing Cooling system vacuum refill If overheating is severe, professional diagnosis is recommended. Safety Precautions Never test hot engine Never exceed rated PSI Wear gloves Wear eye protection Release pressure slowly Cooling systems can cause serious injury if mishandled. How Long Should a Coolant Pressure Test Hold? Healthy system: No pressure drop for 20 minutes Acceptable: Minor 1 PSI drop over 15 minutes Unacceptable: Rapid drop within minutes How Much Does a Coolant Pressure Tester Cost? Basic kit: $40–$80 Professional kit: $120–$300 Considering potential engine damage, it is a worthwhile investment. Common Mistakes During Coolant System Pressure Testing Testing hot engine Over-pressurizing system Using wrong adapter Ignoring radiator cap Not checking heater core Precision matters. Can a Coolant Pressure Test Detect a Head Gasket Leak? Yes. If: Pressure drops No external leak Spark plug contamination present White smoke observed Then internal failure likely. However, always confirm with combustion gas tester. How Often Should You Pressure Test a Cooling System? During overheating diagnosis After major cooling repair When buying used vehicle If coolant loss occurs Not required for routine maintenance unless symptoms appear. Coolant Pressure Tester vs Cooling System Vacuum Tester Pressure tester: Detects leaks Vacuum tester: Refills system without air pockets Professionals use both. Final Thoughts: Why Every DIY Mechanic Needs One A coolant pressure tester is not optional for serious automotive diagnostics. It is foundational. Whether you are: Learning how to pressure test coolant system components Trying to find a coolant leak without a pressure tester Performing a complete coolant system pressure test Understanding this process prevents engine destruction. Cooling system failure escalates fast. Early detection is everything. If you care about engine longevity, accurate diagnostics, and avoiding catastrophic overheating, a high-quality coolant pressure tester kit belongs in your toolbox.

2022 Dodge Ram 1500 Camper

2022 Dodge Ram 1500 Camper Top Guide — Truck Camping, Storage, and Outdoor Adventures

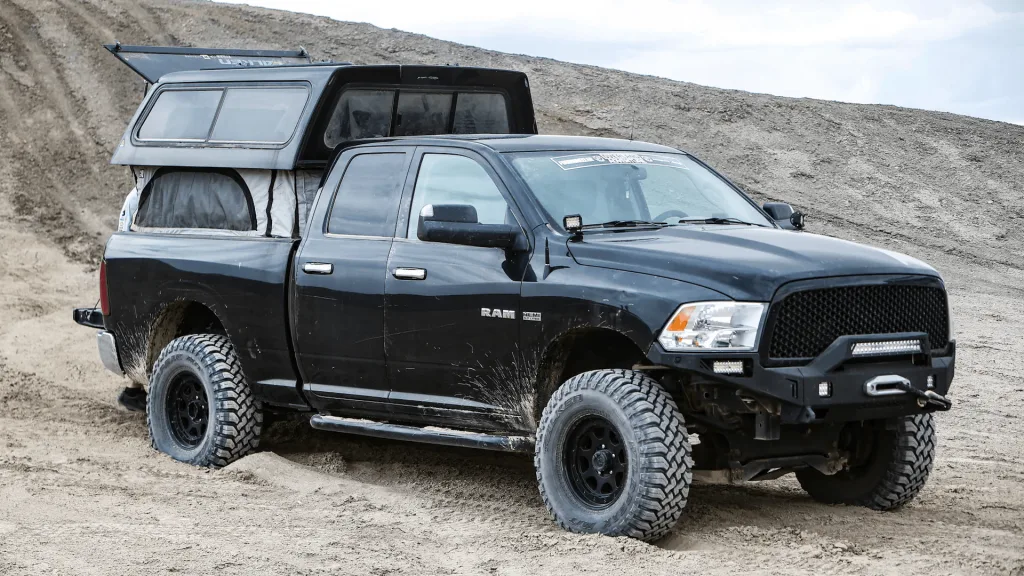
Whether you’re planning weekend getaways, long road trips, or rugged off-grid travel with your 2022 Dodge Ram 1500, adding a camper top or truck shell can completely transform your pickup into a versatile adventure vehicle. From enhanced cargo security and weather protection to converting your truck into a mobile basecamp, the right camper top makes your Ram more useful, comfortable, and capable—without losing payload or usability. In this guide we’ll break down: What a camper top is Benefits of adding one to your Ram 1500 Types of camper tops and shells Materials and design considerations Best options for camping Installation and compatibility tips How a camper top affects performance and payload Practical tips for overlanding and outdoor use Let’s dig in. 🚗 What Is a Camper Top for a Truck? A camper top (also called a camper shell, truck topper, cap, or canopy) is a rigid or semi-rigid cover that attaches to your truck’s bed and encloses it to form a weather-proof storage or camping space over the Ram 1500’s cargo area. It typically matches or extends above the height of the cab and creates a space similar to a small RV pop-up cabin on your truck. Originally developed to enable real camping and truck-based travel, modern camper tops also protect valuables, tools, and gear from weather, theft, and damage. 📈 Why Add a Camper Top to Your 2022 Dodge Ram 1500? Installing a camper top on a 2022 Ram 1500 extends the truck’s versatility far beyond hauling: 🔐 1. Weather Protection & Security A camper shell keeps your gear dry, secure, and out of direct sunlight or rain. Fiberglass or aluminum shells lock up tightly, dramatically lowering theft risk compared with an open bed or soft cover. 🛏️ 2. Truck-Based Camping With a high-profile camper shell or integrated pop-up design, you can set up sleeping space, cooking areas, or storage inside your truck bed—turning your Ram into a small, efficient camper. 🏕️ 3. Overlanding & Outdoor Adventures Couple the camper top with rooftop tents, ladders, and racks, and suddenly your Ram becomes a full expedition vehicle capable of carrying gear, fuel, recovery tools, and bedding without sacrificing interior cabin space. 📦 4. Cargo Organization & Weatherproof Storage Campers and shells help organize smaller gear, tools, and supplies, keeping everything organized and protected. Lockable doors, compartments, and integrated lighting can further enhance usability. 📊 Types of Camper Tops You Can Install There are multiple styles of camper tops available for the 2022 Ram 1500, each with pros and cons depending on use cases: 🛻 1. Hard Shell Camper Tops Hard shells are rigid fiberglass or aluminum camper shells that fit the truck bed and create a secure, enclosed space. Advantages: Maximum security (lockable, tough materials) Weather-tight protection Can support roof racks, gear, or rooftop tents Designed for long-term camping setups Considerations: Adds weight above the bed Costs more than soft covers Professional installation may be required These tops are popular for serious camping, overlanding, or when you want a fixed enclosed space for cargo and equipment. 🧰 2. Soft Tops & Camp Shells Soft tops are fabric-based, often with roll-up or convertible side panels. Advantages: Lightweight Easy to install / remove Lower cost than hard caps Great for occasional camping or hauling gear Drawbacks: Less security than hard shells Limited insulation and weather protection compared with rigid tops Soft tops offer flexibility and are excellent for owners who want occasional camping capability but still need full bed access. 🏕️ 3. Pop-Up Campers & Slide-In Units For more dedicated campers, pop-up or slide-in units provide full camping amenities inside the truck bed. Key options include: Pop-Up Truck Toppers (minimalist camping spaces hugging bed rails) Slide-In Camper Units (complete cabins that lift inside bed frame) Pop-up units like the Project M Topper bolt to your truck and provide living space without consuming full bed depth, while larger slide-in units give full cabin camping features like beds, storage, and even small kitchens. 🛠 Materials & Build Choices Your camper top’s material impacts cost, weight, durability, and overall functionality: Material Pros Cons Fiberglass Very durable, paintable to match truck color, great insulation Heavier, higher cost Aluminum Light, strong, rust-resistant Less insulation, fewer custom finishes Steel Extremely strong Heavy and prone to corrosion Canvas/Fabric Lightweight, affordable Limited security, wear over time Most dedicated camper tops for serious outdoor use are fiberglass or aluminum. Soft covers use canvas or reinforced vinyl and focus on flexibility and ease of use rather than permanence. 🧭 Finding the Right Fit for Your 2022 Ram 1500 🔎 1. Bed Size & RamBox Compatibility Before picking a topper, measure your truck’s bed length (common options are 5’7″, 6’4″, or 8’ beds) and know whether you have a RamBox bed storage system—some shells won’t fit RamBox models without modification. 🏋️ 2. Payload Capacity A camper top adds weight. Fiberglass or hard shells typically weigh several hundred pounds, so ensure your Ram’s payload capacity (which varies by engine and trim) can accept that extra load plus gear and passengers. Too much weight can negatively affect suspension, handling, and fuel economy. 🌦 3. Weather & Climate If you camp in harsh conditions (rain, snow, high winds), prioritize a hard shell with strong seals and weatherstrip. Pop-up or soft tops may struggle in extreme conditions but deliver flexibility in mild climates. 🧭 4. Security Needs If you carry expensive gear or tools, a lockable hard top with integrated locks and secure windows is preferable over soft covers. 🛠 Installation & Maintenance Tips Professional Install vs DIY: Many hard shells require professional mounting to ensure a proper seal and avoid leaks; soft tops often clamp on and can be installed at home. Check Seal Integrity: Weather seals wear over time—inspect them yearly and replace worn seal elements. Inspect Hardware & Locks: Keep latches, hinges, and locks lubricated to prevent corrosion and ensure smooth operation. Weight Management: If your top is heavy, consider bed reinforcements or weight distribution setup if you plan long trips. Accessory Integration: Look for options with integrated rails for roof racks, awnings, or other accessories. 🏕️ Best Camper Top Options for the 2022 Ram 1500 Here’s a breakdown of top styles you might consider if you want to turn your Ram into a true adventure rig: 🔐 1. Expedition-Style Hard Shells Heavy-duty, lockable, and overland-ready shells like the OVS Expedition Cap offer a secure base for camping and gear storage. These are designed around securing the cargo area, resisting water, and supporting rooftop gear. Ideal for: Frequent adventurers, hunters, gear-heavy builds, long trips. 🛻 2. Aluminum Budget Camper Shells A.R.E. truck caps and similar aluminum tops balance strength, low weight, and corrosion resistance. They’re common choices for work and recreation, and they can be painted to match your Ram’s color. Ideal for: Owners who want security and weather protection without spending on fiberglass. 🏕️ 3. Slide-In Pop-Up Campers Slide-in pop-up campers give you sleeping space and basic amenities within your Ram’s bed frame. They range from lightweight to more complete units with beds, water storage, and kitchens. Ideal for: Dedicated campers and weekend warriors who want a compact cabin. 🧰 4. Soft Top Camper Covers Soft tops like the Softopper® allow quick conversion between open bed and covered camper space. They’re UV-resistant and easy to fold up or remove. Ideal for: Occasional campers, seasonal use, and flexible cargo needs. 📊 How a Camper Top Affects Your Truck Adding a camper top alters how your Ram performs and feels: ⚖️ Weight & Payload Hard shells can weigh several hundred pounds. Combine this with gear and passengers, and you begin to eat into your truck’s payload capacity. Always verify that your chosen top plus gear doesn’t exceed your payload rating. Exceeding payload leads to suspension sag, reduced braking performance, and uneven tire wear. 🛞 Lower Center of Gravity Pop-up and slide-in units may raise weight higher above the bed, which can affect handling slightly—especially on curves and off-road trails. 🛣 Fuel Efficiency Aerodynamics change with a camper shell. Well-designed lids can actually improve airflow and fuel economy compared with heavy cargo loads, but tall shells may modestly increase drag at highway speeds. 📦 Usability A camper top drastically increases the usefulness of your bed space for protecting gear, organizing camping setups, and safely storing equipment out of sight. 📌 Practical Uses for Your 2022 Ram 1500 Camper Top Here’s how owners commonly use a camper top: 🏕️ 1. Truck Camping With a hard or pop-up shell, add bedding, cooking tools, and gear for lightweight RVing without a trailer. 🚵 2. Overland Builds Integrate roof racks, recovery gear, tents, lighting, and water storage for extended overland journeys. 🧰 3. Work & Utility Secure tools and equipment for contractors or field technicians—no need to leave valuable items exposed. 🌦 4. Hunting & Fishing Trips Camper tops provide secure storage for gear, and with padded insulation, they reduce noise and exposure. 🧠 Choosing the Right Camper Top When selecting a camper top for your 2022 Dodge Ram 1500, ask yourself: What is my primary use? Weekend camping, work, overlanding, travel? How often will I install/remove it? Do I need security features? What is my budget? Does my truck’s payload accommodate the added weight? Once you understand your goals, the right shell or topper becomes much easier to choose. 🚐 Ready to Outfit Your Ram for Adventure? If you’re thinking about adding a camper top to your 2022 Dodge Ram 1500 but aren’t sure where to start, Simi Valley Chrysler Dodge Jeep Ram can help connect you with parts, accessories, and expert advice on fitting truck camper tops or related gear. Visit Simi Valley CDJR Parts & Accessories to explore options and speak with specialists. ⚠️ Final Tips & Takeaways Always match the camper top to your bed size and payload capacity. Hard shells offer the best security and weather protection. Pop-ups and slide-ins bring real camping comfort. Soft tops are great for versatile, lightweight use. Regular maintenance of seals, locks, and fasteners increases longevity. With the right camper top, your Ram 1500 becomes more than a truck—it becomes a mobile adventure base.

The Ram 1500 Family – Trims

The Ram 1500 Family - Trims Reviewed

When you’re in the market for a full-size pickup that flexes capability, comfort, capability, and technology, the 2026 Ram 1500 remains at the forefront of the segment. With ten distinct trims, each tailored for different lifestyles — from rugged workhorse to premium luxury cruiser — there’s a configuration for every driver and every job. This guide breaks down every 1500 trim level in plain language, with detailed feature highlights and direct links to relevant Simi Valley Chrysler Dodge Jeep Ram content so you can explore deeper. 🚙 Overview: What Makes the 2026 Ram 1500 Stand Out The 2026 model year continues Ram’s reputation for combining robust capability, refined interiors, modern tech, and serious towing power. With standard and available engines like the 3.6-liter Pentastar V6, the powerful 5.7-liter HEMI® V8 with eTorque, and twin-turbo inline-six options, Ram adapts performance to match your needs. Across every trim level, buyers can choose from multiple cab styles, bed lengths, and 4×2/4×4 drivetrains, plus advanced driver aids and connected features powered by the latest Uconnect® infotainment system. Before we dive into each trim, see a full introduction to the 1500’s design and tech, including interior upgrades and exterior features, in our Ram 1500 overview at 2026 Ram 1500 Design, Features, and Colors | Simi Valley CDJR Blog. 🧰 1. Tradesman – The Baseline Workhorse The Tradesman is the backbone of the Ram 1500 lineup — the no-nonsense work truck that’s rugged, dependable, and built for productivity. 📌 What Comes Standard 3.6 L Pentastar® V6 engine with eTorque standard (gas-electric hybrid assist) Basic interior focused on durability Heavy-duty suspension and utility-ready design Standard towing gear and trailer sway control Tradesman trims are ideal for contractors, fleet buyers, and anyone who needs a truck where performance is front and center and luxury is optional. 👉 For a deeper look at Tradesman and what makes it such a dependable choice, visit New Ram 1500 Inventory at Simi Valley CDJR to see current models in stock. 🆕 2. Express – A Slight Step Up With Practical Upgrades The Express trim sits above Tradesman and is perfect for buyers who want a bit more style and convenience without jumping to a higher price bracket. 💡 Notable Features Larger wheels and body-color exterior elements LED fog lamps Interior upgrades like rear in-floor storage and satellite radio capability The Express trim keeps the hard-working spirit of the Tradesman but smooths out some of the edges with useful comfort and tech features. 👉 Check current availability and options for Express models at Simi Valley CDJR New Ram 1500 Vehicles. 👔 3. Big Horn – Comfort Meets Value The Big Horn trim is often one of the most popular choices because it blends comfort, capability, and value. 🚘 Key Upgrades Over Base Trims Larger infotainment display (typically 12-inch Uconnect®) Stylish exterior accents and upgraded wheels Cloth or optional premium seating Additional convenience features (e.g., voice-activated controls) Big Horn represents a “sweet spot” for many buyers — it brings enough tech and comfort to handle daily driving while still offering plenty of towing and hauling capability. 👉 Find examples of Big Horn models and pricing at Simi Valley CDJR New Inventory. 🔥 4. Warlock – Bold Styling With an Edge The Warlock trim gives the Ram 1500 a strong visual identity with blacked-out graphics and unique styling cues. 🖤 What Makes Warlock Different Gloss black exterior trim Aggressive wheels and accents Optional off-road hardware Enhanced interior style elements Warlock is perfect for buyers who want their truck to stand out visually without necessarily paying for a full off-road upgrade package. 👉 Curious how Warlock compares to other trims? Explore options at Simi Valley CDJR New Ram 1500 for Sale. 🏜️ 5. Rebel – Built For Off-Road Action The Rebel is where capability meets adventure. If your Ram spends as much time off the pavement as on it, Rebel has the hardware to match. 🔋 Off-Road Features Standard 4×4 drivetrain Underbody skid plates All-terrain tires Specialized suspension and off-road tuning Rebel adds serious ruggedness to the Ram 1500 without sacrificing everyday usability — a balance that makes it a favorite for trail riders and weekend warriors. 👉 See current Rebel inventory at Simi Valley CDJR New Ram 1500 Trucks. ⚔️ 6. RHO – High-Performance Off-Road Alternative Ram introduced RHO as a performance-oriented off-road trim, effectively filling the gap left by the discontinued TRX. 🚀 RHO Highlights Powerful 3.0 L twin-turbo inline-six (up to ~540 hp) Adaptive suspension and Bilstein Black Hawk dampers Enhanced ground clearance and off-road tuning Digital displays and premium interior options RHO positions itself as a competitor to other performance pickups, delivering serious trail capability while offering more comfort and modern tech than traditional off-road trims. 👉 Get details on RHO features and walk-throughs at Simi Valley CDJR Blog (search for RHO in the blog index). 🪶 7. Laramie – Elevated Comfort & Daily Drive Luxury If you want your Ram to be as comfortable on the highway as it is capable on the job, the Laramie trim brings in a suite of premium comforts and tech. ✨ Premium Features Leather seating surfaces Larger Uconnect® screens with navigation Advanced driver assistance (available) Heated/ventilated seating options Laramie trims elevate the interior experience without jumping all the way to flagship luxury pricing. 👉 See Laramie versions currently in stock at Simi Valley CDJR New Ram Vehicles. 💼 8. Limited – Luxury & Technology Unleashed The Limited trim is where luxury meets power, ideal for buyers who want premium amenities and technology with full truck capability. 🛋️ What You Get Premium leather with advanced adjustability Top-tier Uconnect® system with large displays Class-leading audio systems Most driver assistance features standard or available Limited models make the truck feel more like a luxury SUV than a work pickup, without compromising towing, hauling, or utility. 👉 Explore Limited Ram 1500 models at Simi Valley CDJR New Inventory. 🐎 9. Limited Longhorn – Western Luxury Refined Blending upscale comfort with rustic premium design, the Limited Longhorn takes the luxury of Limited and adds Western-inspired detailing. 🎨 Signature Elements Exclusive leather with filigree details Warm wood accents Rich interior color palettes Limited Longhorn is perfect for buyers who want a luxurious interior with unique style not found on other trims. 👉 Find Limited Longhorn models at Simi Valley CDJR New Ram 1500. 💎 10. Tungsten – Pinnacle of Premium Ram Trucks At the very top of the Ram 1500 lineup sits Tungsten, the most luxury-focused and feature-rich trim available. 🏆 Elite Features Best-in-class comfort seating (massaging, power adjustable) Premium tech and connectivity Audio and convenience at the highest level Most advanced driver assistance available Tungsten is ideal for drivers who demand maximum refinement, high-end amenities, and standout style without sacrificing capability. 👉 Browse Tungsten trims at Simi Valley CDJR New Inventory. 🔧 Engines & Performance Across Trims Across the 2026 lineup, Ram provides a range of engines to suit different priorities, including: 3.6-liter Pentastar V6 with eTorque – excellent all-around performance and fuel efficiency 5.7-liter HEMI® V8 with eTorque – classic Ram power with strong torque and towing performance 3.0-liter Hurricane inline-six – turbocharged performance and refined power delivery High-output twin-turbo inline-six (in RHO) – performance-oriented tuning for spirited driving and off-road prowess These engines are paired with an 8-speed automatic transmission and are designed to balance towing capacity, efficiency, and everyday driveability. 🧠 How to Choose the Right Ram 1500 Trim With ten trims and multiple engine choices, deciding can be overwhelming. Here’s a simple framework: Work-oriented & budget-friendly: Tradesman or Express Best everyday balance: Big Horn or Warlock Off-road adventure: Rebel or RHO Premium comfort & tech: Laramie or Limited Top-tier luxury: Limited Longhorn or Tungsten Each trim can be further customized with packages and options, making the Ram 1500 one of the most flexible truck lineups on the market. 🛠️ Explore More With Simi Valley CDJR Whether you’re comparing trims, planning your next test drive, or ready to lock in pricing, Simi Valley Chrysler Dodge Jeep Ram has the most up-to-date inventory and expert support to help you find your ideal 2026 Ram 1500. 👉 Start your search here: View New 2026 Ram 1500 Inventory | Simi Valley CDJR 👉 Learn more about trim comparisons and details in our blog archive: Simi Valley CDJR Ram 1500 Blog 📌 Final Thoughts From base Tradesman grit to Tungsten-level luxury, the 2026 Ram 1500 lineup delivers remarkable versatility. Each trim level brings unique strengths to the table, ensuring that whether you’re hauling heavy loads, navigating off-road terrain, or simply cruising in comfort, there’s a Ram built for your journey. Remember: the right truck is more than just its badge — it’s how well it fits your lifestyle, job demands, and personal preferences. Want help narrowing it down? Reach out to Simi Valley Chrysler Dodge Jeep Ram today, and let a product expert guide you to the perfect Ram 1500 for your next adventure.

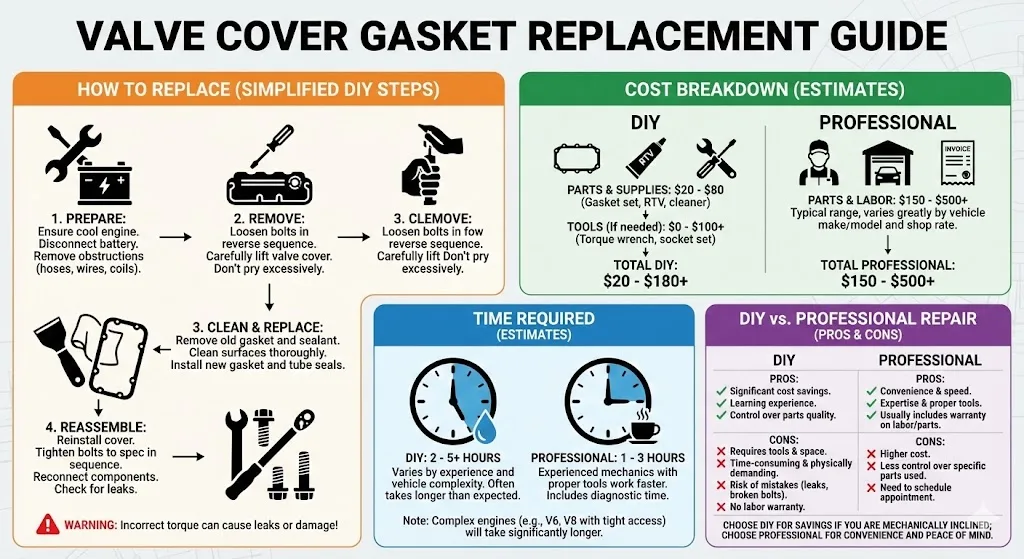
Valve Cover Gasket Replacement Explained

Valve Cover Gasket Replacement Explained

How to Replace a Valve Cover Gasket, Cost Breakdown, Time Required, and DIY vs Professional Repair A leaking valve cover gasket is one of the most common engine oil leaks drivers encounter. While it may start as a minor seep, ignoring it can lead to oil loss, engine misfires, burning oil smells, and even damage to surrounding components. Many drivers ask how to replace a valve cover gasket, how much does it cost to replace a valve cover gasket, and whether you can replace a valve cover gasket yourself. This in-depth guide explains what a valve cover gasket does, when to replace it, how hard a valve cover gasket replacement really is, how long it takes, and whether DIY replacement is a good idea. All guidance aligns with service standards used at Simi Valley Chrysler Dodge Jeep Ram. For professional diagnosis and engine oil leak repair, visit: https://www.simivalleychryslerdodgejeepram.com/service.aspx What Is a Valve Cover Gasket? The valve cover gasket is a rubber, silicone, or composite seal that sits between the valve cover and the cylinder head. Its job is to keep engine oil contained while allowing access to internal valve train components. Over time, exposure to heat cycles causes the gasket to: Harden Shrink Crack Lose elasticity Once this happens, oil begins to seep or leak from the top of the engine. When to Replace a Valve Cover Gasket Drivers often ask when to replace valve cover gasket or do you need to replace valve cover gasket. Common signs include: Oil leaking onto the engine block Burning oil smell Oil pooling around spark plugs Engine misfires Low oil levels without visible drips Even small leaks should not be ignored, as oil can damage ignition components and rubber hoses. Simi CDJR technicians routinely identify valve cover gasket leaks during routine inspections. https://www.simivalleychryslerdodgejeepram.com/service.aspx What Happens If You Don’t Replace a Valve Cover Gasket? Failing to replace a leaking gasket can lead to: Oil-soaked ignition coils Spark plug fouling Engine bay contamination Increased fire risk Premature engine wear What starts as a minor repair can escalate into a more expensive service if left unresolved. How Hard Is a Valve Cover Gasket Replacement? One of the most common questions is how hard is it to replace a valve cover gasket. The difficulty varies based on: Engine layout (inline vs V-engine) Accessibility Number of components blocking the valve cover Vehicle age General difficulty: Inline 4-cylinder engines: moderate V6 engines: moderate to difficult V8 engines: moderate to complex Some vehicles require removal of intake components, wiring harnesses, or ignition coils. Can You Replace a Valve Cover Gasket Yourself? Many people ask: Can you replace a valve cover gasket yourself? Can I replace a valve cover gasket myself? The answer: Yes, but with conditions. DIY replacement is possible if: You have mechanical experience You have the correct tools You can follow torque specifications You understand gasket seating procedures DIY risks include: Over-torquing bolts Pinching the gasket Improper sealing Creating new leaks Professional installation reduces these risks significantly. How to Replace a Valve Cover Gasket (General Overview) Searches like how to replace valve cover gasket or how to replace the valve cover gasket are extremely common. Below is a high-level overview. Step 1: Disconnect Battery Prevent accidental electrical damage. Step 2: Remove Obstructions Remove ignition coils, hoses, and wiring as required. Step 3: Remove Valve Cover Unbolt evenly and carefully lift the cover. Step 4: Clean Surfaces Old gasket material and oil residue must be removed completely. Step 5: Install New Gasket Seat the gasket properly into the valve cover groove. Step 6: Reinstall Valve Cover Torque bolts in sequence using manufacturer specifications. Step 7: Reassemble Components Reconnect all removed components and battery. Improper torque is one of the most common causes of repeat leaks. How Long Does It Take to Replace a Valve Cover Gasket? Drivers frequently ask: How long does it take to replace valve cover gasket? How many hours to replace valve cover gasket? Typical time estimates: Inline engines: 1 to 2 hours V6 engines: 2 to 4 hours V8 engines: 3 to 6 hours Time varies based on accessibility and engine design. At Simi CDJR, labor time is based on manufacturer flat-rate guidelines. https://www.simivalleychryslerdodgejeepram.com/service.aspx How Much Does It Cost to Replace a Valve Cover Gasket? Cost is one of the most searched topics: How much to replace valve cover gasket How much does valve cover gasket replacement cost How much is labor for valve cover gasket replacement Typical cost factors: Engine type Labor hours Gasket material Number of valve covers General cost range: Parts: relatively affordable Labor: primary cost driver Complex engines or multiple valve covers increase labor time and cost. Professional service includes proper sealing, torque procedures, and leak verification. How Much Should a Valve Cover Gasket Replacement Cost? When drivers ask how much should a valve cover gasket replacement cost, they are often comparing quotes. A proper replacement includes: New gasket Surface cleaning Correct torque sequence Leak inspection Lower prices may indicate shortcuts, such as reusing old seals or skipping surface prep. Where to Get Valve Cover Gasket Replaced Another common query is where to get valve cover gasket replaced. Dealership service offers: Manufacturer-trained technicians Factory torque specs OEM or approved gaskets Warranty-backed labor Simi Valley Chrysler Dodge Jeep Ram performs valve cover gasket replacements following manufacturer standards. https://www.simivalleychryslerdodgejeepram.com/service.aspx Is Valve Cover Gasket Replacement Easy? Drivers often ask: Is valve cover gasket easy to replace? Are valve cover gaskets easy to replace? For experienced technicians, yes. For DIY beginners, it can be challenging due to: Tight spaces Torque sensitivity Risk of leaks What seems simple can quickly become frustrating without proper tools. Valve Cover Gasket Replacement vs Ignoring the Leak Replacing the gasket: Prevents oil loss Protects engine components Restores cleanliness Prevents misfires Ignoring the leak: Causes oil contamination Leads to secondary repairs Increases total repair cost Preventative repair is always cheaper than reactive repair. Why Professional Valve Cover Gasket Replacement Makes Sense At Simi Valley Chrysler Dodge Jeep Ram, valve cover gasket service includes: Leak confirmation Proper gasket selection Torque-controlled installation Post-repair inspection Oil contamination cleanup This ensures the repair is done correctly the first time. https://www.simivalleychryslerdodgejeepram.com/service.aspx Final Thoughts A leaking valve cover gasket may seem minor, but it should never be ignored. Understanding how to replace a valve cover gasket, how long it takes, and how much it costs helps you make an informed decision about DIY versus professional service. If you notice oil leaks, burning smells, or engine misfires, schedule an inspection at Simi Valley Chrysler Dodge Jeep Ram Service Center to prevent further damage and restore engine reliability. https://www.simivalleychryslerdodgejeepram.com/service.aspx

Radiator Flush Explained

Radiator Flush Explained - Mechanic Advice

What a Radiator Flush Does, How to Flush a Radiator, and How Much It Costs A radiator flush is one of the most misunderstood cooling system services. Many drivers know coolant is important, but few understand what a radiator flush actually does, how often to flush radiator fluid, or how much a radiator flush should cost. Ignoring cooling system maintenance can lead to overheating, corrosion, heater failure, and in severe cases, engine damage. This in-depth guide explains what a radiator flush is, how to flush a car radiator, whether a do-it-yourself radiator flush is safe, and when professional service is the smarter choice. The guidance aligns with best practices referenced throughout Simi Valley Chrysler Dodge Jeep Ram service resources. For cooling system inspections and professional radiator flush service, visit Simi Valley Chrysler Dodge Jeep Ram Service Center. https://www.simivalleychryslerdodgejeepram.com/service.aspx What Is a Radiator Flush? A radiator flush is a maintenance service that removes old coolant, rust, scale, and contaminants from the radiator and entire cooling system. Over time, coolant degrades and loses its ability to protect internal components from corrosion and overheating. A proper radiator flush: Drains old coolant Circulates cleaning solution or fresh coolant Removes debris and buildup Refills the system with manufacturer-approved coolant This process restores the cooling system’s ability to regulate engine temperature effectively. What Does a Radiator Flush Do? Many drivers ask what does a radiator flush do or what does flushing the radiator do. A radiator flush: Removes rust and scale from internal passages Prevents overheating Protects the water pump and thermostat Improves heater performance Extends engine life Coolant doesn’t just cool the engine. It also lubricates seals and prevents corrosion. When coolant breaks down, those protections disappear. Simi CDJR service content frequently emphasizes cooling system health as critical to engine reliability. https://www.simivalleychryslerdodgejeepram.com/blogs/5737 Is a Radiator Flush Necessary? Is a radiator flush necessary? Yes, in most cases. Modern engines operate at higher temperatures and tighter tolerances than older designs. Even “long-life” coolant degrades over time due to heat cycles and contamination. Skipping radiator flushes can lead to: Internal corrosion Heater core clogging Radiator blockage Premature water pump failure A radiator flush is preventative maintenance, not a repair after failure. How Often to Flush Radiator Fluid One of the most common questions is how often to flush radiator fluid or how often should you flush your radiator. General guidelines: Every 30,000 to 60,000 miles, depending on vehicle and coolant type Every 3 to 5 years Sooner if coolant appears dirty or discolored Always follow manufacturer recommendations, as some Chrysler, Dodge, Jeep, and Ram vehicles use specific extended-life coolants. Simi CDJR technicians verify coolant type and service intervals during inspections. https://www.simivalleychryslerdodgejeepram.com/service.aspx How Long Does a Radiator Flush Take? Drivers often ask how long does a radiator flush take or how long does it take to flush a radiator. Typical service time: 45 minutes to 1.5 hours Time varies based on: Vehicle design Cooling system capacity Level of contamination DIY flushes often take longer due to setup and cleanup. How to Flush a Radiator (DIY Overview) Many people search how to flush a radiator, how to flush a car radiator, or how to flush radiator coolant. Below is a general overview of a do it yourself radiator flush. This is for educational purposes only. Step 1: Allow Engine to Cool Never attempt a radiator flush on a hot engine. Pressurized coolant can cause severe burns. Step 2: Drain Old Coolant Place a drain pan under the radiator Open the drain valve or remove the lower hose Allow coolant to fully drain Coolant is toxic and must be disposed of properly. Step 3: Flush With Water or Cleaner This is where many search how to flush a radiator with a garden hose. Close drain Fill system with water or flush solution Run engine briefly Drain again This helps remove loose debris, but does not always remove internal scale. Step 4: Refill With Correct Coolant Close drain Refill with manufacturer-approved coolant Bleed air from system Improper bleeding can cause air pockets and overheating. Important DIY Risks DIY radiator flush risks include: Trapped air pockets Incorrect coolant mixture Coolant contamination Damaged radiator drain valves Because of these risks, professional service is often safer. How to Flush a Radiator at Home: What Most DIY Guides Miss Searches like how to flush radiator at home or how to flush a radiator at home often omit critical steps: Thermostat operation during flush Heater core circulation Proper coolant ratio Cooling system pressure testing A partial flush may leave contaminants behind. Simi CDJR service includes system-wide circulation and pressure verification. https://www.simivalleychryslerdodgejeepram.com/service.aspx How Much Is a Radiator Flush? Pricing is a major concern. Drivers ask: How much is a radiator flush? How much does a radiator flush cost? How much should a radiator flush cost? Typical radiator flush cost ranges: Entry level: lower for small systems Higher for larger engines, trucks, or specialty coolant Factors affecting cost: Vehicle size Coolant type System capacity Labor time At Simi CDJR, pricing reflects manufacturer-approved coolant, proper disposal, and professional inspection. https://www.simivalleychryslerdodgejeepram.com/service.aspx How Much Does It Cost to Flush a Radiator Fluid? Another variation drivers search is how much to flush radiator fluid. This cost includes: Coolant Labor System flushing process Inspection Cheaper services may only drain and refill, not perform a true flush. What Is in Radiator Flush? Many drivers ask what is in radiator flush products. Radiator flush solutions typically contain: Detergents to loosen scale Corrosion inhibitors Neutralizing agents However, improper use can dislodge debris that clogs narrow passages. Professional flush machines control flow and pressure to avoid damage. What Does Flushing the Radiator Do for Performance? A clean cooling system: Maintains stable engine temperature Prevents overheating under load Improves heater efficiency Reduces stress on engine components Overheating is one of the fastest ways to damage an engine. When NOT to Flush a Radiator A radiator flush should be delayed or avoided if: The system is already leaking Coolant loss is unexplained Engine shows overheating symptoms In these cases, inspection is required before flushing. Simi CDJR technicians inspect cooling systems before performing any flush service. https://www.simivalleychryslerdodgejeepram.com/service.aspx Radiator Flush vs Coolant Drain and Refill Drain and refill: Removes some coolant Leaves contaminants behind Radiator flush: Circulates cleaning solution Removes internal debris More thorough Flushes are recommended at longer intervals, while drain and refill may be used for interim maintenance. Professional Radiator Flush at Simi CDJR At Simi Valley Chrysler Dodge Jeep Ram, radiator flush service includes: Full system circulation Manufacturer-approved coolant Air bleed procedures Cooling system inspection Leak and pressure checks This ensures long-term cooling system reliability. https://www.simivalleychryslerdodgejeepram.com/service.aspx Final Thoughts A radiator flush is not just about replacing coolant. It protects your engine, heater system, and cooling components from corrosion and overheating. Understanding how to flush a radiator, how often to flush radiator fluid, and how much a radiator flush costs helps you make informed maintenance decisions. If your vehicle is due for cooling system service, schedule a professional radiator flush at Simi Valley Chrysler Dodge Jeep Ram Service Center to ensure the job is done correctly. https://www.simivalleychryslerdodgejeepram.com/service.aspx

Tire Repair Kit Explained

Tire Repair Kit Explained - Mechanic Advice

What a Tire Repair Kit Is, How to Use One, and When It’s Actually Safe A flat tire can happen without warning, and many modern vehicles no longer come with a full-size spare. Instead, manufacturers often include a tire repair kit designed to temporarily restore mobility. While these kits can be useful in emergencies, they are often misunderstood. This in-depth guide explains what a tire repair kit is, how different types work, how to use a tire repair kit properly, and when a tire repair kit should not be relied on as a permanent solution. The guidance aligns with tire and safety recommendations discussed across Simi Valley Chrysler Dodge Jeep Ram service resources. For proper tire inspection and long-term repair, professional service at Simi Valley Chrysler Dodge Jeep Ram Service Center is always recommended. https://www.simivalleychryslerdodgejeepram.com/service.aspx What Is a Tire Repair Kit? A tire repair kit is an emergency solution designed to temporarily seal a puncture and restore air pressure so you can safely drive to a repair facility. Tire repair kits vary by vehicle and purpose, but they generally fall into two categories: Plug-style tire repair kits Sealant-based flat tire repair kits Some kits are designed specifically for tubeless tires, while others are compact sealant systems paired with a small air compressor. Common Types of Tire Repair Kits Flat Tire Repair Kit (Sealant + Compressor) A flat tire repair kit typically includes: Liquid sealant Small electric air compressor Inflation hose and power cable These kits inject sealant into the tire and inflate it simultaneously. They are commonly supplied with newer vehicles in place of a spare tire. Simi CDJR service articles often address the limitations of sealant-based systems and why professional inspection is required afterward. https://www.simivalleychryslerdodgejeepram.com/blogs/5737 Tubeless Tire Repair Kit A tubeless tire repair kit usually contains: T-handle reaming tool Plug insertion tool Rubber plugs Adhesive or rubber cement These kits are used to physically plug a puncture in a tubeless tire’s tread area. Bike Tire Repair Kit / Bicycle Tire Repair Kit A bike tire repair kit or bicycle tire repair kit is specifically designed for: Thinner tire casings Lower air pressures Inner tube or tubeless bicycle systems These kits should never be used on automotive tires, as they are not designed for vehicle weight, speed, or load. How to Use a Tire Repair Kit One of the most common searches is how to use a tire repair kit, and the answer depends on the type of kit you have. How to Use a Sealant-Based Flat Tire Repair Kit This process applies to most factory-supplied flat tire repair kits. Step 1: Park Safely Pull over to a safe, flat location Turn off the engine Engage the parking brake Step 2: Connect the Sealant Attach the sealant hose to the tire valve Plug the compressor into the vehicle’s power outlet Step 3: Inflate the Tire Turn on the compressor Allow sealant and air to enter the tire Inflate to the recommended pressure Step 4: Drive Immediately Drive for 5–10 minutes This spreads the sealant inside the tire After use, the tire must be professionally inspected, even if it appears to hold air. Simi CDJR service technicians routinely clean and inspect tires after sealant use to ensure no internal damage exists. https://www.simivalleychryslerdodgejeepram.com/service.aspx How to Use a Tubeless Tire Repair Kit Drivers also frequently search how to use tubeless tire repair kit. This applies to plug-style kits. Locate the puncture Remove the object Ream the hole Insert the plug Trim excess rubber Inflate tire Check for leaks This method is typically considered a temporary repair, not a permanent fix. Are Tire Repair Kits Permanent? This is one of the most misunderstood aspects of tire repair kits. Most tire repair kits are NOT permanent solutions. Sealant kits: Do not inspect internal tire structure Can mask internal damage Often void tire warranties Plug kits: Do not reinforce internal layers Cannot detect belt separation Professional tire repair standards require: Tire removal Internal inspection Patch or patch-plug repair Simi CDJR recommends professional evaluation after any tire repair kit use. https://www.simivalleychryslerdodgejeepram.com/service.aspx Does Tesla Come With a Tire Repair Kit? Many drivers ask does Tesla come with a tire repair kit, especially Tesla Model 3 owners. Some Tesla vehicles include a sealant-based repair kit, while others do not. Regardless of brand, the limitations of tire repair kits remain the same: Temporary mobility only Speed and distance restrictions Mandatory professional inspection afterward The same principles apply to Chrysler, Dodge, Jeep, and Ram vehicles equipped with repair kits instead of spare tires. How to Use Tesla Tire Repair Kit Model 3 (General Principles) Searches like how to use Tesla tire repair kit Model 3 reflect confusion around electric vehicles and tire repair. While procedures vary slightly by manufacturer, the fundamentals are the same: Sealant + compressor Temporary use only Speed limitations Immediate service required Simi CDJR service guidance applies similar caution to all sealant-based systems. https://www.simivalleychryslerdodgejeepram.com/service.aspx When NOT to Use a Tire Repair Kit Do not use a tire repair kit if: Damage is on the sidewall Tire has a blowout Tire has multiple punctures Wheel is damaged Tire pressure dropped to zero at speed In these cases, towing or tire replacement is the safest option. Tire Repair Kit vs Spare Tire Tire repair kit advantages: Lightweight Saves trunk space Quick roadside use Disadvantages: Temporary repair Limited effectiveness Cannot repair large damage Spare tire advantages: True replacement No sealant residue No speed restrictions Simi CDJR service teams can help drivers evaluate whether a spare tire conversion is appropriate. https://www.simivalleychryslerdodgejeepram.com/service.aspx How Long Can You Drive on a Tire Repaired With a Kit? Most manufacturers recommend: Driving no more than 50–100 miles Staying below highway speeds Visiting a service center immediately Driving longer than recommended increases the risk of tire failure. Are Tire Repair Kits Safe? Tire repair kits are safe only when used correctly and temporarily. They are unsafe when: Used as permanent repairs Used on sidewall damage Ignored without follow-up inspection Safety systems like ABS and traction control depend on tire integrity. Professional Tire Repair at Simi CDJR At Simi Valley Chrysler Dodge Jeep Ram, tire service includes: Internal tire inspection Proper patch installation Sealant cleanup TPMS sensor inspection Tire replacement if necessary This ensures your vehicle remains safe at highway speeds and under load. https://www.simivalleychryslerdodgejeepram.com/service.aspx Final Thoughts A tire repair kit is an emergency mobility solution — not a permanent fix. While it can help you get back on the road temporarily, it does not replace professional tire repair or replacement. If you’ve used a tire repair kit, or your vehicle came equipped with one instead of a spare, schedule a tire inspection at Simi Valley Chrysler Dodge Jeep Ram Service Center to ensure long-term safety and reliability. https://www.simivalleychryslerdodgejeepram.com/service.aspx

Tire Plug Kit Guide

Tire Plug Kit Guide : Mechanic Advice

How to Use a Tire Plug Kit, Are Tire Plug Kits Safe, and When You Shouldn’t Use One A flat tire can happen anywhere — on the freeway, at work, or in your driveway. When it does, many drivers turn to a tire plug kit as a quick roadside solution. But questions remain: How to use a tire plug kit properly? Are tire plug kits safe? Are tire plug kits permanent? How long does a tire plug kit last? What is the best tire plug kit? This complete guide answers those questions and explains when a tire plug repair kit is appropriate — and when professional tire repair is the safer option. For proper tire inspection and repair, Simi Valley Chrysler Dodge Jeep Ram provides professional tire services that ensure safe and long-lasting results. https://www.simivalleychryslerdodgejeepram.com/service.aspx What Is a Tire Plug Kit? A tire plug kit is a compact repair kit designed to temporarily seal punctures in tubeless tires. Most kits include: T-handle reaming tool Insertion tool Sticky rubber plugs Rubber cement (in some kits) Razor blade Common variations include: Slime tire plug kit Slime deluxe tire plug kit CRC tire plug kits Basic tire plug repair kit options These kits are commonly used for small punctures caused by nails or screws in the tread area. How to Use a Tire Plug Kit One of the most searched questions is how to use a tire plug kit, and while the process may seem simple, proper steps matter. Step 1: Locate the Puncture Inspect the tire carefully Identify the object causing the leak Confirm it is in the tread area Do not attempt to plug: Sidewall damage Large tears Blowouts Step 2: Remove the Object Use pliers to pull out the nail or screw Be prepared for air loss Step 3: Use the Reaming Tool Insert the reamer into the hole Move it in and out to clean and widen the puncture This prepares the tire for the plug This step ensures the plug bonds properly. Step 4: Insert the Plug Thread the sticky plug through the insertion tool Apply rubber cement if included Push the plug into the puncture firmly Leave about half an inch exposed Then pull the tool straight out. Step 5: Trim Excess Plug Cut off excess rubber Inflate tire to proper pressure Check for leaks That explains how to plug a tire with a plug kit, but the bigger question is whether it’s a safe long-term fix. Are Tire Plug Kits Permanent? This is one of the most important questions. Are tire plug kits permanent? In most cases, no. A tire plug kit is typically considered a temporary repair. While some plugs may last months or even years, professional tire repair standards recommend: Internal patch + plug combination Tire removal for inspection Damage verification Professional repair ensures no internal sidewall damage occurred. Simi CDJR recommends professional inspection after any puncture to verify structural integrity. https://www.simivalleychryslerdodgejeepram.com/service.aspx Are Tire Plug Kits Safe? Are tire plug kits safe? They can be safe under specific conditions: Safe when: Puncture is less than 1/4 inch Damage is in the tread area No sidewall damage Tire is otherwise in good condition Unsafe when: Damage is near the sidewall Tire has internal separation Multiple punctures exist Tire is worn below safe tread depth A tire plug alone does not allow inspection of internal tire layers. That’s why professional repair is considered safer. How Long Do Tire Plug Kits Last? Another common question: how long does a tire plug kit last? There is no guaranteed lifespan. Some plugs may last the remaining life of the tire, while others may fail sooner depending on: Driving conditions Tire age Installation quality Speed and load stress For daily driving and highway speeds, professional patch repair is strongly recommended after using a plug as a temporary fix. Do Tire Plug Kits Work? Yes — for small tread punctures, a tire plug repair kit can stop air loss effectively. However: It does not restore structural integrity It does not inspect for internal damage It may void tire warranties Professional tire services provide a more complete solution. https://www.simivalleychryslerdodgejeepram.com/service.aspx Best Tire Plug Kit: What to Look For When people search best tire plug kit, they typically compare: Slime tire plug kit Slime deluxe tire plug kit Heavy-duty T-handle kits Compact roadside kits What matters most: Strong insertion tool Quality rubber plugs Durable reaming tool Clear instructions Brand matters less than correct usage and understanding limitations. Where to Buy a Tire Plug Kit Drivers often ask: Where to buy tire plug kit Does dollar general sell tire plug kits While many retail stores sell basic kits, quality and completeness vary. For safety-critical repairs, professional tire inspection is more reliable than retail plug-only solutions. https://www.simivalleychryslerdodgejeepram.com/service.aspx How Much Does a Tire Plug Kit Cost? Another frequent question: How much is a tire plug kit? How much does a tire plug kit cost? Most retail kits range between $10 and $30 depending on brand and included tools. However, cost should not be the only factor when considering tire safety. How to Plug a Tire Without a Kit Some drivers search: How to plug a tire without a kit How to plug a tire without a plug kit This is strongly discouraged. Improvised methods: Do not seal properly Risk sudden failure Compromise safety Always use proper equipment or seek professional repair. How to Use a Slime Tire Plug Kit The process for how to use a Slime tire plug kit or Slime deluxe tire plug kit is similar to other kits: Remove puncturing object Ream the hole Insert plug Trim excess Inflate and test Brand does not change repair limitations. Tire Plug Kit vs Patch Repair Key difference: Plug: Installed externally Quick roadside solution Temporary in most cases Patch: Installed internally Requires tire removal More reliable long-term Professional patch-plug combination repairs are considered industry standard. Simi Valley Chrysler Dodge Jeep Ram offers tire inspections and safe repair procedures to ensure long-term reliability. https://www.simivalleychryslerdodgejeepram.com/service.aspx When NOT to Use a Tire Plug Kit Do not use a tire plug kit if: Damage is on sidewall Puncture is larger than 1/4 inch Tire cords are visible Tire is severely worn Tire has multiple punctures close together These situations require professional evaluation or tire replacement. Why Professional Tire Service Is Safer At Simi Valley Chrysler Dodge Jeep Ram, tire service includes: Full tire removal Internal inspection Proper patch installation TPMS inspection Pressure balancing This ensures the tire remains safe at highway speeds and under load. https://www.simivalleychryslerdodgejeepram.com/service.aspx Final Thoughts A tire plug kit can be a useful emergency solution. It answers the immediate need to restore air pressure and get you moving again. However, it is rarely considered a permanent repair. If you’ve used a plug or are unsure about tire safety, schedule a professional tire inspection at Simi Valley Chrysler Dodge Jeep Ram Service Center. https://www.simivalleychryslerdodgejeepram.com/service.aspx

How to Read Tire Size Mechanic Guide

How to Read Tire Size : Mechanic Guide

A Complete Guide to Understanding Tire Size Numbers on Your Vehicle Tire size numbers can look confusing at first glance, but they contain critical information about your vehicle’s handling, safety, ride comfort, and performance. Whether you are replacing worn tires, upgrading wheels, or preparing for seasonal driving, understanding how to read a tire size ensures you choose the correct fit for your Chrysler, Dodge, Jeep, or Ram vehicle. This in-depth guide explains how to read tire size numbers, what each marking means, where to find your factory tire size, and how incorrect sizing can impact performance. The information aligns with guidance commonly discussed in Simi Valley Chrysler Dodge Jeep Ram service and maintenance resources. For tire inspections, fitment verification, or professional tire replacement, visit Simi Valley Chrysler Dodge Jeep Ram Service Center. https://www.simivalleychryslerdodgejeepram.com/service.aspx What Does Tire Size Mean? A tire size is a standardized code printed on the sidewall of every tire. This code describes the tire’s: Width Sidewall height Construction type Wheel diameter Load capacity Speed rating Understanding how to read tire sizes ensures your replacement tires match factory specifications, maintaining correct speedometer calibration, suspension geometry, and braking performance. Simi CDJR service content regularly highlights the importance of using manufacturer-approved tire sizes for safety and warranty compliance. https://www.simivalleychryslerdodgejeepram.com/blogs/5737 Where to Find Your Tire Size Before learning how to read tire size numbers, you should know where to find them: On the tire sidewall – the most common location Driver’s door jamb placard – lists factory tire size and pressure Owner’s manual – includes approved tire specifications The door jamb label is the most reliable reference if your tires have been changed previously. How to Read a Tire Size: Step-by-Step Breakdown Let’s break down a common example: P265/70R17 113T This format is used across nearly all passenger vehicles and trucks. 1. Tire Type Prefix (P) The first letter indicates the tire type. P = Passenger vehicle tire LT = Light truck tire (common on Ram trucks) Many Jeep and Ram vehicles use LT-rated tires for higher load capacity. Simi CDJR tire service articles often discuss the importance of selecting the correct tire class for trucks and SUVs. https://www.simivalleychryslerdodgejeepram.com/service.aspx 2. Tire Width (265) The first number represents tire width in millimeters. 265 means the tire is 265 mm wide from sidewall to sidewall Wider tires generally offer improved traction but may impact fuel economy and steering feel. Understanding how to read tire size numbers helps ensure clearance with suspension components and fenders. 3. Aspect Ratio (70) The aspect ratio is the height of the tire’s sidewall expressed as a percentage of the width. 70 means the sidewall height is 70 percent of 265 mm Higher aspect ratios provide: More ride comfort Better absorption of road imperfections Lower aspect ratios offer: Sharper handling Sportier appearance 4. Construction Type (R) The letter R stands for radial construction, which is standard on modern vehicles. Radial tires: Improve durability Enhance ride quality Reduce rolling resistance Nearly all Chrysler, Dodge, Jeep, and Ram vehicles use radial tires. 5. Wheel Diameter (17) This number tells you the wheel diameter in inches. 17 means the tire fits a 17-inch wheel This is one of the most critical numbers when replacing tires. Installing a tire on the wrong wheel diameter is unsafe and impossible. Simi CDJR technicians verify wheel diameter during every tire replacement service. https://www.simivalleychryslerdodgejeepram.com/service.aspx 6. Load Index (113) The load index represents how much weight each tire can safely support. 113 corresponds to a specific weight rating Using a tire with an insufficient load index can result in premature wear or failure, especially on trucks and SUVs. 7. Speed Rating (T) The final letter indicates the tire’s maximum safe speed. Common speed ratings include: S – typical for sedans T – common for SUVs H / V – performance-oriented vehicles Your replacement tire should always meet or exceed the factory speed rating. How to Read Tire Sizes for Trucks and SUVs Many Jeep and Ram vehicles use LT tire sizing, which looks slightly different: LT275/65R18 Key differences: LT indicates light truck construction Thicker sidewalls Higher load ratings Simi CDJR service guidance emphasizes matching LT ratings for vehicles designed for towing or off-road use. https://www.simivalleychryslerdodgejeepram.com/service.aspx Why Tire Size Matters More Than You Think Using the wrong tire size can cause: Speedometer inaccuracies Reduced braking performance Uneven tire wear Suspension strain Traction control errors Modern vehicles rely on precise tire diameter calculations for ABS and stability systems. Even small deviations can affect system performance. Common Tire Size Reading Mistakes Misreading Width vs Wheel Size Some drivers confuse tire width with wheel diameter, leading to incorrect purchases. Ignoring Load Index Choosing tires based only on size without matching load rating can compromise safety. Mixing Sizes Different tire sizes front and rear can disrupt traction systems unless factory-approved. Simi CDJR technicians routinely correct these issues during tire inspections. https://www.simivalleychryslerdodgejeepram.com/service.aspx How to Read Tire Size Numbers on the Sidewall In addition to the main size code, tires include other markings: DOT code – manufacturing date UTQG ratings – treadwear, traction, temperature Maximum load and pressure While important, these markings do not replace the primary tire size code when selecting replacements. Can You Change Tire Size? In some cases, yes — but changes should be approved and calculated carefully. Potential reasons for changing tire size: Off-road upgrades Winter tire packages Wheel upgrades Risks include: Rubbing against suspension Incorrect gearing Reduced fuel efficiency Before changing tire size, Simi CDJR recommends professional fitment verification. https://www.simivalleychryslerdodgejeepram.com/service.aspx Tire Size and Seasonal Tires Winter tires often use: Slightly narrower widths Higher sidewall ratios This improves traction in snow and slush. The correct winter tire size should still remain within manufacturer-approved limits. Simi CDJR service teams regularly assist with seasonal tire sizing and installation. https://www.simivalleychryslerdodgejeepram.com/service.aspx How Often Should Tire Size Be Checked? You should confirm tire size: When replacing tires After buying a used vehicle When upgrading wheels Before seasonal tire changes Incorrect tire sizing is one of the most common causes of drivability complaints. Professional Tire Services at Simi CDJR At Simi Valley Chrysler Dodge Jeep Ram, tire services include: Factory tire size verification Load and speed rating matching Tire mounting and balancing TPMS inspection Alignment checks Using dealership-grade tools ensures your vehicle maintains factory handling and safety standards. https://www.simivalleychryslerdodgejeepram.com/service.aspx Final Thoughts Knowing how to read a tire size empowers you to make informed decisions about tire replacement and upgrades. Tire size numbers are not random — each digit plays a role in how your vehicle handles, rides, and performs. If you’re unsure about tire sizing or want professional guidance, schedule a tire inspection at Simi Valley Chrysler Dodge Jeep Ram Service Center. https://www.simivalleychryslerdodgejeepram.com/service.aspx

Contact Us

Fill out this form below and we'll contact you shortly
*Required Fields