



Simi Valley Chrysler Dodge Jeep Ram

Blog

The Best Guide to Brake Bleeder Kits, Brake Bleeders, and Bleeding Brakes Properly

Brake Bleeder Kits

If you are trying to choose the right brake bleeder kit, learn how bleeding brakes works, or figure out whether you need a vacuum brake bleeder, brake pressure bleeder, or a simple one man brake bleeder kit, this is the guide that covers it properly.

Brake bleeding sounds simple, but it is one of those jobs people mess up all the time. A small mistake can leave you with a soft pedal, trapped air, wasted brake fluid, stripped bleeder screws, or in the worst case, unsafe braking performance. That is why understanding the process matters just as much as buying the right brake bleeder tool.

This guide explains:

  • what a brake bleeder actually does,
  • the different types of brake bleeding kits,
  • the best methods for bleeding brakes by yourself,
  • how to bleed ABS systems,
  • common mistakes when bleeding brake lines,
  • and how to choose the best brake bleeder kit for your garage.

What Is a Brake Bleeder?

A brake bleeder is any tool or setup used to remove air from a hydraulic brake system. Since brake systems rely on incompressible brake fluid to transfer force, any air trapped in the lines causes a spongy pedal and reduced braking performance.

When you open a bleeder screw and force fluid through the system, you push out trapped air bubbles. That process is called brake bleeding.

You usually need to bleed brakes after:

  • replacing calipers,
  • replacing brake hoses or hard lines,
  • changing a master cylinder,
  • installing wheel cylinders,
  • opening the hydraulic system for repairs,
  • or when the pedal feels soft and air contamination is suspected.

In some cases, a full flush is also done simply because old brake fluid absorbs moisture over time.


Why Bleeding Brakes Matters

A brake system works on hydraulic pressure. When you press the brake pedal, the master cylinder pushes fluid through lines to the calipers or wheel cylinders. If there is air in the system, that air compresses. Fluid does not compress the same way, but air does. That is what causes the mushy pedal feel.

Proper brake bleeding restores:

  • firm pedal feel,
  • consistent braking response,
  • better modulation,
  • safer stopping performance.

You are not just doing maintenance. You are restoring hydraulic integrity.
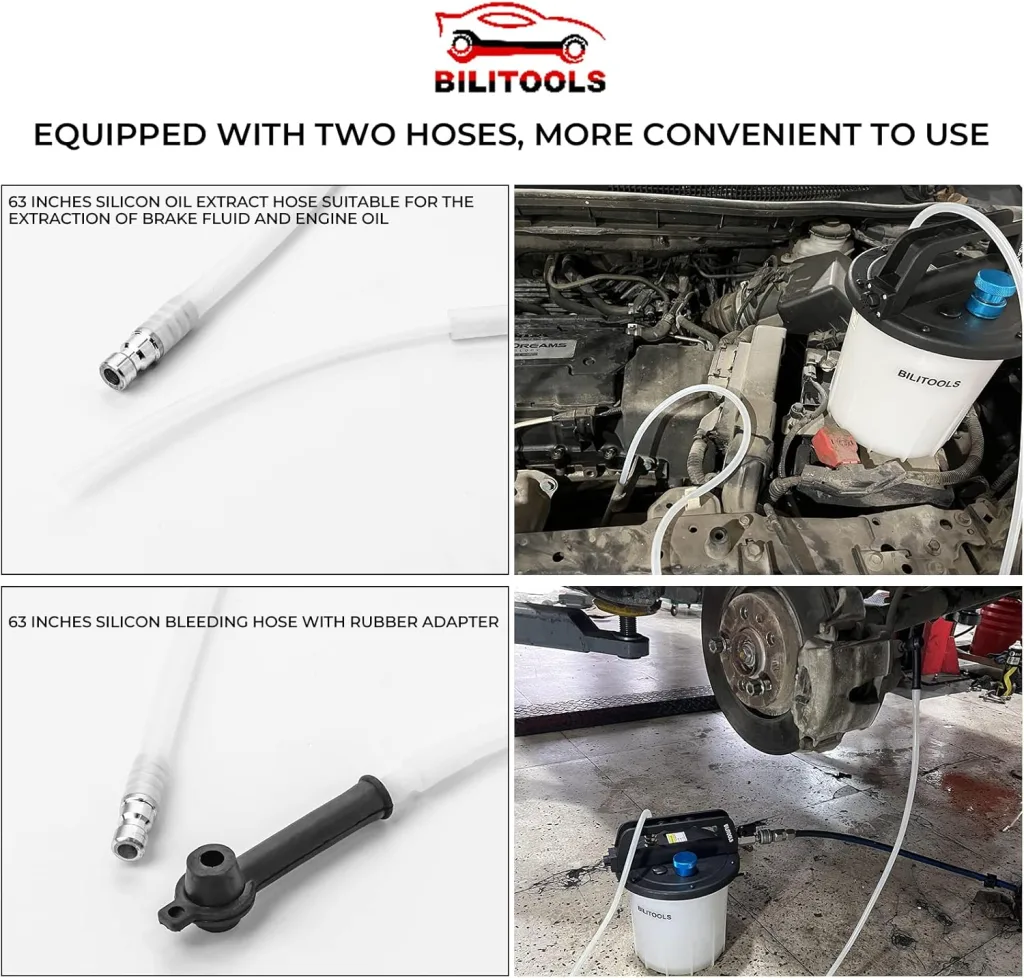
Brake Bleeder Kits2

Types of Brake Bleeder Kits

Not all brake bleeder kits work the same way. Choosing the right type depends on your budget, how often you work on brakes, and whether you usually work alone.

1. Manual two-person brake bleeding

This is the old-school method. One person pumps the brake pedal while another opens and closes the bleeder screw.

How it works

  1. One person pumps the pedal several times.
  2. The helper holds the pedal down.
  3. The second person opens the bleeder valve.
  4. Air and fluid escape.
  5. The bleeder is closed before the pedal is released.

Pros

  • Cheap
  • No special tools required
  • Effective when done correctly

Cons

  • Requires two people
  • Easy to mess up timing
  • Can overstroke an old master cylinder
  • More annoying than modern methods

This still works, but it is not the best option for most DIYers today.


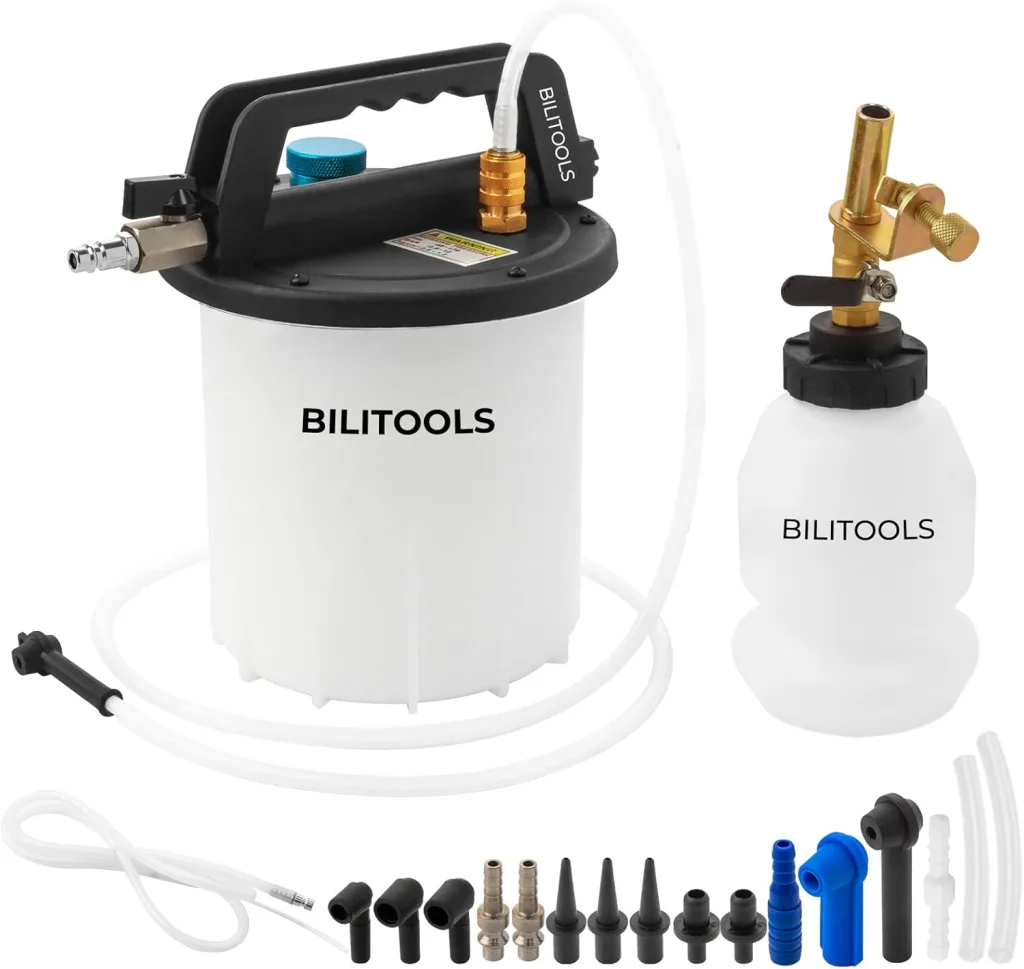
2. Vacuum brake bleeder

A vacuum brake bleeder uses suction at the bleeder screw to pull brake fluid and air through the system. This is one of the most popular options for DIY use.

It is often sold as a brake bleeder vacuum pump, vacuum brake bleeder kit, or brake bleeder and vacuum pump kit.

Pros

  • Good for one-person operation
  • Affordable
  • Easy to use on many vehicles
  • Useful for general fluid extraction tasks too

Cons

  • Can pull false air past bleeder screw threads
  • Sometimes confusing for beginners
  • Requires good hose sealing
  • May be slower on stubborn systems

If someone wants a practical one person brake bleeder, vacuum kits are often the first serious upgrade from the basic bottle-and-hose method.


3. Pressure brake bleeder

A brake pressure bleeder attaches to the master cylinder reservoir and pressurizes the system from the top. This pushes brake fluid through the lines and out the bleeder screws.

It is also called a pressure brake bleeder, pressurized brake bleeder, or power brake bleeder.

Pros

  • Excellent for full system flushing
  • Very effective for one-person use
  • Fast and clean
  • Often the best method for modern vehicles
  • Great for consistent fluid flow

Cons

  • Costs more than basic methods
  • Requires the correct reservoir cap adapter
  • Can make a mess if improperly sealed
  • Needs careful pressure management

For many enthusiasts and serious home mechanics, a pressure brake bleeder is the best all-around tool.
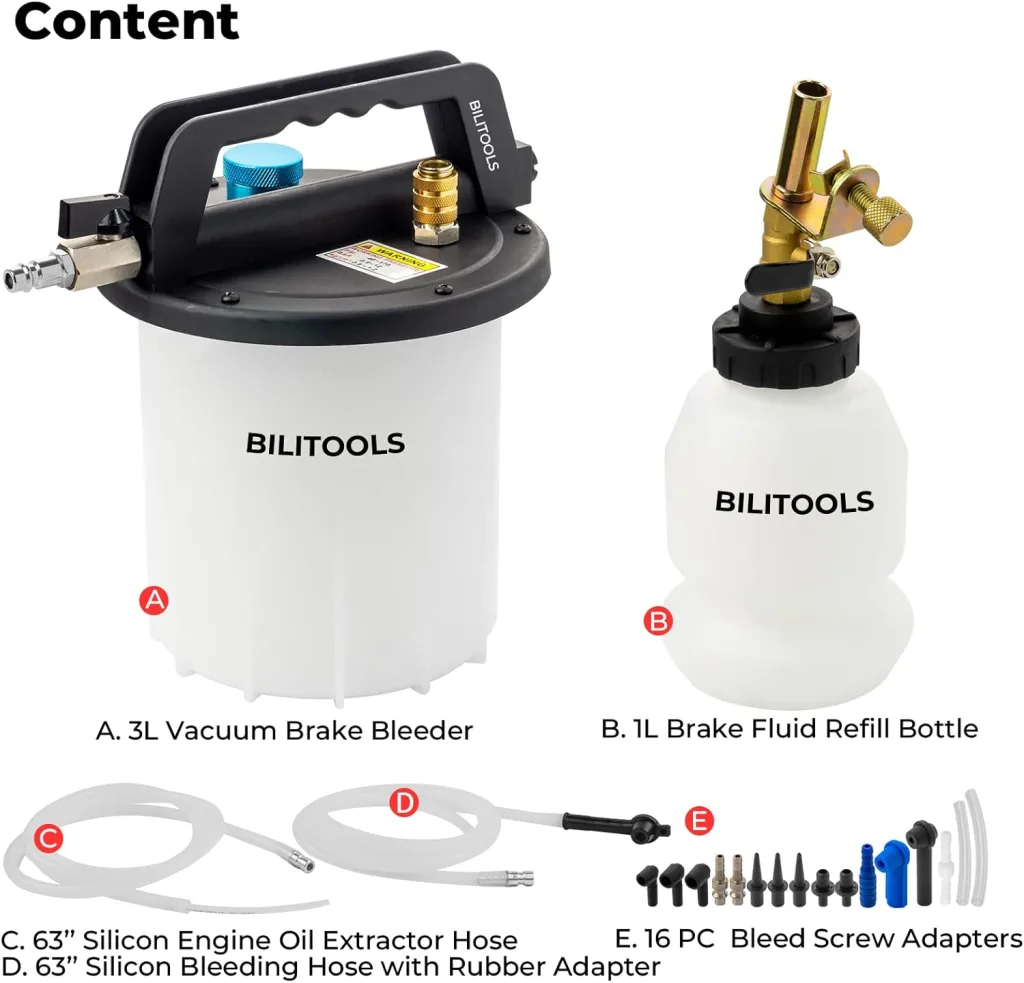
Brake Bleeder Kits3

4. Pneumatic brake bleeder

A pneumatic brake bleeder uses compressed air to generate vacuum or assist fluid extraction. These are more common in shop environments.

Pros

  • Fast
  • Good for repeated shop use
  • Less manual effort

Cons

  • Requires an air compressor
  • Less practical for casual users
  • More equipment involved

If you work on brakes frequently, this can be worthwhile. For occasional DIY jobs, a manual vacuum or pressure setup is usually more sensible.


5. One man brake bleeder kit

A one man brake bleeder kit is a general category. It may be vacuum-based, pressure-based, or use a simple one way brake bleeder valve or check-valve bottle setup.

Pros

  • Lets you bleed brakes by yourself
  • Great for DIY garages
  • Available in many price ranges

Cons

  • Cheap kits vary wildly in quality
  • Simple check-valve kits are less reliable than pressure systems
  • Not all designs work equally well on stubborn ABS systems

If your main goal is bleeding brakes by yourself, this is the category to shop carefully.


Brake Bleeder Tools You Should Know

A complete brake bleeding job often involves more than just one tool.

Brake bleeder wrench

A brake bleeder wrench is sized to fit bleeder screws without rounding them off. This matters more than people think. Bleeder screws strip easily.

Brake bleeder hose

A clear brake bleeder hose lets you see air bubbles and fluid color. It is one of the simplest but most helpful tools in the whole job.

Brake bleeder bottle

A brake bleeder bottle collects old fluid and helps you monitor bubbles. Many low-cost one-person kits rely on this.

Brake bleeder screw

The brake bleeder screw or brake bleeder valve is the small valve on the caliper or wheel cylinder that you open during bleeding. If it is seized, rusted, or damaged, your job becomes much harder.

Brake master cylinder bleeder kit

A brake master cylinder bleeder kit is usually for bench bleeding a master cylinder before installation. This is different from wheel-end bleeding and is essential when replacing the master cylinder.


The Best Brake Bleeder Kit for Different Users

Best for beginners

A quality vacuum brake bleeder kit is usually the easiest place to start. It is affordable, beginner-friendly, and lets one person do the job.

Best for serious DIYers

A brake pressure bleeder is often the best choice overall. It is cleaner, more consistent, and usually better for full fluid flushes.
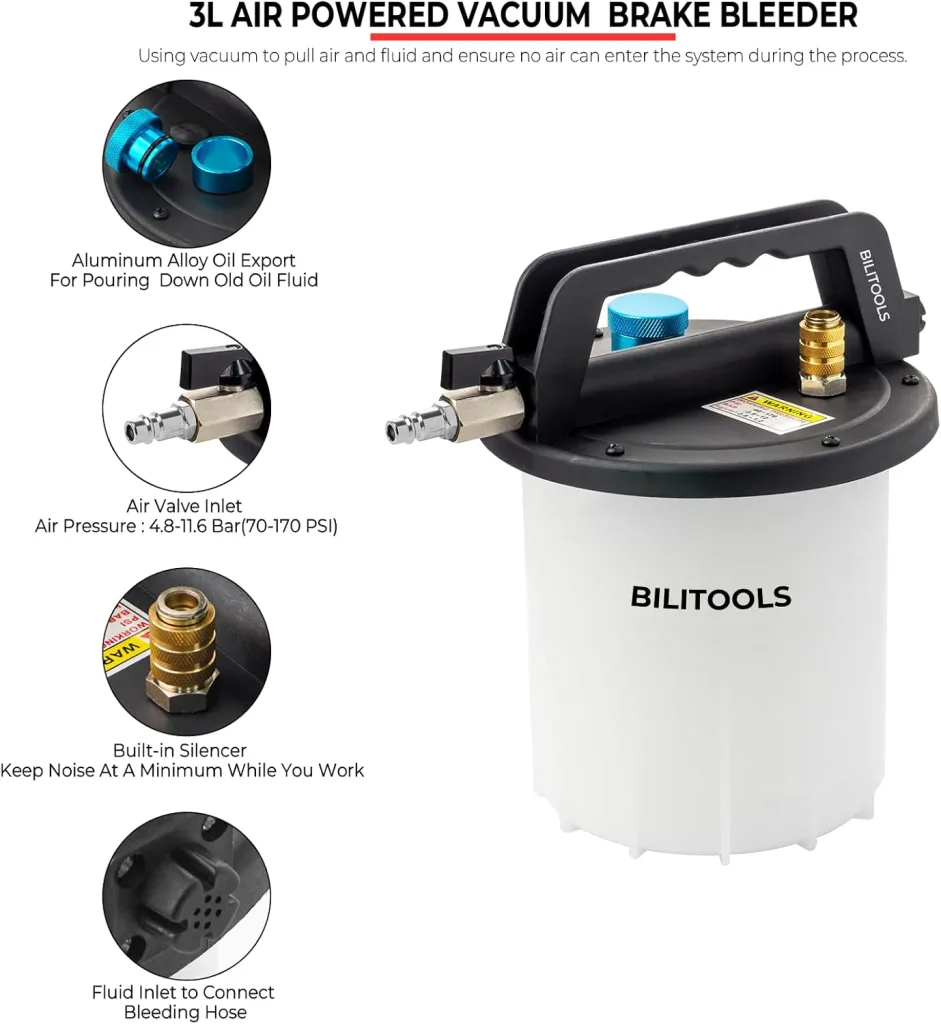
Brake Bleeder Kits4

Best for shops

A pneumatic brake bleeder or high-quality power brake bleeder makes sense if you do brake work regularly.

Best for occasional users

A one man brake bleeder kit with a bottle, hose, and check valve can work, but quality matters. Cheap kits can waste time.

Best for ABS-heavy modern vehicles

A pressure brake bleeder is often the better starting point, especially when followed by the correct ABS bleed procedure for the vehicle.


How to Bleed Brakes Properly

Now let’s get into the actual brake bleeding procedure.

Step 1: Gather the right tools

You will usually need:

  • correct brake fluid type,
  • brake bleeder kit,
  • wrench for bleeder screws,
  • clear hose,
  • catch bottle,
  • gloves,
  • eye protection,
  • jack and stands if wheels need to come off,
  • shop towels,
  • penetrating oil if bleeders are rusty.

Do not start if you are not sure what brake fluid spec your vehicle requires.


Step 2: Bench bleed the master cylinder if it was replaced

If you installed a new master cylinder, you should usually bench bleed it first using a master brake cylinder bleeding kit or brake master cylinder bleeder kit.

If you skip this, you may fight trapped air for much longer than necessary.


Step 3: Keep the master cylinder reservoir full

This is one of the most important rules in all of bleeding brakes.

Never let the reservoir run dry.

If it runs dry, you introduce new air into the system and may have to start all over again.


Step 4: Follow the correct brake bleeding sequence

The basic brake bleeding sequence on many vehicles is to start with the wheel farthest from the master cylinder and work toward the closest.

A common sequence is:

  1. Right rear
  2. Left rear
  3. Right front
  4. Left front

But not every vehicle uses the same order. Some diagonal systems, ABS systems, and specific OEM procedures differ. Always verify for your exact vehicle if possible.


Step 5: Use your chosen bleeding method

Manual method

  • Pump pedal slowly
  • Hold pedal down
  • Open bleeder
  • Let fluid and air out
  • Close bleeder
  • Release pedal
  • Repeat until no bubbles

Vacuum brake bleeder method

  • Attach hose securely to bleeder screw
  • Apply vacuum
  • Open bleeder screw
  • Draw fluid until no bubbles remain
  • Monitor reservoir constantly

Pressure brake bleeder method

  • Attach pressure bleeder to reservoir
  • Pressurize to safe specified level
  • Open bleeder screw at each corner
  • Let fluid run until clear and bubble-free
  • Close bleeder and move to next wheel

Bleeding Brakes by Yourself

Many people search for bleeding brakes by yourself, bleeding brakes one person, one person brake bleeder, or 1 person brake bleeder kit because solo brake work is common.

The best ways to do it alone are:

1. Pressure bleeder

Usually the most reliable one-person method.

2. Vacuum brake bleeder

Very effective if your hose connections seal well and you understand false bubble issues.

3. Check valve bottle kit

Works, but usually less refined and less consistent than the two methods above.

If you ask me for the best solo method overall, the answer for most modern vehicles is a brake pressure bleeder.


Bleeding Brakes With a Mityvac

Bleeding brakes with a Mityvac is one of the most searched brake service methods for a reason. A Mityvac-style hand pump is a common brake bleeder vacuum pump setup.

Best practices

  • Wrap bleeder threads lightly if needed to reduce false air
  • Keep the hose tight
  • Pull vacuum before opening the bleeder
  • Watch actual fluid movement, not just tiny bubbles
  • Refill the reservoir constantly

One thing beginners often misunderstand: vacuum systems can sometimes show bubbles that are not actually from trapped air in the brake line, but from tiny air leaks around the bleeder screw threads. That does not automatically mean the system is still full of air.


Bleeding Brakes With a Pressure Bleeder

Bleeding brakes with a pressure bleeder is one of the cleanest and most efficient methods.

Why it works so well

Instead of sucking fluid from the caliper end, it pushes fluid from the master cylinder down through the entire hydraulic system. That usually gives smoother, more consistent flow.

Best practices

  • Use the correct cap adapter
  • Do not overpressurize
  • Check for leaks before starting
  • Protect painted surfaces from brake fluid
  • Use fresh brake fluid only

For many serious DIYers, a power brake bleeder is the best investment in brake service tools.


Bleeding Brakes on ABS Systems

Bleeding brakes on ABS system jobs can be straightforward or annoying depending on what was replaced and how much air entered the system.

In many standard pad-and-caliper jobs, a normal bleed may be enough.

But if:

  • the master cylinder ran dry,
  • the ABS hydraulic control unit got air in it,
  • major line work was done,
  • or the manufacturer requires special cycling procedures,

then you may need an ABS brake bleeding scan tool.

Some ABS systems require electronically cycling the ABS pump and valves to purge trapped air. Without that scan tool function, you can end up with a pedal that still feels wrong even after ordinary bleeding.

So for bleeding brakes with ABS or bleeding brakes with ABS system, remember this:

A normal brake bleeder kit may not be enough if air is trapped inside the ABS module.


Common Mistakes When Bleeding Brakes

Searches for common mistakes when bleeding brakes are popular because people make the same errors over and over.

1. Letting the reservoir run dry

This is the biggest mistake.

2. Using the wrong fluid

DOT 3, DOT 4, DOT 5, and DOT 5.1 are not interchangeable in every case.

3. Opening bleeders too far

You only need them cracked open, not fully backed out.

4. Stripping bleeder screws

Use the correct brake bleeder wrench and be gentle.

5. Misreading vacuum bubbles

Tiny bubbles may come from bleeder threads, not trapped system air.

6. Pumping the pedal too aggressively

Fast pumping can aerate fluid.

7. Ignoring ABS procedure requirements

Some vehicles need scan tool activation.

8. Reusing contaminated fluid

Never do this.

9. Spilling brake fluid on paint

Brake fluid damages painted surfaces fast.

10. Bleeding in the wrong sequence

Always verify the correct order for the vehicle.


Brake Bleeding Pressure: How Much Is Too Much?

When using a brake pressure bleeder, more pressure is not automatically better.

Too much pressure can:

  • cause reservoir leaks,
  • make a mess,
  • damage seals,
  • or create unnecessary risk.

Most DIY pressure bleeder setups are run at modest pressure, not extreme pressure. Always follow tool and vehicle guidance. The goal is controlled hydraulic flow, not brute force.


Signs Your Brake Bleeding Worked

After proper brake bleeding, you should usually notice:

  • firmer pedal feel,
  • more consistent pedal height,
  • no obvious sponginess,
  • improved braking response,
  • clean fluid at the bleeder,
  • no visible bubbles in final flow.

If the pedal is still soft, possible reasons include:

  • air still trapped in the system,
  • rear brake adjustment issues on drum systems,
  • master cylinder problems,
  • flexible hose expansion,
  • ABS module air,
  • or external leaks.

Brake Bleeder Kit Buying Guide

If you are shopping for the best brake bleeder kit, here is the simplest way to decide.

Choose a vacuum brake bleeder if:

  • you want affordable one-person bleeding,
  • you are a beginner,
  • you want a multi-purpose vacuum tool,
  • you only do brake jobs occasionally.

Choose a pressure brake bleeder if:

  • you work on your own vehicles regularly,
  • you want faster full fluid flushes,
  • you want the best one-person workflow,
  • you work on newer cars often.

Choose a pneumatic brake bleeder if:

  • you already have compressed air,
  • you do frequent brake service,
  • you want shop-style speed.

Choose a basic one-man bottle kit if:

  • budget is extremely tight,
  • you only do occasional simple bleeding,
  • you understand its limitations.

Final Verdict

The best approach to brake bleeding depends on how often you do the job and what kind of vehicles you work on.

For the average DIYer, a quality vacuum brake bleeder kit is a strong starting point.

For the enthusiast or serious home mechanic, a brake pressure bleeder is often the best overall solution because it makes bleeding brakes by yourself cleaner, faster, and more consistent.

For shop use, a pneumatic brake bleeder or higher-end power brake bleeder usually makes the most sense.

No matter which brake bleeder tool you use, the fundamentals stay the same:

  • keep the reservoir full,
  • use the correct fluid,
  • follow the proper brake bleeding sequence,
  • do not rush,
  • and understand when an ABS system needs scan tool intervention.

That is what separates a quick brake job from a correct one.

Recommended Posts

Freightliner Bumpers and Cascadia Fairing Panels for a Stronger, Sleeker Truck

Shop durable Freightliner truck bumpers and Cascadia fairing panels for sale. Precise-fit exterior components for 2008-2017 and 2018+ trucks with fast shipping and expert support. Keeping a Freightliner Cascadia in top condition is about more than the engine under the hood — the exterior body components play a huge role in how the truck performs, looks, and holds its value. Side fairings, step skirts, and front-end pieces all work together to cut drag, protect vulnerable systems, and give the rig a clean, professional presence on the road. Operators searching for quality freightliner bumpers for sale often find that upgrading the entire front and side profile delivers the biggest return. When you pair durable freightliner truck bumpers with well-fitted aerodynamic panels, your Cascadia gains both protection and efficiency in one smart upgrade. The Value of a Complete Exterior Upgrade A truck's exterior is its first line of defense and its calling card all at once. Aerodynamic fairing panels smooth the airflow around the fuel tanks and drive area, lowering wind resistance and helping every gallon of diesel go further. A solid front end absorbs impacts and shields the radiator and cooling system from road debris. Together these components reduce long-term repair costs while keeping the truck looking sharp mile after mile. Over time, that combination of efficiency and protection adds up to real savings, since a truck that burns less fuel and stays out of the repair bay simply earns more for its owner on every route. At tacoma-truckparts.com, the Cascadia selection covers front, middle, and rear fairing panels, step skirts, extensions, and complete sets for both driver and passenger sides. Whether you run a 2008-2017 model or a 2018-and-newer truck, there are pieces engineered to match your exact frame and factory mounting points. Precision Fit for Every Model Year Fitment is everything with exterior body components. Panels and front-end pieces built for your specific model year line up cleanly with existing hardware, so installation is straightforward and the finished surface sits flush and secure. Durable materials stand up to road spray, gravel, and constant vibration, keeping the truck looking its best season after season. Reinforced panels and aluminum step skirts add both function and a polished, professional finish that owner-operators take pride in. Choosing correctly-sized components also protects everything around them. Well-fitted fairings shield tanks, steps, and wiring from flying debris, while a strong front end guards the systems behind it. That kind of protection keeps your Cascadia earning out on the highway instead of sitting in the shop. Efficiency, Protection, and Uptime Downtime is expensive, which is why fast order processing and dependable availability matter as much as the parts themselves. Orders ship quickly, backed by knowledgeable support that understands the daily demands facing fleet managers and independent drivers alike. Being able to find the exact panel, skirt, or front-end piece you need without guesswork keeps maintenance simple and predictable. Investing in your Cascadia's exterior is a smart move for fuel economy, curb appeal, and long-term resale value. With aerodynamic fairings and dependable front-end components working together, your truck cuts cleanly through the wind, looks its best, and stays ready for the next long haul. A well-maintained, polished rig also builds trust with customers and makes a strong impression during inspections. Browse the full selection today and give your Freightliner Cascadia the efficient, protected, road-ready finish it truly deserves.

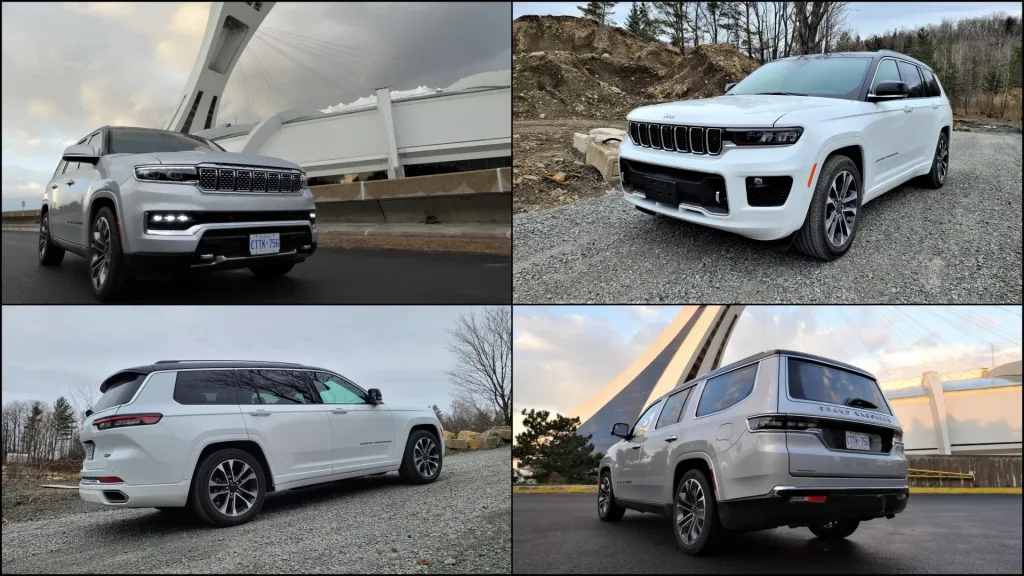
Jeep Grand Cherokee L and Wagoneer

Compare Jeep Grand Cherokee L and Wagoneer

Yes, Jeep SUVs do offer 3rd row seating. The main Jeep SUVs with three rows are the Jeep Grand Cherokee L and the Jeep Wagoneer / Grand Wagoneer lineup, depending on model year and availability. For most families near Simi Valley, Thousand Oaks, Moorpark, Oxnard, Los Angeles, San Fernando Valley, Santa Clarita, and Burbank, the Jeep Grand Cherokee L is the more practical three-row Jeep SUV. The Wagoneer and Grand Wagoneer are better for shoppers who want maximum passenger room, more cargo space, stronger towing capability, and a larger full-size SUV feel. If you want to compare options, start with the new Jeep inventory at Simi Valley Chrysler Dodge Jeep Ram, check the used Jeep inventory, or value your current vehicle before upgrading through the trade-in page. Table of Contents Which Jeep SUVs Have 3rd Row Seating? Jeep Grand Cherokee L: The Practical 3-Row Jeep SUV Jeep Wagoneer and Grand Wagoneer: The Bigger 3-Row Jeep Option Grand Cherokee vs. Grand Cherokee L: Which One Has More Room? Grand Cherokee L vs. Wagoneer: Which 3-Row Jeep Is Better? Is the Third Row Comfortable for Adults? How Much Cargo Space Do 3-Row Jeep SUVs Offer? Can a 3-Row Jeep SUV Tow? Common Buyer Warnings Before Buying a Used 3-Row Jeep Local Dealership Angle: Simi Valley CDJR Final Answer Which Jeep SUVs Have 3rd Row Seating? The Jeep SUVs with 3rd row seating are the Jeep Grand Cherokee L and the Jeep Wagoneer / Grand Wagoneer family. The standard Jeep Grand Cherokee is a two-row SUV with seating for up to five passengers. The Grand Cherokee L is the longer three-row version with seating for up to seven passengers. Jeep confirms that the two-row Grand Cherokee seats up to five, while the Grand Cherokee L seats up to seven. The Wagoneer and Grand Wagoneer are larger full-size Jeep SUVs with three-row seating. They are designed for shoppers who want more passenger space, more cargo capacity, more towing ability, and a more premium full-size SUV experience. So the simple answer is: Choose the Jeep Grand Cherokee L if you want a midsize three-row Jeep SUV. Choose the Wagoneer or Grand Wagoneer if you want a larger full-size three-row Jeep SUV. Choose the regular Grand Cherokee if you only need two rows and prefer a smaller, easier-to-park SUV. Jeep Grand Cherokee L: The Practical 3-Row Jeep SUV The Jeep Grand Cherokee L is usually the best fit for families who want three rows without going all the way up to a full-size SUV. It gives you: Seating for up to seven passengers. Available second-row captain’s chairs or a second-row bench, depending on configuration. A usable third row for kids, teens, or occasional adult passengers. Available 4x4 capability. Strong towing capability when properly equipped. A more manageable size than a Wagoneer. A more premium feel than many mainstream three-row SUVs. According to Jeep, the Grand Cherokee L offers up to 84.6 cubic feet of cargo space with the second and third rows folded. Jeep also notes that a second-row bench seat is available so the vehicle can carry up to seven passengers. Source: Jeep Grand Cherokee 3-Row SUV That makes the Grand Cherokee L a smart choice for families who need extra seating but still want a vehicle that feels comfortable for daily driving, school pickup, road trips, and weekend getaways. Jeep Wagoneer and Grand Wagoneer: The Bigger 3-Row Jeep Option The Wagoneer and Grand Wagoneer are the larger three-row Jeep SUVs. They are built for shoppers who want more room, more towing confidence, and more upscale features than the Grand Cherokee L. The Grand Wagoneer is especially strong for buyers who need a premium full-size SUV. Jeep lists the 2026 Grand Wagoneer with seating for seven, 179 cubic feet of passenger volume, and strong cargo space depending on configuration. Source: Jeep Grand Wagoneer Specs The Grand Wagoneer is also the stronger choice for towing. Jeep lists an available maximum towing capacity of up to 10,000 pounds when properly equipped. Source: Jeep Grand Wagoneer Capability Choose the Wagoneer or Grand Wagoneer if you want: A larger full-size SUV. More third-row room. More cargo space. More luxury features. Stronger towing capability when properly equipped. A better fit for larger families. A stronger road-trip SUV. The tradeoff is size. A Wagoneer or Grand Wagoneer will feel larger in traffic, parking lots, tight garages, and city driving compared to a Grand Cherokee L. Grand Cherokee vs. Grand Cherokee L: Which One Has More Room? The Jeep Grand Cherokee and Jeep Grand Cherokee L are closely related, but they are not the same. The standard Grand Cherokee has two rows and seats up to five passengers. It is better for drivers who want a premium SUV, strong available 4x4 capability, and easier daily maneuverability without needing a third row. The Grand Cherokee L adds the third row and stretches the vehicle to create space for up to seven passengers. It is the better choice if you have a larger family, drive with kids and friends, or want extra flexibility for road trips. Choose the standard Grand Cherokee if you want: Two rows. Easier parking. Slightly simpler family use. More focus on front and second-row comfort. A good mix of daily driving and Jeep capability. Choose the Grand Cherokee L if you want: Three rows. Seating for up to seven. More passenger flexibility. More cargo flexibility. A better family SUV setup. A stronger alternative to three-row crossovers. For shoppers near Simi Valley and Thousand Oaks who want one SUV for daily driving, family trips, and weekend adventures, the Grand Cherokee L is usually the more flexible choice. Grand Cherokee L vs. Wagoneer: Which 3-Row Jeep Is Better? The better choice depends on how much space and capability you need. The Jeep Grand Cherokee L is better if you want a three-row SUV that still feels manageable for daily driving. It is easier to park, easier to maneuver, and more practical for many families who only need the third row part of the time. The Wagoneer or Grand Wagoneer is better if you want more room and more towing strength. It is the better choice for larger families, frequent road trips, heavy cargo needs, and towing larger trailers when properly equipped. Choose the Grand Cherokee L if: You want three rows but do not want a massive SUV. You need seating for up to seven. You want a premium midsize SUV feel. You want available Jeep 4x4 capability. You want a practical family SUV for daily use. Choose the Wagoneer or Grand Wagoneer if: You need more adult-friendly third-row space. You want more cargo space behind the rows. You tow more often. You want a larger, more premium SUV. You regularly travel with a full family and luggage. For most local families, the Grand Cherokee L is the sweet spot. For shoppers who want the biggest Jeep SUV available, the Wagoneer and Grand Wagoneer are the stronger fit. Is the Third Row Comfortable for Adults? The third row in the Jeep Grand Cherokee L is useful, but it is best for kids, teens, and shorter trips with adults. Adults can use it, but it is not as spacious as a full-size SUV third row. The Wagoneer and Grand Wagoneer are better if adult third-row comfort is a major priority. Their larger body gives passengers more room to stretch out, especially on longer drives. Think of it this way: Grand Cherokee L: better for families who need occasional third-row use. Wagoneer / Grand Wagoneer: better for regular adult third-row use. Standard Grand Cherokee: better if you do not need a third row at all. If you regularly drive with six or seven people, test the third row before buying. Seat comfort depends on passenger height, second-row position, seat configuration, and cargo needs. How Much Cargo Space Do 3-Row Jeep SUVs Offer? Cargo space depends on which Jeep SUV you choose and how many seats are in use. The Jeep Grand Cherokee L is flexible because you can fold the third row when you do not need it. With the second and third rows folded, Jeep lists up to 84.6 cubic feet of cargo space. Source: Jeep Grand Cherokee 3-Row SUV That is useful for: Groceries. Strollers. Sports gear. Camping supplies. Luggage. Home improvement items. Road-trip bags. The Wagoneer and Grand Wagoneer offer more space overall because they are full-size SUVs. They are better if you need to carry passengers and cargo at the same time. If you have a big family and often travel with luggage, the Wagoneer or Grand Wagoneer makes more sense. If you only need the third row occasionally, the Grand Cherokee L is usually enough. Can a 3-Row Jeep SUV Tow? Yes, three-row Jeep SUVs can tow when properly equipped, but towing capacity depends on engine, drivetrain, equipment, trim, and vehicle condition. The Jeep Grand Cherokee L can tow up to 6,200 pounds when properly equipped, according to Jeep’s Grand Cherokee specifications. Source: Jeep Grand Cherokee Specs The Grand Wagoneer can tow up to 10,000 pounds when properly equipped, according to Jeep. Source: Jeep Grand Wagoneer Capability That makes the Grand Cherokee L strong enough for many smaller trailers, light campers, personal watercraft, and utility trailers. The Grand Wagoneer is the better choice if you tow heavier loads more often. Before towing, always check: Owner’s manual. Exact towing rating by VIN. Trailer weight. Tongue weight. Payload. Hitch rating. Tire condition. Brake controller needs. Cooling system condition. Local towing laws. Always use “when properly equipped” for towing because not every trim or configuration has the same rating. Common Buyer Warnings Before Buying a Used 3-Row Jeep A used Jeep Grand Cherokee L, Wagoneer, or Grand Wagoneer can be a strong family SUV, but condition matters. Before buying, check: Service history. Tire wear. Brake condition. Suspension noise. Oil leaks. Coolant leaks. Transmission shifting. 4x4 system operation. Infotainment screen function. Power seat and power-folding seat operation. Liftgate operation. Prior accident history. Rust or underbody damage. Water leaks. Towing history. Aftermarket wiring. Open recalls by VIN. If the SUV was used for towing, inspect the hitch, rear suspension, brakes, tires, and cooling system. If it was used off-road, inspect the underbody, skid plates, suspension, wheels, and alignment. Always check recalls by VIN using the official NHTSA recall lookup tool, especially when buying a used family SUV. Local Dealership Angle: Simi Valley CDJR For shoppers near Simi Valley, Thousand Oaks, Moorpark, Oxnard, Los Angeles, San Fernando Valley, Santa Clarita, and Burbank, a three-row Jeep SUV makes sense if you want family space without giving up Jeep capability. At Simi Valley Chrysler Dodge Jeep Ram, you can compare available Jeep Grand Cherokee L, Wagoneer, Grand Wagoneer, and other Jeep SUVs in new inventory. If you want a lower payment or more trim options, check the used inventory and compare mileage, condition, service history, trim, drivetrain, and warranty coverage. You can also start your approval through the finance application, estimate your vehicle’s value through the trade-in page, schedule maintenance with the service department, or order genuine Mopar parts through the parts department. For families who need a daily driver, road-trip SUV, school-run vehicle, and weekend adventure vehicle in one package, the Grand Cherokee L is usually the best starting point. For maximum space and towing strength, move up to the Wagoneer or Grand Wagoneer. Final Answer: Do Any Jeep SUVs Have 3rd Row Seating? Yes, Jeep SUVs do have 3rd row seating. The main options are the Jeep Grand Cherokee L and the Jeep Wagoneer / Grand Wagoneer lineup. The best choice for most families is the Jeep Grand Cherokee L because it offers seating for up to seven, useful cargo flexibility, available 4x4 capability, and a more manageable size than a full-size SUV. The Wagoneer and Grand Wagoneer are better if you want maximum space, more premium features, and stronger towing capability when properly equipped. For shoppers near Simi Valley, Thousand Oaks, Moorpark, Oxnard, Los Angeles, San Fernando Valley, Santa Clarita, and Burbank, compare new and used three-row Jeep SUVs at Simi Valley Chrysler Dodge Jeep Ram, check financing options, value your trade, or schedule a test drive to see which Jeep SUV fits your family best.

CC26_JLJL74_2TB_PYC_APA_XXX_XXX_XXX.44595767d2e79008ad8cdbe55f250a44

How much do you have to pay a month for a Jeep Wrangler?

How Much Do You Have to Pay a Month for a Jeep Wrangler? A Jeep Wrangler monthly payment usually ranges from about $575 to $1,100+ per month, depending on the price, down payment, credit score, interest rate, loan term, taxes, fees, and trim. The simple answer is this: a lower-trim Jeep Wrangler Sport may land around $600 to $750 per month with normal financing, while a Wrangler Willys, Sahara, Rubicon, 4xe, or 392 can easily push payments into the $800 to $1,200+ range. Jeep lists the 2026 Wrangler starting at $36,035 MSRP, while higher trims like Sahara, Rubicon, and Rubicon X start much higher. Jeep Wrangler Quick Monthly Payment Estimate Here is a realistic estimate using a 72-month loan, about 7% APR, and roughly estimated taxes and fees. Actual payments can be higher or lower. $36,000 Wrangler: about $615 to $700/month $45,000 Wrangler: about $760 to $875/month $55,000 Wrangler: about $930 to $1,070/month $65,000 Wrangler: about $1,100 to $1,260/month $75,000+ Wrangler 392: about $1,275 to $1,500+/month This assumes little to moderate money down. A larger down payment or trade-in can lower the payment. A higher APR can raise it fast. Wrangler Price by Trim Jeep’s official 2026 Wrangler page lists starting MSRPs such as: Sport: from $36,035 Sport S: from $39,685 Willys: from $43,755 Sahara: from $48,910 Rubicon: from $45,815 Rubicon X: from $55,765 Jeep Wrangler Those are starting prices before taxes, registration, dealer fees, accessories, packages, and finance charges. A real Wrangler on the lot can cost much more once options are added. What Affects Your Jeep Wrangler Payment? The biggest factors are: Vehicle price: A Rubicon costs much more per month than a Sport. Down payment: More money down lowers the amount financed. Trade-in equity: Positive equity can reduce your payment. Credit score: Better credit usually means a lower APR. Loan term: Longer terms lower monthly payments but increase total interest. Taxes and fees: California taxes and registration can add thousands to the financed amount. Add-ons: Warranties, protection products, accessories, and lift packages can raise the payment. New vs Used Wrangler Monthly Payment A used Wrangler may not always be dramatically cheaper because Wranglers hold value well. A clean used Wrangler can still have a strong price, especially if it is a Rubicon, Willys, 4xe, or low-mileage Unlimited. That said, used can still be the better monthly-payment move if you choose the right year, mileage, and trim. For LA and Simi Valley shoppers, compare used Jeep inventory against new Jeep inventory before deciding. Sometimes the new-car incentives make a new Wrangler closer in payment than expected. Best Way to Lower the Payment The cleanest ways to lower a Wrangler payment are: Choose a lower trim like Sport, Sport S, or Willys. Put more money down. Use trade-in equity. Improve credit before applying. Avoid unnecessary add-ons. Compare new and used options. Choose a realistic loan term. A longer loan can make the payment look easier, but do not stretch the term too far just to afford a higher trim. The total cost matters. Final Answer Most Jeep Wrangler payments fall around $600 to $1,100 per month. A basic Wrangler Sport may be close to $600 to $750/month with typical financing. A Wrangler Willys, Sahara, Rubicon, or 4xe may be closer to $800 to $1,100/month. A Wrangler 392 or heavily optioned model can go well above $1,200/month. The only accurate number comes from the exact Wrangler, your credit, down payment, trade value, taxes, fees, and approved APR.