





Simi Valley Chrysler Dodge Jeep Ram

Blog

How to Buff Out Scratches on a Car: What Actually Works, What Only Hides the Damage, and When to Stop Polishing

How to Buff Out Scratches on a Car

If you search how to buff out scratches on car, you are usually not asking about body-shop-level refinishing. You want to know whether a scratch can be fixed at home, what products actually work, whether a scratch is only in the clear coat or deeper in the paint, and when buffing is a smart fix versus a complete waste of time.

That is the real question. Not just how to rub on polish, but which scratches can actually be buffed out and which ones cannot.

The short answer is this: light surface scratches, paint transfer, swirl marks, and some clear-coat defects can often be improved or removed with the right polishing compound and technique, but deeper scratches that cut through the clear coat usually need touch-up paint, professional refinishing, or both. That distinction shows up clearly in product guidance from detailing brands and in independent testing. Meguiar’s says fine scratches and blemishes can be removed with clear-coat-safe products like ScratchX or Ultimate Compound, while Consumer Reports found that scratch repair pens only work on minor surface scratches and can even make the damage look worse. (Meguiar’s catalog, Consumer Reports)

Why this question gets confused so fast

A lot of online advice treats all scratches like they are the same. They are not.

Some marks are barely more than paint transfer or very fine clear-coat abrasion. Others go through the clear coat into the base color. Some reach the primer. Some even expose bare metal or plastic. If you use the same method for all of those, you are going to get bad results.

That is why the first rule of buffing out scratches is not “buy a compound.” The first rule is figure out how deep the damage is.

The first thing you need to know: clear coat versus deeper paint damage

Modern automotive paint usually includes a top clear coat over the color coat. If a scratch is only affecting that upper clear layer, you have a much better chance of improving it with polishing or a light compound.

If the scratch goes deeper into the color layer, primer, or substrate, buffing alone will not truly remove it. At best, polishing may soften the edges or reduce how visible it looks. But once paint is physically missing, you are no longer just correcting the surface. You are dealing with lost material.

This is exactly why manufacturers also sell touch-up paint. Toyota’s official parts site, for example, markets genuine touch-up paint specifically for scratches and chips, which is a direct reminder that some defects need paint repair rather than polishing.

The easiest test: if your fingernail catches, be careful

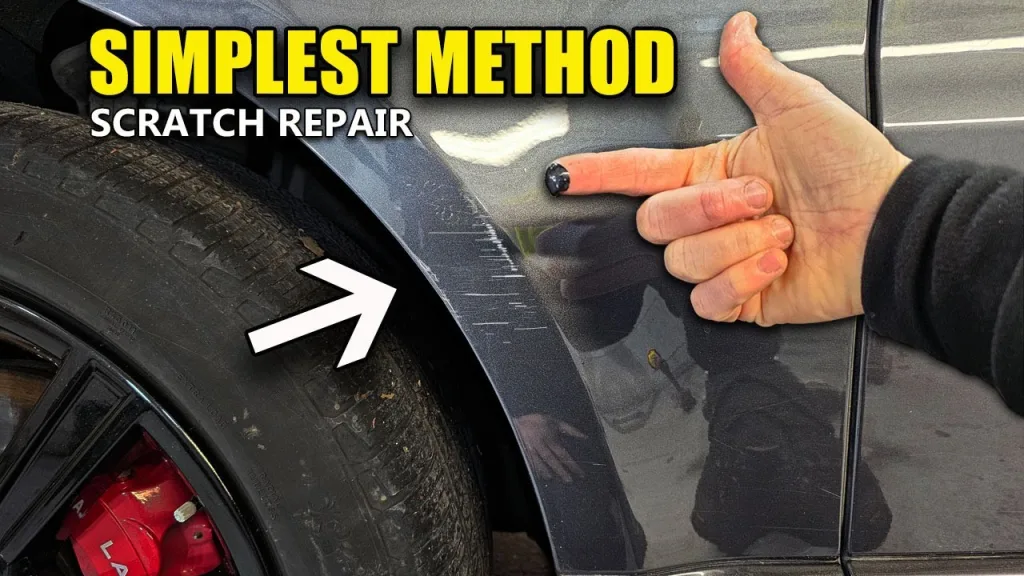
One of the most common quick checks is to lightly run a fingernail across the scratch. If your nail does not catch, the damage is often lighter and more likely to be in the clear coat or on the surface. If your nail catches clearly, the scratch is usually deeper and less likely to be fully corrected by buffing.

That is not a laboratory test, but it is a useful real-world filter. It helps you stop expecting compound to do the job of paint.

What kinds of scratches can usually be buffed out?

The scratches most likely to respond well to buffing or polishing include:

  • light clear-coat scratches
  • swirl marks
  • fingernail scratches around door handles
  • paint transfer from another object
  • fine blemishes and surface scuffs
  • light oxidation-related defects that look like scratching

Meguiar’s product guidance specifically says its ScratchX is designed for fine scratches, scuff marks, paint transfer, and fingernail marks, while the company’s FAQ says small scratches and swirl marks can be removed with a clear-coat-safe paint cleaner like Ultimate Compound. (Meguiar’s FAQ)

That is the category where home correction usually has the best chance of success.

What kinds of scratches usually cannot be buffed out completely?

Buffing is usually the wrong expectation for:

  • deep scratches that expose primer
  • scratches that expose bare metal or plastic
  • chips with missing paint
  • damage that has sharp edges and obvious depth
  • wide gouges from impact
  • peeling or failing paint around the damaged area

This is where a lot of DIY advice goes wrong. It sells people on the idea that every scratch can be “erased.” But if material is gone, polishing cannot magically replace it.

At that point, the better paths are usually touch-up paint, localized paint repair, or professional refinishing.

What you actually need to buff out light scratches

If the scratch is minor enough to try correcting at home, the basic process usually needs:

  • a wash first
  • a clean microfiber towel
  • a clear-coat-safe scratch remover or compound
  • optional polishing pad or foam applicator
  • patience and good lighting

This is where product choice matters. Meguiar’s says Ultimate Compound removes oxidation, scratches, water spots, and blemishes while being clear-coat safe. Its catalog also says small below-surface imperfections and fine scratches can be safely removed with ScratchX or Ultimate Compound. (Meguiar’s catalog)

The key phrase there is clear-coat safe. Modern paint systems are not the place for aggressive old-school rubbing compounds unless you really know what you are doing.

Step 1: Wash the area first

Never start buffing a dirty panel. Dirt and grit can turn a small correction job into more scratching very quickly.

Wash the panel thoroughly, dry it, and inspect the area in strong light. Sometimes what looks like a scratch is partly dirt, rubber, or transferred paint. That is good news because surface contamination is easier to remove than true paint damage.

Step 2: See if it is actually paint transfer

Paint transfer often looks worse than it is. If another car, shopping cart, wall, or pole rubbed the panel, some of what you see may be the other material sitting on top of your clear coat rather than your paint being deeply cut.

This is where a mild scratch remover or compound can make a big difference. If the mark lightens quickly after a careful test spot, you may be dealing more with transfer and surface scuffing than with a deep scratch.

Step 3: Start with the least aggressive method

This is one of the smartest habits in paint correction. Always start with the mildest realistic product and test a small area first.

That might mean beginning with a lighter scratch remover rather than jumping straight to a heavier compound. Meguiar’s own scratch-removal positioning reflects this logic, with products aimed at fine blemishes before more aggressive defect-removal work. (Meguiar’s Scratch Kit)

The reason is simple: every polishing step removes or levels a little material. You want the minimum correction that gives you the result you need.

Step 4: Work the product properly, not just quickly

A lot of people get bad results because they wipe compound on and off like wax. Scratch correction is not just about applying a product. It is about working the abrasive long enough, with the right pressure, to actually level or refine the defect.

Professional paint-finishing guidance from 3M is aimed more at collision and refinish work than casual driveway detailing, but it still reinforces an important principle: scratch removal and paint finishing are process-based, and results depend on the correct abrasive step, enough working time, and the right follow-up. 3M’s paint finishing and detail shop guidance and Perfect-It finishing system materials show that even professional scratch refinement moves through graded processes rather than one magic swipe.

For an at-home job, that means slow, controlled passes on a small section, not frantic rubbing over a huge panel.

Step 5: Wipe, inspect, repeat only if the defect is improving

After a test pass, wipe the area clean with a microfiber towel and inspect the result in direct light.

If the mark is clearly improving, you may be on the right track.

If nothing changes, or if the scratch still has sharp depth and obvious color loss, you are probably outside the range where buffing alone is a real solution.

That is the point where people either waste time or save time. If the defect is too deep, polishing more aggressively can just thin surrounding clear coat without truly fixing the problem.

Step 6: Finish with polish or protection

If you successfully reduce or remove the scratch, you should follow up with finishing polish or paint protection depending on the process you used.

Compounds and scratch removers are designed to correct defects, not necessarily leave long-term protection behind. A finishing polish, wax, or sealant can help restore gloss and protect the corrected area.

Consumer Reports’ wax buying guide also notes that some “cleaner wax” products are mildly abrasive and can remove some paint from the surface, which is another reminder that correction and protection are not the same step. (Consumer Reports)

Scratch repair pens: are they worth it?

This is one of the most searched subtopics around paint scratches, and the answer is more limited than a lot of ads imply.

Consumer Reports tested scratch repair pens and found they do not work on much beyond minor surface scratches and may actually make damage look worse. That does not mean every pen is useless in every situation. But it does mean you should not expect a pen to erase a meaningful scratch that really needed polishing or paint repair in the first place. (Consumer Reports)

That finding lines up with the broader logic here: shallow defects may respond to mild correction, but deeper damage usually needs real refinishing, not a cosmetic pen trick.

When touch-up paint makes more sense than buffing

If you can see the scratch is through the color layer, or you can see primer or exposed substrate, buffing is not the main fix anymore.

At that point, touch-up paint becomes much more relevant. That is exactly why automakers like Toyota sell factory-matched touch-up paint for chips and scratches.

Touch-up paint will not make every repair invisible, especially if the damage is large. But it is a better response than endlessly polishing paint that is no longer there.

When you should stop and go to a body shop

You should seriously consider professional repair if:

  • the scratch is deep enough to expose primer or metal
  • the panel has multiple damaged layers
  • the scratch is large and highly visible
  • the area is on a body line or edge where hand correction is risky
  • the damage includes denting or cracking
  • the vehicle has premium paint you do not want to experiment on

There is a big difference between improving a light scratch on a daily driver and trying to make a deep key mark disappear on a dark, newer car without repainting. Knowing that difference saves money and disappointment.

The biggest mistake DIYers make

The biggest mistake is believing more aggression automatically equals better results.

In reality, aggressive polishing on a scratch that is too deep can just remove healthy surrounding clear coat, reduce gloss, and still leave the scratch behind. That is why the smartest approach is always:

  1. inspect the defect
  2. start mild
  3. test a small area
  4. escalate only if the scratch is truly improving
  5. stop when the defect clearly needs paint, not polish

So how do you buff out scratches on a car?

The cleanest answer is this: you can buff out light scratches by washing the area, confirming the damage is shallow enough, using a clear-coat-safe scratch remover or compound on a small test spot, working it carefully, and inspecting whether the defect is actually improving. Fine clear-coat defects, paint transfer, and light scratches often respond well. Deeper scratches usually do not. (Meguiar’s FAQ, Meguiar’s Ultimate Compound)

Final verdict

If you want the real answer to how to buff out scratches on car, it is this: light scratches can often be improved or removed with proper washing, a clear-coat-safe compound, and controlled polishing, but deeper scratches that go through the paint usually need touch-up paint or professional repair. That is why the smartest move is to identify the depth first, start with the least aggressive correction method, and stop once you realize you are dealing with missing paint rather than a surface defect. (Meguiar’s catalog, Consumer Reports)

So the short practical version is this: if it is light, polish it; if it is deep, paint it; if it is severe, price out a body shop before you burn through clear coat chasing a miracle.

Recommended Posts

Turbocharger Wastegate Problems: How Small Mechanical Faults Can Affect Boost Control

Turbocharger Wastegate Problems: How Small Mechanical Faults Can Affect Boost Control

Turbocharger problems are often associated with failure of the entire unit. Loss of power, unstable boost, or unusual noise under acceleration may suggest that the turbocharger itself is worn out. Yet boost control depends on more than the compressor wheel, turbine, and bearings. The wastegate regulates exhaust energy reaching the turbine, keeping turbocharger speed and boost pressure within the intended range. When its flap, shaft, linkage, or related hardware wears, the symptoms can resemble a larger failure. This is why a Wastegate Repair Kit may be relevant when the turbocharger core remains serviceable but its boost-control mechanism has localized wear. What Happens When the Wastegate Mechanism Wears Wastegate wear usually appears as changes in boost behaviour rather than one clear symptom. Excessive clearance around the flap or shaft can cause a metallic rattle, while poor sealing may let exhaust gas bypass the turbine too early. This can result in underboost, weaker acceleration, or inconsistent response across the RPM range. If the mechanism fails to open correctly, excessive boost may develop and trigger engine-management intervention. Typical symptoms include: Boost pressure differing from the expected target. Underboost during acceleration or sustained load. Overboost or boost-control warnings. Intermittent power delivery. Rattling near the turbocharger. Reduced response at certain RPM ranges. These symptoms do not confirm a wastegate fault. Leaks, actuators, sensors, control valves, hoses, software issues, or internal turbocharger damage can behave similarly. Diagnosis should compare commanded and actual boost while checking the wastegate's mechanical operation. Why Replacing the Entire Turbo May Be Excessive A turbocharger can develop localized mechanical wear without its complete assembly failing. Compressor and turbine wheels, bearings, shaft, housings, and lubrication systems may remain serviceable while the wastegate deteriorates. A precise repair separates the failed component from parts that are still usable, avoiding unnecessary replacement of the entire unit. The decision should follow a complete inspection. A technician should determine whether there is: Significant rotating-assembly damage. Excessive shaft movement or bearing wear. Damaged compressor or turbine wheels. Housing damage affecting safe operation. A fault limited to the wastegate mechanism. If the core remains sound and the fault is clearly localized, targeted repair may be appropriate. Complete replacement can still be justified by secondary damage, thermal distortion, severe corrosion, or extensive wear. The key is to establish the condition of the whole turbocharger first. When a Targeted Repair Is the Better Approach When diagnostics confirm localized wastegate wear and the rest of the turbocharger remains serviceable, targeted repair can be more logical than replacing the complete assembly. A Wastegate Repair Kit may allow worn components to be replaced while retaining sound original parts. Compatibility must be confirmed for the specific turbocharger design and application. Repair should begin with inspection rather than simple parts selection. The technician needs to identify why the mechanism stopped working correctly and which components have deteriorated. Particular attention should be given to: Flap and shaft condition. Mechanical play and seating surfaces. Linkage and actuator movement. Heat damage, corrosion, or distortion. Condition of the rotating assembly. A component that fits physically but does not reproduce the original geometry can create another boost-control problem. Part quality is also critical. A wastegate operates under high temperatures, vibration, repeated movement, and strong exhaust-gas forces, so correct dimensions and materials directly affect the function of the flap, shaft, and related components.

/What is the Most Common Problem with the Jeep Grand Cherokee

What is the Most Common Problem with the Jeep Grand Cherokee

The Most Common Problem with the Jeep Grand Cherokee: What Every Owner Should Know The Jeep Grand Cherokee has a reputation that’s equal parts rugged capability and frustrating reliability. It can tow, crawl over rocks, and haul the family in comfort. But if you talk to enough owners—or spend time digging through complaint databases—you’ll notice a pattern. One issue comes up again and again. The most common problem with the Jeep Grand Cherokee is electrical system failure. That’s not just a minor annoyance. Electrical gremlins can leave you stranded, drain your battery overnight, or cause a chain reaction of warning lights that makes you wonder if the whole SUV is falling apart. Here’s a closer look at what goes wrong, which models are most affected, and what you can do about it. WHY ELECTRICAL ISSUES TOP THE LIST Across multiple model years, electrical complaints dominate owner reports and NHTSA data. For the 2024 Grand Cherokee, owners frequently report engines losing power, batteries dying, exterior lighting malfunctioning, and infotainment systems freezing. But the problem isn’t new. Older generations have their own electrical headaches, especially the infamous TIPM. The TIPM Problem The Totally Integrated Power Module (TIPM) is a fuse box on steroids. It controls fuel pump operation, lighting, wipers, and more. When it fails—and it often does—you might experience: - A fuel pump that won’t prime or stops working - Wipers that run nonstop or won’t turn on - Random warning lights - Battery drain that kills the battery overnight Replacing a TIPM isn’t cheap, and diagnosing the issue can be a nightmare because the symptoms mimic other problems. Battery Drain and Infotainment Glitches Modern Grand Cherokees are rolling computers. That means parasitic battery drains, unresponsive touchscreens, and software bugs are common. Some owners have replaced batteries multiple times only to find the real culprit is a faulty module that never sleeps. OTHER COMMON PROBLEMS WORTH KNOWING While electrical faults are the most frequent, they aren’t the only issues. If you’re shopping for a Grand Cherokee, keep these in mind too. Transmission Trouble Rough shifting, delayed engagement, and occasional slipping into neutral are common complaints, especially in model years from 2005 through 2015. Some owners describe a “clunk” when shifting from park to drive. Engine and Cooling Issues The 2024 model has seen reports of stalling, overheating, and excessive oil consumption. Older models (2011–2014) have fuel-related stalling complaints, often at higher mileage. Suspension Recall Jeep recently recalled over 328,000 Grand Cherokees from 2021–2023 because rear coil springs could detach while driving. It’s the third recall for the same problem, which tells you something about persistence. MODEL YEARS TO WATCH Based on complaint data, these model years are often flagged as ones to approach with caution: - 2011 - 2012 - 2014 - 2015 - 2018 - 2021–2024 That doesn’t mean every single one is a lemon. But electrical failure rates on some of these years are up to 3.2 times the model’s median. If you’re buying used, a pre-purchase inspection by a mechanic who knows Jeeps is worth every penny. WHAT YOU CAN DO If you own a Grand Cherokee or plan to buy one: 1. Check for recalls using your VIN on the NHTSA website. 2. Scan for stored codes before buying. Electrical issues often leave ghost codes. 3. Test the battery and charging system—a weak battery can trigger dozens of false warnings. 4. Consider an extended warranty if you’re buying an older model with known electrical quirks. 5. Join owner forums to learn the specific workarounds for your model year. THE BOTTOM LINE The Jeep Grand Cherokee is still a capable, comfortable, and iconic SUV. But its Achilles’ heel is the electrical system. From TIPM failures to battery drains and infotainment glitches, these problems are the most common complaints among owners. If you can look past them—or budget for repairs—you’ll enjoy everything else the Grand Cherokee does well. Just don’t ignore the warning signs. Have you dealt with electrical issues in your Grand Cherokee? Share your story in the comments—it might help another owner avoid the same headache.

Freightliner Bumpers and Cascadia Fairing Panels for a Stronger, Sleeker Truck

Shop durable Freightliner truck bumpers and Cascadia fairing panels for sale. Precise-fit exterior components for 2008-2017 and 2018+ trucks with fast shipping and expert support. Keeping a Freightliner Cascadia in top condition is about more than the engine under the hood — the exterior body components play a huge role in how the truck performs, looks, and holds its value. Side fairings, step skirts, and front-end pieces all work together to cut drag, protect vulnerable systems, and give the rig a clean, professional presence on the road. Operators searching for quality freightliner bumpers for sale often find that upgrading the entire front and side profile delivers the biggest return. When you pair durable freightliner truck bumpers with well-fitted aerodynamic panels, your Cascadia gains both protection and efficiency in one smart upgrade. The Value of a Complete Exterior Upgrade A truck's exterior is its first line of defense and its calling card all at once. Aerodynamic fairing panels smooth the airflow around the fuel tanks and drive area, lowering wind resistance and helping every gallon of diesel go further. A solid front end absorbs impacts and shields the radiator and cooling system from road debris. Together these components reduce long-term repair costs while keeping the truck looking sharp mile after mile. Over time, that combination of efficiency and protection adds up to real savings, since a truck that burns less fuel and stays out of the repair bay simply earns more for its owner on every route. At tacoma-truckparts.com, the Cascadia selection covers front, middle, and rear fairing panels, step skirts, extensions, and complete sets for both driver and passenger sides. Whether you run a 2008-2017 model or a 2018-and-newer truck, there are pieces engineered to match your exact frame and factory mounting points. Precision Fit for Every Model Year Fitment is everything with exterior body components. Panels and front-end pieces built for your specific model year line up cleanly with existing hardware, so installation is straightforward and the finished surface sits flush and secure. Durable materials stand up to road spray, gravel, and constant vibration, keeping the truck looking its best season after season. Reinforced panels and aluminum step skirts add both function and a polished, professional finish that owner-operators take pride in. Choosing correctly-sized components also protects everything around them. Well-fitted fairings shield tanks, steps, and wiring from flying debris, while a strong front end guards the systems behind it. That kind of protection keeps your Cascadia earning out on the highway instead of sitting in the shop. Efficiency, Protection, and Uptime Downtime is expensive, which is why fast order processing and dependable availability matter as much as the parts themselves. Orders ship quickly, backed by knowledgeable support that understands the daily demands facing fleet managers and independent drivers alike. Being able to find the exact panel, skirt, or front-end piece you need without guesswork keeps maintenance simple and predictable. Investing in your Cascadia's exterior is a smart move for fuel economy, curb appeal, and long-term resale value. With aerodynamic fairings and dependable front-end components working together, your truck cuts cleanly through the wind, looks its best, and stays ready for the next long haul. A well-maintained, polished rig also builds trust with customers and makes a strong impression during inspections. Browse the full selection today and give your Freightliner Cascadia the efficient, protected, road-ready finish it truly deserves.