



Simi Valley Chrysler Dodge Jeep Ram

Blog

Brake Caliper Compression Tool: The Best Guide to Compressing Front and Rear Caliper Pistons the Right Way

Brake Caliper Compression Tool

A brake caliper compression tool is one of those tools that looks simple until you actually try to do a brake job without one. Then it becomes obvious very quickly why so many DIYers search for terms like brake caliper compression tool, brake caliper piston compression tool, rear brake caliper compression tool, disc brake caliper compression tool, and best brake caliper compression tool.

When you replace brake pads, the new pads are thicker than the worn-out ones you are removing. That means the caliper piston has to be pushed back into the caliper housing to make room. If you do not compress it correctly, the caliper will not fit over the new pads, you can damage components, and on some rear calipers you can make the job much worse by using the wrong method.

This guide explains everything properly:

  • what a tool for compressing brake calipers actually does,
  • the different types of brake caliper compression tools,
  • front vs rear caliper piston differences,
  • when a simple tool works and when you need a full kit,
  • how to compress a brake caliper safely,
  • and what to know about how to compress brake caliper without tool in an emergency.

What Is a Brake Caliper Compression Tool?

A brake caliper compression tool is a tool used to push or rotate the caliper piston back into the caliper bore during a brake pad replacement or brake service.

Its job is simple in theory:

  • retract the piston,
  • create space for new brake pads,
  • and help the caliper fit back over the rotor and pad assembly.

But not all calipers work the same way. Some front calipers only need to be pressed straight in. Many rear calipers, especially those integrated with a parking brake system, need to be turned and pressed at the same time. That is why there are multiple tool types and why a random clamp is not always enough.


Why You Need to Compress the Brake Caliper Piston

As brake pads wear down, the caliper piston gradually moves outward to maintain contact with the pads. When you install new pads, they are much thicker, so the piston must go back in.

If you do not retract the piston:

  • the caliper may not clear the new pads,
  • you may struggle to reinstall the caliper,
  • you risk forcing parts together incorrectly,
  • and you can damage the piston, seals, or slide hardware.

This is why a brake caliper piston compression tool is a standard part of any brake-service setup.


What the Tool Actually Does

A good tool to compress brake calipers applies even force to the piston face without damaging it. Depending on the design, it may:

  • push the piston straight back,
  • rotate and push the piston simultaneously,
  • spread evenly across the piston face,
  • or fit into piston notches for rear parking-brake calipers.

That last part matters. Rear calipers are where many DIYers get caught. They assume all pistons just push in. Many do not.


Types of Brake Caliper Compression Tools
71EdcTfAjiL._AC_SL1500_

There is no single universal design that covers every vehicle equally well. Here are the main types.

1. Basic piston press or spreader tool

This is the simplest style. It is often a screw-driven press that pushes the piston back slowly and evenly. It works well for many front calipers.

Best for:

  • front disc brake jobs,
  • simple floating calipers,
  • occasional DIY work.

This is often what people mean when they search disc brake caliper compression tool.


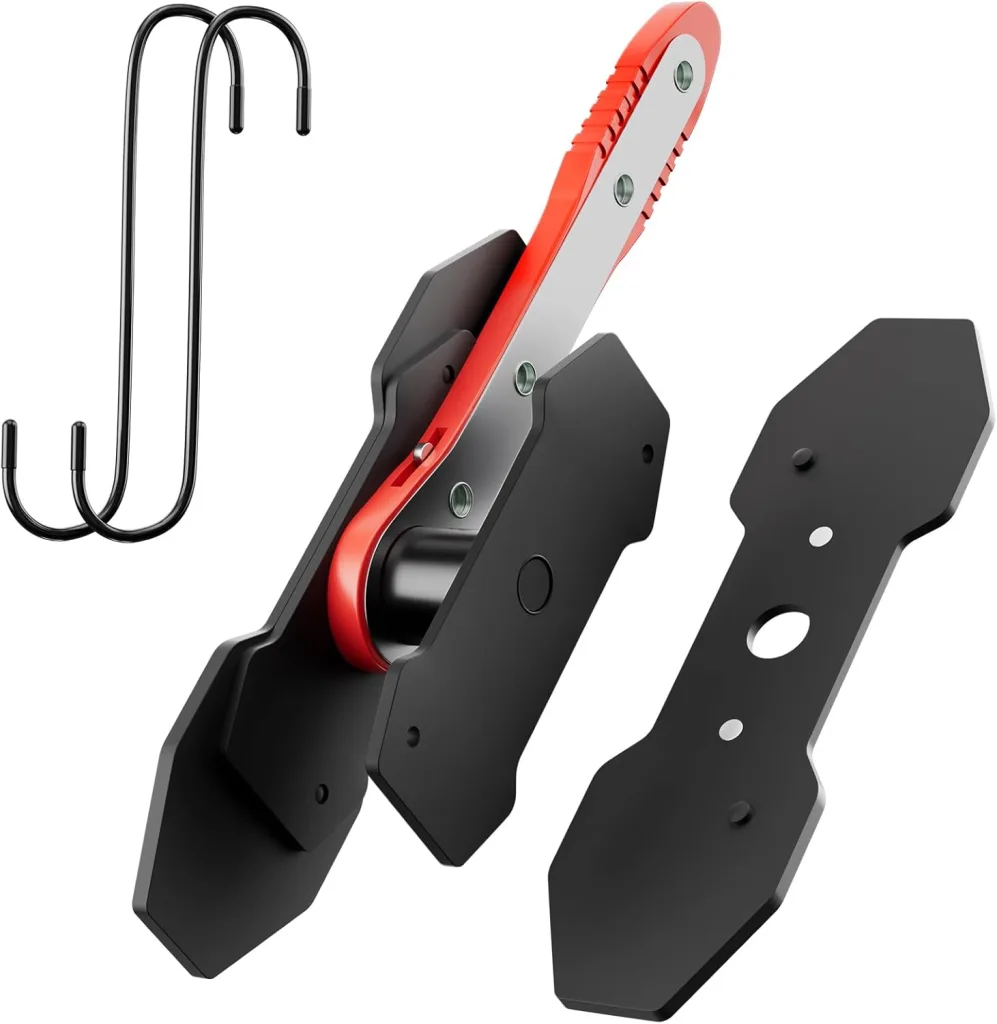
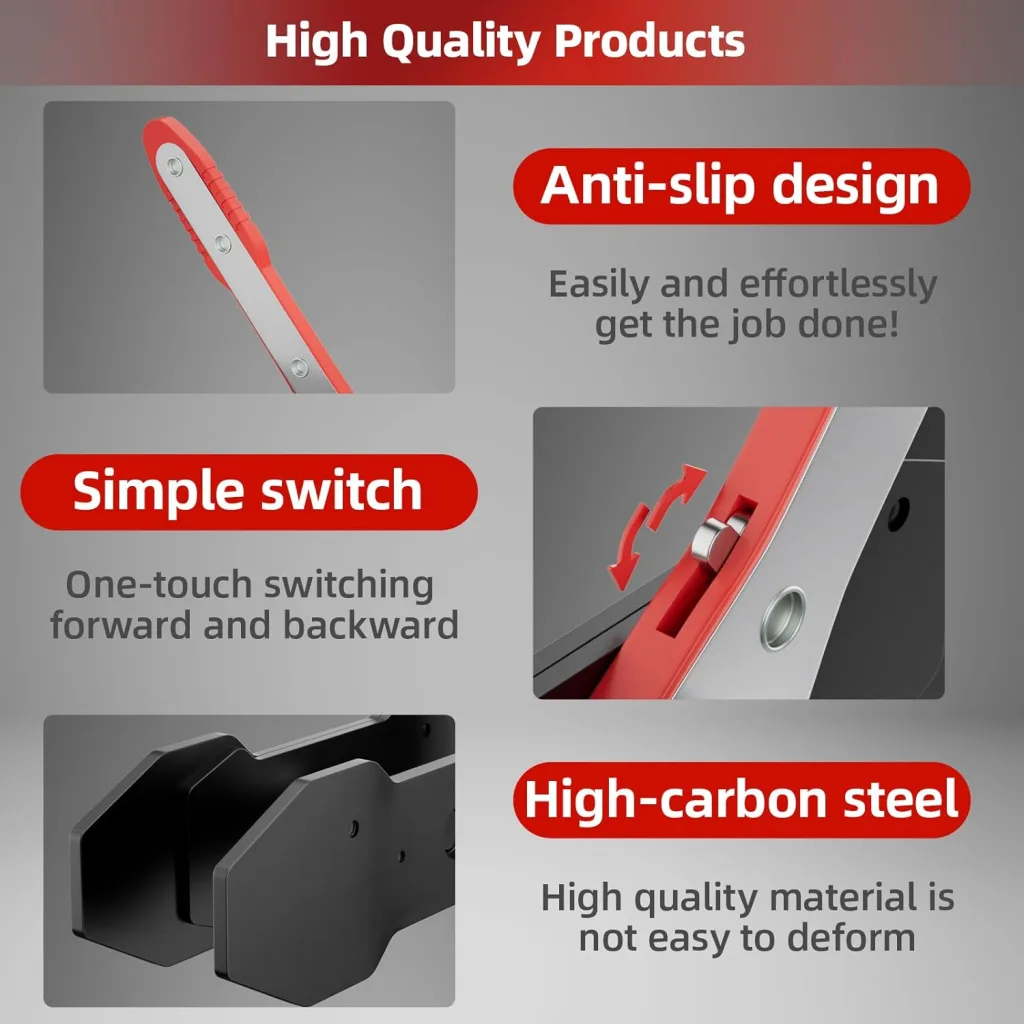
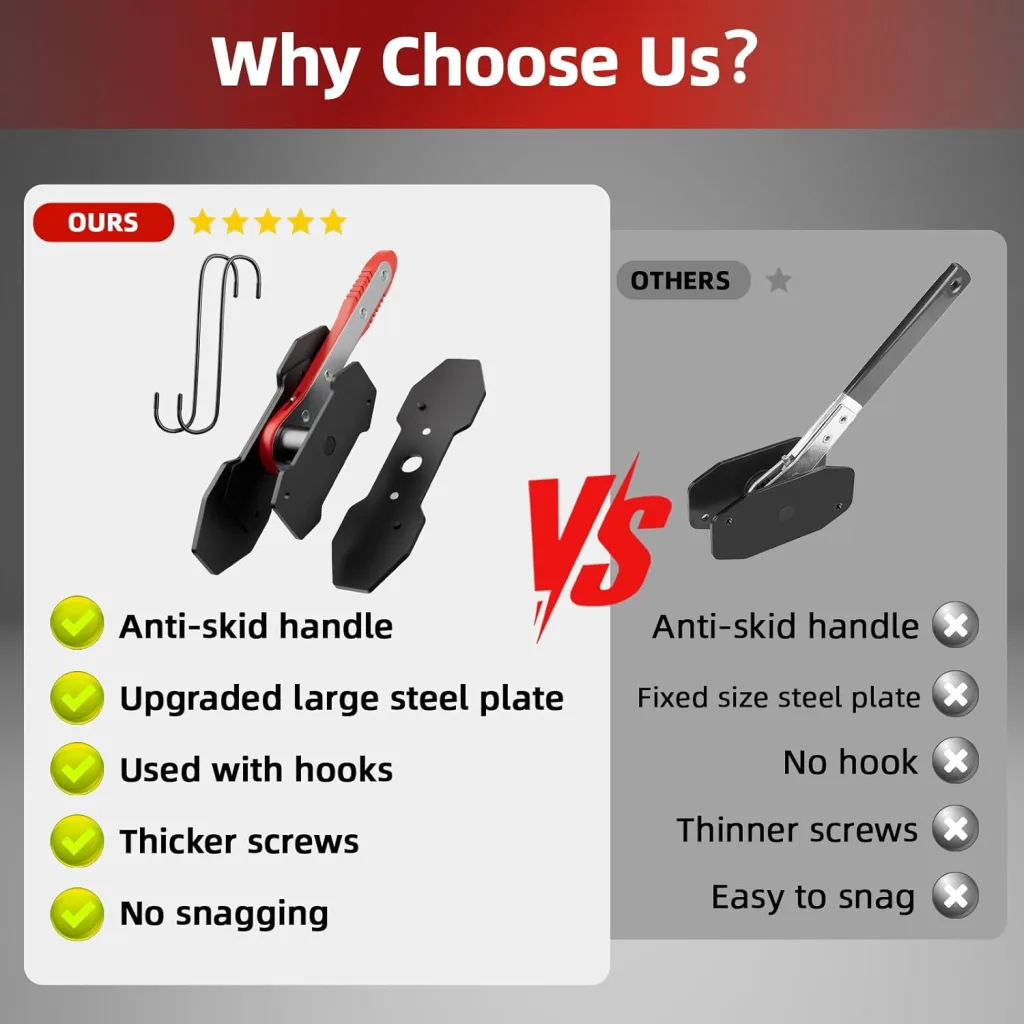
2. Ratcheting brake caliper compression tool

A ratcheting brake caliper compression tool uses a ratchet-style mechanism to spread or compress with more speed and control. These are popular because they are easy to use and work well on many front calipers.

Best for:

  • faster pad changes,
  • frequent brake jobs,
  • people who want easier one-hand control.

The main advantage is convenience. The better ones also feel smoother and more controlled than improvised methods.


3. Cube brake caliper compression tool

A cube brake caliper compression tool is a compact multi-face tool designed mainly for rotating rear caliper pistons with different notch patterns.

Best for:

  • rear calipers that must be turned,
  • occasional DIY use,
  • budget-conscious users.

It is cheap and compact, but not always the easiest or fastest tool to use. It usually requires a ratchet or extension and can be awkward in tight spaces.


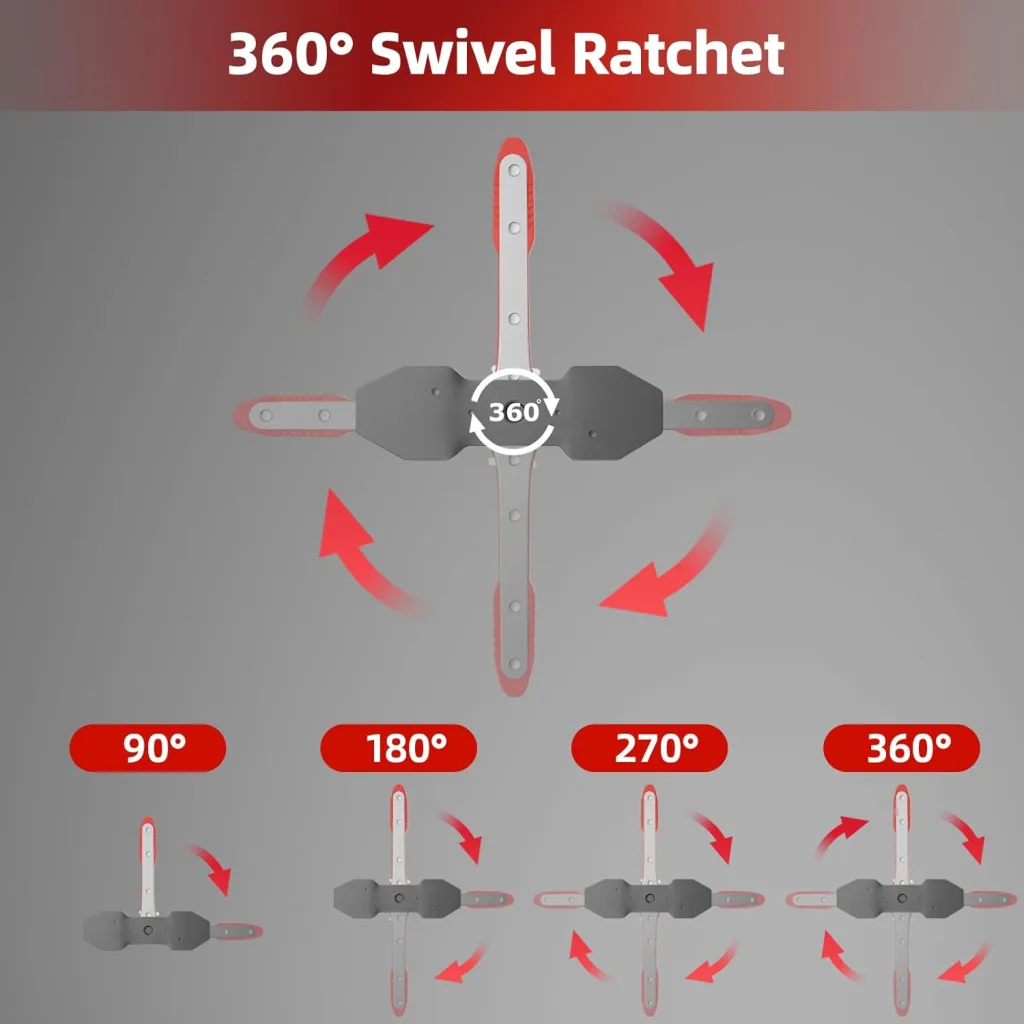
4. Brake caliper compression tool kit

A brake caliper compression tool kit is the most versatile choice. It usually includes:

  • left-hand and right-hand threaded forcing tools,
  • multiple adapter plates,
  • and a carrying case.

These kits are designed for front and rear calipers across many makes and models.

Best for:

  • working on multiple vehicles,
  • rear screw-in calipers,
  • enthusiasts and serious DIYers,
  • anyone wanting better compatibility.

If you do your own brakes regularly, a full kit is often the smartest buy.
61GB9fVOf4L._AC_SL1500_

5. Rear brake caliper compression tool

A rear brake caliper compression tool is specifically meant for calipers that need to rotate while retracting. These are common on rear brakes with integrated parking brake mechanisms.

Best for:

  • rear caliper service,
  • vehicles with screw-in piston designs,
  • jobs where a standard press tool will not work.

This is where people most often damage parts by using the wrong method.


Front vs Rear Brake Caliper Compression: The Big Difference

This is the part many guides rush past, but it is the most important.

Front caliper pistons

Most front caliper pistons are compressed by simply pressing them straight back into the bore. A clamp, press tool, or ratcheting spreader can often do the job.

Rear caliper pistons

Many rear caliper pistons must be rotated while being pressed inward. This is because the parking brake mechanism is built into the caliper. These pistons often have notches or slots on the piston face for a turning tool.

If you try to force one of these straight in with raw pressure, you can:

  • damage the parking brake mechanism,
  • tear seals,
  • strip internal components,
  • or fail to retract the piston at all.

So when someone searches how to compress rear brake caliper piston without tool, the real answer is: sometimes you should not attempt it unless you know exactly what style of caliper you are working with.


The Best Brake Caliper Compression Tool for Each Type of User

Best for occasional DIYers

A basic press tool or simple ratcheting brake caliper compression tool is usually enough if you mainly work on common front calipers.

Best for mixed front and rear jobs

A full brake caliper compression tool kit is the strongest all-around choice. It covers more vehicles and saves frustration on rear calipers.

Best for rear brake service

A proper rear brake caliper compression tool or full wind-back kit is the safest option.

Best for value

A cube brake caliper compression tool is inexpensive and useful, but it is not the easiest option for repeated work.

Best overall

For most people who do their own brakes more than once, the best brake caliper compression tool is a full kit with multiple adapters plus a proper threaded press. It gives you front and rear capability and prevents a lot of headaches.


How to Use a Brake Caliper Compression Tool Properly

Now let’s get into the real-world process.

Step 1: Confirm what type of caliper you have

Before touching the piston, determine whether the caliper:

  • pushes straight in,
  • or must be turned while pressing.

Do not guess. If it is a rear caliper with an integrated parking brake, it often requires a wind-back style tool.


Step 2: Check the brake fluid reservoir

As you compress the piston, brake fluid returns to the reservoir. If the reservoir is already full, fluid may overflow.

Before compressing:

  • inspect fluid level,
  • remove some fluid if necessary,
  • protect painted surfaces because brake fluid damages paint.
61OmqHsT65L._AC_SL1500_

Step 3: Open the bleeder or not?

There are two common approaches.

Compress with bleeder closed

This is common and fast. Fluid is pushed backward through the system.

Compress with bleeder open

Some mechanics prefer opening the bleeder so old fluid exits at the caliper instead of being pushed back upstream. This can be cleaner hydraulically, especially on older systems, but it requires more care and usually a hose/bottle setup.

Either way, the important point is to compress slowly and under control.


Step 4: Position the tool correctly

A brake caliper piston compression tool should sit squarely on the piston face. Uneven pressure can cock the piston or damage the dust boot.

For rear wind-back tools:

  • match the adapter to the piston notch pattern,
  • confirm thread direction,
  • and make sure the tool stays centered.

Step 5: Compress slowly

Do not rush. Whether using a ratcheting spreader, screw press, or full wind-back kit, retract the piston gradually.

Watch for:

  • torn boots,
  • binding,
  • fluid overflow,
  • unusual resistance,
  • or crooked piston movement.

Any of those mean stop and reassess.


Step 6: Align rear piston notches if needed

Many rear calipers require the piston face to end in a specific orientation so the brake pad pin or tab can sit correctly in the notch. This step gets missed often.

If the piston is not aligned properly:

  • the pad may not sit correctly,
  • the caliper may not assemble right,
  • or the rear brakes may drag.

How to Compress Brake Caliper Without Tool

Searches for how to compress brake caliper without tool, how to compress brake caliper piston without tool, and how to compress rear brake caliper piston without tool are common because people often start a brake job and realize they do not have the right tool.

Here is the honest answer.
81uHrdXqE+L._AC_SL1500_

For front calipers

In some cases, you can compress a front piston carefully using:

  • a large C-clamp,
  • channel-lock pliers with an old pad in place,
  • or another improvised pressing method.

But even then, you need to be careful not to:

  • damage the piston face,
  • crack the caliper body,
  • tear the dust boot,
  • or apply uneven force.

So yes, sometimes a front caliper can be compressed without a dedicated tool, but it is still better to use a proper tool for compressing brake calipers.

For rear calipers

This is where the answer changes.

If the rear caliper is a screw-in design, trying to compress it without the proper rotating tool is a bad idea. You may get nowhere, or worse, damage the caliper.

So for most rear parking-brake calipers, how to compress rear brake caliper piston without tool should really be read as: do not force it without verifying the correct method first.


Common Mistakes When Compressing Brake Calipers

1. Assuming all pistons push straight in

This is the classic error on rear brake jobs.

2. Forcing a rear screw-in piston with a clamp

This can damage the internal parking brake mechanism.

3. Compressing too fast

Rapid compression can shock seals and cause fluid overflow.

4. Ignoring the brake fluid reservoir

Overflowed brake fluid creates a mess and can damage paint.

5. Damaging the dust boot

A torn boot invites dirt and moisture into the caliper.

6. Using the wrong adapter in a tool kit

If the adapter does not seat properly, the piston can slip or bind.

7. Failing to inspect slide pins and hardware

A stuck caliper problem is not always a piston problem. Sometimes the real issue is seized slide pins or worn bracket hardware.

8. Not checking for piston binding

If the piston is unusually hard to retract, there may be corrosion, seal failure, or caliper damage.


Signs the Caliper Piston or Caliper May Have a Problem

A compression tool is not meant to brute-force a bad caliper back into service. If you notice any of the following, inspect more closely:

  • piston will not retract even with the correct tool,
  • dust boot is ripped,
  • fluid leakage is visible,
  • caliper is sticking badly,
  • one pad is worn far more than the other,
  • rear piston refuses to rotate correctly,
  • piston retracts unevenly or at an angle.

In those cases, the problem may be:

  • seized piston,
  • internal corrosion,
  • parking brake mechanism failure,
  • collapsed hose preventing pressure release,
  • or slide pin binding.

A brake caliper compression tool kit helps with the service, but it does not fix a damaged caliper.


Ratcheting Tool vs Full Compression Kit

This is one of the most useful comparisons.

Ratcheting brake caliper compression tool

Best for:

  • quick front brake jobs,
  • convenience,
  • simple compression tasks.

Pros:

  • fast,
  • easy to use,
  • great for straightforward front calipers.

Cons:

  • less useful for rear screw-in calipers,
  • not as universal.

Full brake caliper compression tool kit

Best for:

  • front and rear brake service,
  • multiple vehicles,
  • long-term DIY value.

Pros:

  • much more versatile,
  • handles screw-in rear pistons,
  • better for mixed fleets.

Cons:

  • larger,
  • more pieces,
  • slightly slower to set up.

For a single vehicle with standard front calipers, a ratcheting tool may be enough. For broader brake work, the kit wins.


Harbor Freight, AutoZone, O’Reilly, and Nearby Tool Searches

A lot of people search:

  • brake caliper compression tool harbor freight
  • brake caliper compression tool autozone
  • brake caliper compression tool oreillys
  • brake caliper compression tool nearby

That tells you something important: this is often a same-day need. People usually realize they need the tool in the middle of a brake job.

If that is your situation, the priority is not fancy branding. The priority is getting the correct type:

  • straight press for front pistons,
  • or wind-back kit for rear calipers.

The wrong nearby tool is still the wrong tool.


What to Look for in the Best Brake Caliper Compression Tool

If you are buying one and want the smartest choice, focus on these features.

Strong threaded mechanism

Cheap screw tools can bind or feel rough under load.

Good adapter fit

A full kit is only useful if the adapters seat properly on piston faces.

Left- and right-hand threaded options

Some rear calipers require different thread directions.

Durable case and organization

Tool kits are frustrating when adapters get mixed up or lost.

Clear compatibility

The best kits cover a broad range of vehicle types and rear piston patterns.

Smooth action under pressure

You want control, not a jerky tool that feels like it will slip.


Do You Need a Full Brake Caliper Compression Tool Kit?

You should strongly consider a full brake caliper compression tool kit if:

  • you work on more than one vehicle,
  • you do rear brakes often,
  • you own European or mixed-brand vehicles,
  • you do your own brake service regularly,
  • or you want to avoid mid-job surprises.

If you only do basic front pads once in a while, a simpler tool may be enough. But the full kit usually pays for itself quickly in saved time and reduced frustration.


Final Verdict

A brake caliper compression tool is not optional if you want brake jobs to go smoothly. It is one of the core tools that separates a controlled pad replacement from a frustrating fight with the caliper.

For simple front brake jobs, a basic press tool or ratcheting brake caliper compression tool may be enough.

For rear brake service, especially on vehicles with integrated parking brakes, a proper rear brake caliper compression tool or full brake caliper compression tool kit is the right answer.

And for most DIYers who want one solution that covers real-world brake work, the best brake caliper compression tool is usually a complete kit with multiple adapters and a proper wind-back mechanism. It gives you the flexibility to handle both front and rear pistons correctly, which is exactly where most people run into trouble.

Using the correct tool to compress brake calipers does three things:

  • makes the job faster,
  • reduces the chance of damage,
  • and helps ensure the new pads fit and function the way they should.

That is the difference between just getting the caliper back on and doing the brake job properly.

Recommended Posts

Freightliner Bumpers and Cascadia Fairing Panels for a Stronger, Sleeker Truck

Shop durable Freightliner truck bumpers and Cascadia fairing panels for sale. Precise-fit exterior components for 2008-2017 and 2018+ trucks with fast shipping and expert support. Keeping a Freightliner Cascadia in top condition is about more than the engine under the hood — the exterior body components play a huge role in how the truck performs, looks, and holds its value. Side fairings, step skirts, and front-end pieces all work together to cut drag, protect vulnerable systems, and give the rig a clean, professional presence on the road. Operators searching for quality freightliner bumpers for sale often find that upgrading the entire front and side profile delivers the biggest return. When you pair durable freightliner truck bumpers with well-fitted aerodynamic panels, your Cascadia gains both protection and efficiency in one smart upgrade. The Value of a Complete Exterior Upgrade A truck's exterior is its first line of defense and its calling card all at once. Aerodynamic fairing panels smooth the airflow around the fuel tanks and drive area, lowering wind resistance and helping every gallon of diesel go further. A solid front end absorbs impacts and shields the radiator and cooling system from road debris. Together these components reduce long-term repair costs while keeping the truck looking sharp mile after mile. Over time, that combination of efficiency and protection adds up to real savings, since a truck that burns less fuel and stays out of the repair bay simply earns more for its owner on every route. At tacoma-truckparts.com, the Cascadia selection covers front, middle, and rear fairing panels, step skirts, extensions, and complete sets for both driver and passenger sides. Whether you run a 2008-2017 model or a 2018-and-newer truck, there are pieces engineered to match your exact frame and factory mounting points. Precision Fit for Every Model Year Fitment is everything with exterior body components. Panels and front-end pieces built for your specific model year line up cleanly with existing hardware, so installation is straightforward and the finished surface sits flush and secure. Durable materials stand up to road spray, gravel, and constant vibration, keeping the truck looking its best season after season. Reinforced panels and aluminum step skirts add both function and a polished, professional finish that owner-operators take pride in. Choosing correctly-sized components also protects everything around them. Well-fitted fairings shield tanks, steps, and wiring from flying debris, while a strong front end guards the systems behind it. That kind of protection keeps your Cascadia earning out on the highway instead of sitting in the shop. Efficiency, Protection, and Uptime Downtime is expensive, which is why fast order processing and dependable availability matter as much as the parts themselves. Orders ship quickly, backed by knowledgeable support that understands the daily demands facing fleet managers and independent drivers alike. Being able to find the exact panel, skirt, or front-end piece you need without guesswork keeps maintenance simple and predictable. Investing in your Cascadia's exterior is a smart move for fuel economy, curb appeal, and long-term resale value. With aerodynamic fairings and dependable front-end components working together, your truck cuts cleanly through the wind, looks its best, and stays ready for the next long haul. A well-maintained, polished rig also builds trust with customers and makes a strong impression during inspections. Browse the full selection today and give your Freightliner Cascadia the efficient, protected, road-ready finish it truly deserves.

Jeep Grand Cherokee L and Wagoneer

Compare Jeep Grand Cherokee L and Wagoneer

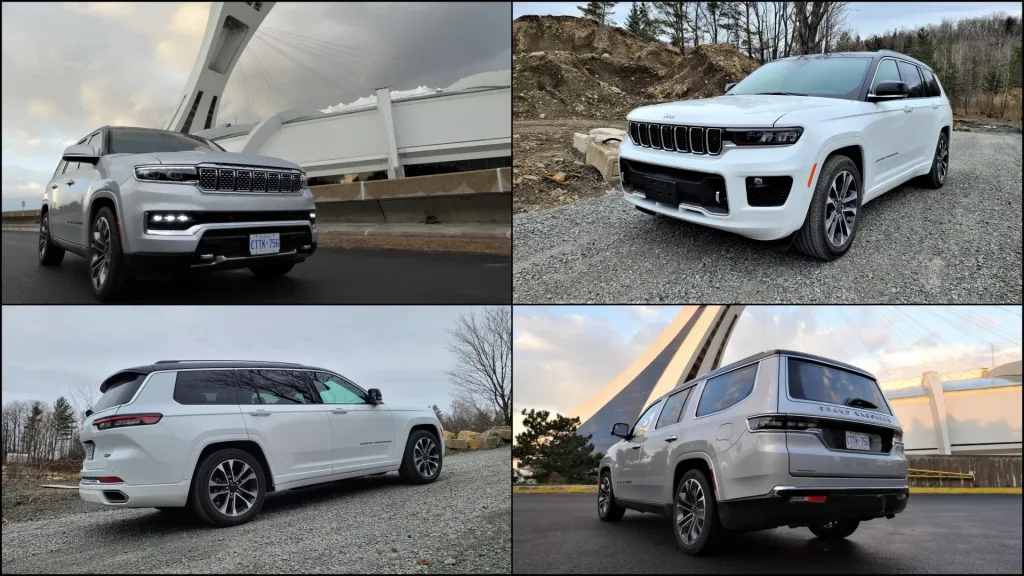
Yes, Jeep SUVs do offer 3rd row seating. The main Jeep SUVs with three rows are the Jeep Grand Cherokee L and the Jeep Wagoneer / Grand Wagoneer lineup, depending on model year and availability. For most families near Simi Valley, Thousand Oaks, Moorpark, Oxnard, Los Angeles, San Fernando Valley, Santa Clarita, and Burbank, the Jeep Grand Cherokee L is the more practical three-row Jeep SUV. The Wagoneer and Grand Wagoneer are better for shoppers who want maximum passenger room, more cargo space, stronger towing capability, and a larger full-size SUV feel. If you want to compare options, start with the new Jeep inventory at Simi Valley Chrysler Dodge Jeep Ram, check the used Jeep inventory, or value your current vehicle before upgrading through the trade-in page. Table of Contents Which Jeep SUVs Have 3rd Row Seating? Jeep Grand Cherokee L: The Practical 3-Row Jeep SUV Jeep Wagoneer and Grand Wagoneer: The Bigger 3-Row Jeep Option Grand Cherokee vs. Grand Cherokee L: Which One Has More Room? Grand Cherokee L vs. Wagoneer: Which 3-Row Jeep Is Better? Is the Third Row Comfortable for Adults? How Much Cargo Space Do 3-Row Jeep SUVs Offer? Can a 3-Row Jeep SUV Tow? Common Buyer Warnings Before Buying a Used 3-Row Jeep Local Dealership Angle: Simi Valley CDJR Final Answer Which Jeep SUVs Have 3rd Row Seating? The Jeep SUVs with 3rd row seating are the Jeep Grand Cherokee L and the Jeep Wagoneer / Grand Wagoneer family. The standard Jeep Grand Cherokee is a two-row SUV with seating for up to five passengers. The Grand Cherokee L is the longer three-row version with seating for up to seven passengers. Jeep confirms that the two-row Grand Cherokee seats up to five, while the Grand Cherokee L seats up to seven. The Wagoneer and Grand Wagoneer are larger full-size Jeep SUVs with three-row seating. They are designed for shoppers who want more passenger space, more cargo capacity, more towing ability, and a more premium full-size SUV experience. So the simple answer is: Choose the Jeep Grand Cherokee L if you want a midsize three-row Jeep SUV. Choose the Wagoneer or Grand Wagoneer if you want a larger full-size three-row Jeep SUV. Choose the regular Grand Cherokee if you only need two rows and prefer a smaller, easier-to-park SUV. Jeep Grand Cherokee L: The Practical 3-Row Jeep SUV The Jeep Grand Cherokee L is usually the best fit for families who want three rows without going all the way up to a full-size SUV. It gives you: Seating for up to seven passengers. Available second-row captain’s chairs or a second-row bench, depending on configuration. A usable third row for kids, teens, or occasional adult passengers. Available 4x4 capability. Strong towing capability when properly equipped. A more manageable size than a Wagoneer. A more premium feel than many mainstream three-row SUVs. According to Jeep, the Grand Cherokee L offers up to 84.6 cubic feet of cargo space with the second and third rows folded. Jeep also notes that a second-row bench seat is available so the vehicle can carry up to seven passengers. Source: Jeep Grand Cherokee 3-Row SUV That makes the Grand Cherokee L a smart choice for families who need extra seating but still want a vehicle that feels comfortable for daily driving, school pickup, road trips, and weekend getaways. Jeep Wagoneer and Grand Wagoneer: The Bigger 3-Row Jeep Option The Wagoneer and Grand Wagoneer are the larger three-row Jeep SUVs. They are built for shoppers who want more room, more towing confidence, and more upscale features than the Grand Cherokee L. The Grand Wagoneer is especially strong for buyers who need a premium full-size SUV. Jeep lists the 2026 Grand Wagoneer with seating for seven, 179 cubic feet of passenger volume, and strong cargo space depending on configuration. Source: Jeep Grand Wagoneer Specs The Grand Wagoneer is also the stronger choice for towing. Jeep lists an available maximum towing capacity of up to 10,000 pounds when properly equipped. Source: Jeep Grand Wagoneer Capability Choose the Wagoneer or Grand Wagoneer if you want: A larger full-size SUV. More third-row room. More cargo space. More luxury features. Stronger towing capability when properly equipped. A better fit for larger families. A stronger road-trip SUV. The tradeoff is size. A Wagoneer or Grand Wagoneer will feel larger in traffic, parking lots, tight garages, and city driving compared to a Grand Cherokee L. Grand Cherokee vs. Grand Cherokee L: Which One Has More Room? The Jeep Grand Cherokee and Jeep Grand Cherokee L are closely related, but they are not the same. The standard Grand Cherokee has two rows and seats up to five passengers. It is better for drivers who want a premium SUV, strong available 4x4 capability, and easier daily maneuverability without needing a third row. The Grand Cherokee L adds the third row and stretches the vehicle to create space for up to seven passengers. It is the better choice if you have a larger family, drive with kids and friends, or want extra flexibility for road trips. Choose the standard Grand Cherokee if you want: Two rows. Easier parking. Slightly simpler family use. More focus on front and second-row comfort. A good mix of daily driving and Jeep capability. Choose the Grand Cherokee L if you want: Three rows. Seating for up to seven. More passenger flexibility. More cargo flexibility. A better family SUV setup. A stronger alternative to three-row crossovers. For shoppers near Simi Valley and Thousand Oaks who want one SUV for daily driving, family trips, and weekend adventures, the Grand Cherokee L is usually the more flexible choice. Grand Cherokee L vs. Wagoneer: Which 3-Row Jeep Is Better? The better choice depends on how much space and capability you need. The Jeep Grand Cherokee L is better if you want a three-row SUV that still feels manageable for daily driving. It is easier to park, easier to maneuver, and more practical for many families who only need the third row part of the time. The Wagoneer or Grand Wagoneer is better if you want more room and more towing strength. It is the better choice for larger families, frequent road trips, heavy cargo needs, and towing larger trailers when properly equipped. Choose the Grand Cherokee L if: You want three rows but do not want a massive SUV. You need seating for up to seven. You want a premium midsize SUV feel. You want available Jeep 4x4 capability. You want a practical family SUV for daily use. Choose the Wagoneer or Grand Wagoneer if: You need more adult-friendly third-row space. You want more cargo space behind the rows. You tow more often. You want a larger, more premium SUV. You regularly travel with a full family and luggage. For most local families, the Grand Cherokee L is the sweet spot. For shoppers who want the biggest Jeep SUV available, the Wagoneer and Grand Wagoneer are the stronger fit. Is the Third Row Comfortable for Adults? The third row in the Jeep Grand Cherokee L is useful, but it is best for kids, teens, and shorter trips with adults. Adults can use it, but it is not as spacious as a full-size SUV third row. The Wagoneer and Grand Wagoneer are better if adult third-row comfort is a major priority. Their larger body gives passengers more room to stretch out, especially on longer drives. Think of it this way: Grand Cherokee L: better for families who need occasional third-row use. Wagoneer / Grand Wagoneer: better for regular adult third-row use. Standard Grand Cherokee: better if you do not need a third row at all. If you regularly drive with six or seven people, test the third row before buying. Seat comfort depends on passenger height, second-row position, seat configuration, and cargo needs. How Much Cargo Space Do 3-Row Jeep SUVs Offer? Cargo space depends on which Jeep SUV you choose and how many seats are in use. The Jeep Grand Cherokee L is flexible because you can fold the third row when you do not need it. With the second and third rows folded, Jeep lists up to 84.6 cubic feet of cargo space. Source: Jeep Grand Cherokee 3-Row SUV That is useful for: Groceries. Strollers. Sports gear. Camping supplies. Luggage. Home improvement items. Road-trip bags. The Wagoneer and Grand Wagoneer offer more space overall because they are full-size SUVs. They are better if you need to carry passengers and cargo at the same time. If you have a big family and often travel with luggage, the Wagoneer or Grand Wagoneer makes more sense. If you only need the third row occasionally, the Grand Cherokee L is usually enough. Can a 3-Row Jeep SUV Tow? Yes, three-row Jeep SUVs can tow when properly equipped, but towing capacity depends on engine, drivetrain, equipment, trim, and vehicle condition. The Jeep Grand Cherokee L can tow up to 6,200 pounds when properly equipped, according to Jeep’s Grand Cherokee specifications. Source: Jeep Grand Cherokee Specs The Grand Wagoneer can tow up to 10,000 pounds when properly equipped, according to Jeep. Source: Jeep Grand Wagoneer Capability That makes the Grand Cherokee L strong enough for many smaller trailers, light campers, personal watercraft, and utility trailers. The Grand Wagoneer is the better choice if you tow heavier loads more often. Before towing, always check: Owner’s manual. Exact towing rating by VIN. Trailer weight. Tongue weight. Payload. Hitch rating. Tire condition. Brake controller needs. Cooling system condition. Local towing laws. Always use “when properly equipped” for towing because not every trim or configuration has the same rating. Common Buyer Warnings Before Buying a Used 3-Row Jeep A used Jeep Grand Cherokee L, Wagoneer, or Grand Wagoneer can be a strong family SUV, but condition matters. Before buying, check: Service history. Tire wear. Brake condition. Suspension noise. Oil leaks. Coolant leaks. Transmission shifting. 4x4 system operation. Infotainment screen function. Power seat and power-folding seat operation. Liftgate operation. Prior accident history. Rust or underbody damage. Water leaks. Towing history. Aftermarket wiring. Open recalls by VIN. If the SUV was used for towing, inspect the hitch, rear suspension, brakes, tires, and cooling system. If it was used off-road, inspect the underbody, skid plates, suspension, wheels, and alignment. Always check recalls by VIN using the official NHTSA recall lookup tool, especially when buying a used family SUV. Local Dealership Angle: Simi Valley CDJR For shoppers near Simi Valley, Thousand Oaks, Moorpark, Oxnard, Los Angeles, San Fernando Valley, Santa Clarita, and Burbank, a three-row Jeep SUV makes sense if you want family space without giving up Jeep capability. At Simi Valley Chrysler Dodge Jeep Ram, you can compare available Jeep Grand Cherokee L, Wagoneer, Grand Wagoneer, and other Jeep SUVs in new inventory. If you want a lower payment or more trim options, check the used inventory and compare mileage, condition, service history, trim, drivetrain, and warranty coverage. You can also start your approval through the finance application, estimate your vehicle’s value through the trade-in page, schedule maintenance with the service department, or order genuine Mopar parts through the parts department. For families who need a daily driver, road-trip SUV, school-run vehicle, and weekend adventure vehicle in one package, the Grand Cherokee L is usually the best starting point. For maximum space and towing strength, move up to the Wagoneer or Grand Wagoneer. Final Answer: Do Any Jeep SUVs Have 3rd Row Seating? Yes, Jeep SUVs do have 3rd row seating. The main options are the Jeep Grand Cherokee L and the Jeep Wagoneer / Grand Wagoneer lineup. The best choice for most families is the Jeep Grand Cherokee L because it offers seating for up to seven, useful cargo flexibility, available 4x4 capability, and a more manageable size than a full-size SUV. The Wagoneer and Grand Wagoneer are better if you want maximum space, more premium features, and stronger towing capability when properly equipped. For shoppers near Simi Valley, Thousand Oaks, Moorpark, Oxnard, Los Angeles, San Fernando Valley, Santa Clarita, and Burbank, compare new and used three-row Jeep SUVs at Simi Valley Chrysler Dodge Jeep Ram, check financing options, value your trade, or schedule a test drive to see which Jeep SUV fits your family best.

CC26_JLJL74_2TB_PYC_APA_XXX_XXX_XXX.44595767d2e79008ad8cdbe55f250a44

How much do you have to pay a month for a Jeep Wrangler?

How Much Do You Have to Pay a Month for a Jeep Wrangler? A Jeep Wrangler monthly payment usually ranges from about $575 to $1,100+ per month, depending on the price, down payment, credit score, interest rate, loan term, taxes, fees, and trim. The simple answer is this: a lower-trim Jeep Wrangler Sport may land around $600 to $750 per month with normal financing, while a Wrangler Willys, Sahara, Rubicon, 4xe, or 392 can easily push payments into the $800 to $1,200+ range. Jeep lists the 2026 Wrangler starting at $36,035 MSRP, while higher trims like Sahara, Rubicon, and Rubicon X start much higher. Jeep Wrangler Quick Monthly Payment Estimate Here is a realistic estimate using a 72-month loan, about 7% APR, and roughly estimated taxes and fees. Actual payments can be higher or lower. $36,000 Wrangler: about $615 to $700/month $45,000 Wrangler: about $760 to $875/month $55,000 Wrangler: about $930 to $1,070/month $65,000 Wrangler: about $1,100 to $1,260/month $75,000+ Wrangler 392: about $1,275 to $1,500+/month This assumes little to moderate money down. A larger down payment or trade-in can lower the payment. A higher APR can raise it fast. Wrangler Price by Trim Jeep’s official 2026 Wrangler page lists starting MSRPs such as: Sport: from $36,035 Sport S: from $39,685 Willys: from $43,755 Sahara: from $48,910 Rubicon: from $45,815 Rubicon X: from $55,765 Jeep Wrangler Those are starting prices before taxes, registration, dealer fees, accessories, packages, and finance charges. A real Wrangler on the lot can cost much more once options are added. What Affects Your Jeep Wrangler Payment? The biggest factors are: Vehicle price: A Rubicon costs much more per month than a Sport. Down payment: More money down lowers the amount financed. Trade-in equity: Positive equity can reduce your payment. Credit score: Better credit usually means a lower APR. Loan term: Longer terms lower monthly payments but increase total interest. Taxes and fees: California taxes and registration can add thousands to the financed amount. Add-ons: Warranties, protection products, accessories, and lift packages can raise the payment. New vs Used Wrangler Monthly Payment A used Wrangler may not always be dramatically cheaper because Wranglers hold value well. A clean used Wrangler can still have a strong price, especially if it is a Rubicon, Willys, 4xe, or low-mileage Unlimited. That said, used can still be the better monthly-payment move if you choose the right year, mileage, and trim. For LA and Simi Valley shoppers, compare used Jeep inventory against new Jeep inventory before deciding. Sometimes the new-car incentives make a new Wrangler closer in payment than expected. Best Way to Lower the Payment The cleanest ways to lower a Wrangler payment are: Choose a lower trim like Sport, Sport S, or Willys. Put more money down. Use trade-in equity. Improve credit before applying. Avoid unnecessary add-ons. Compare new and used options. Choose a realistic loan term. A longer loan can make the payment look easier, but do not stretch the term too far just to afford a higher trim. The total cost matters. Final Answer Most Jeep Wrangler payments fall around $600 to $1,100 per month. A basic Wrangler Sport may be close to $600 to $750/month with typical financing. A Wrangler Willys, Sahara, Rubicon, or 4xe may be closer to $800 to $1,100/month. A Wrangler 392 or heavily optioned model can go well above $1,200/month. The only accurate number comes from the exact Wrangler, your credit, down payment, trade value, taxes, fees, and approved APR.