




Simi Valley Chrysler Dodge Jeep Ram

Blog / General

Best Tire Patch Kits for Quick Repairs - Expert Reviews

Best Tire Patch Kits for Quick Repairs – Expert Reviews

A reliable tire patch kit is an essential tool for maintaining safety and performance on the road. Unexpected punctures can happen at any time, whether you’re navigating rugged off-road terrain or simply commuting through city streets. High-quality tire patch kits offer a convenient and cost-effective way to address these issues, saving you from the hassle of calling for roadside assistance or replacing an entire tire. Designed to handle everything from small tread punctures to more complex sidewall damage, these kits ensure you’re prepared for any situation.

In this guide, we’ll explore the best tire patch kits available on Amazon.com, highlighting their standout features and practical applications. From versatile all-in-one kits to specialized solutions for off-road vehicles, each product is tailored to meet specific needs. Whether you’re a seasoned adventurer or a daily driver, having a dependable tire repair kit on hand can make all the difference, keeping you safe and stress-free on the road.


Why Invest in a Tire Patch Kit?

A punctured tire can happen anytime, whether you’re navigating rocky trails, driving on rough city streets, or working with heavy equipment. A tire patch kit offers several advantages:

  • Convenience: Repairs can often be made without removing the tire.
  • Cost Savings: Avoid expensive roadside assistance or tire replacements.
  • Versatility: Many kits work for cars, trucks, motorcycles, and even off-road vehicles.
  • Durability: Proper patches ensure long-lasting repairs that withstand pressure and wear.

Now, let’s dive into the top-rated tire patch kits designed to handle various tire issues.


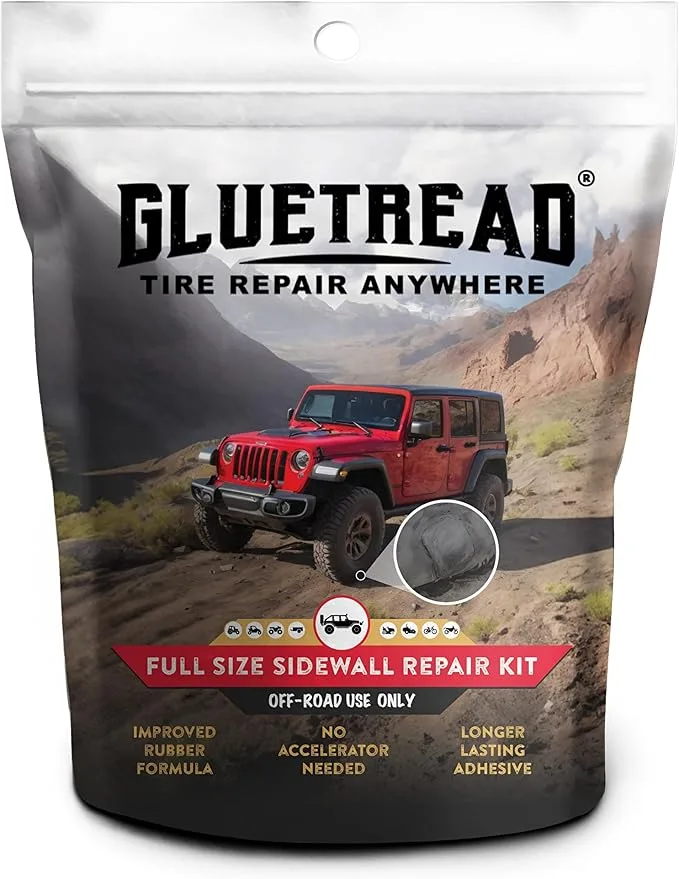
1. GlueTread Full-Size Sidewall Repair Kit
Best Tire Patch Kits for Quick Repairs – Expert Reviews

Check Price on Amazon

Overview

The GlueTread Full-Size Sidewall Repair Kit is engineered for off-road enthusiasts and 4x4 drivers. Designed to patch sidewall damage—a type of puncture that many traditional kits can’t address—this kit allows you to perform professional-grade repairs on the go.

Features

  • Comprehensive Kit: Includes two 4" x 4.5" patches, two 3” x 1.5” patches, adhesive, and applicators.
  • Quick Curing: The rubber adhesive cures in just 10 minutes, ensuring rapid repairs.
  • Heavy-Duty Materials: The patches are made of robust rubber to withstand rough terrain and high tire pressure.

Why Choose This Kit?

This kit is ideal for off-road drivers who frequently encounter sharp rocks, tree branches, or other hazards that can damage tire sidewalls. The GlueTread system ensures a secure patch without requiring tire removal, making it an invaluable tool for adventurers and professionals alike.


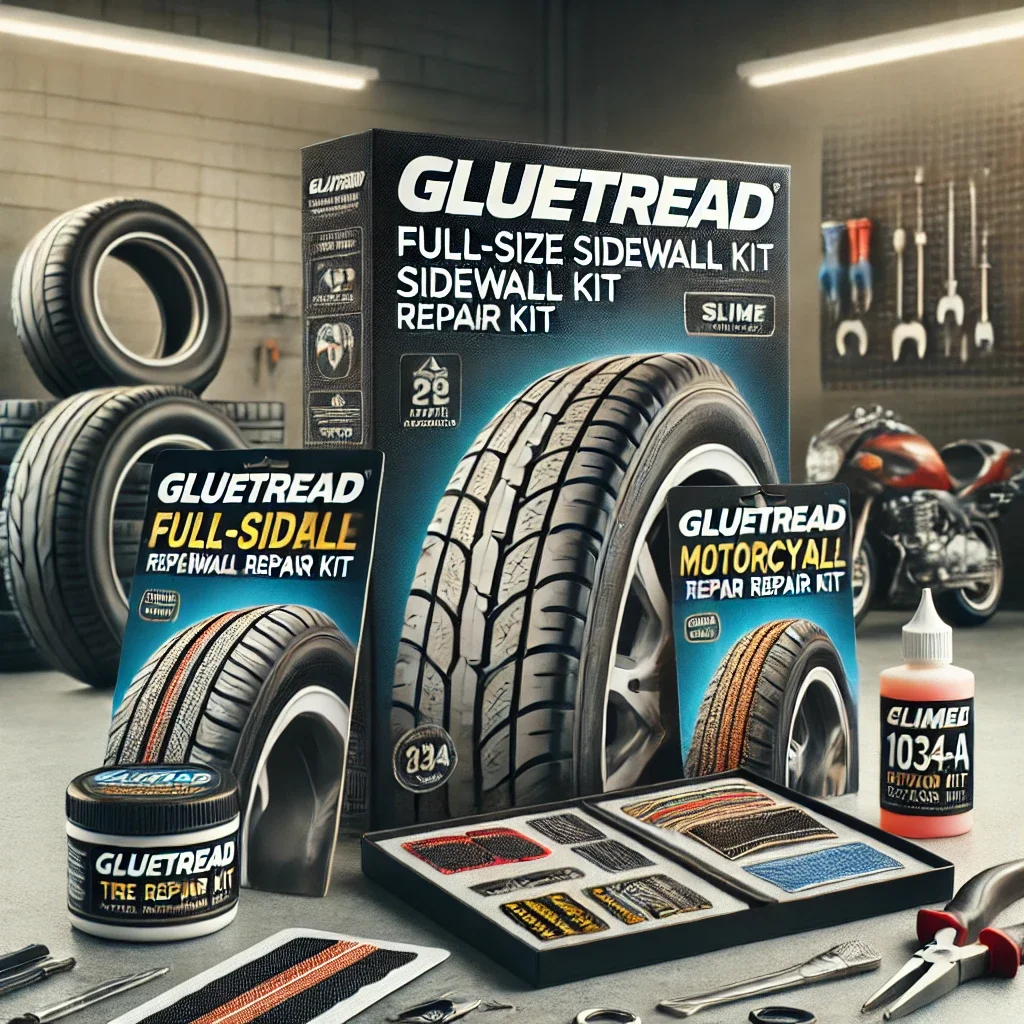
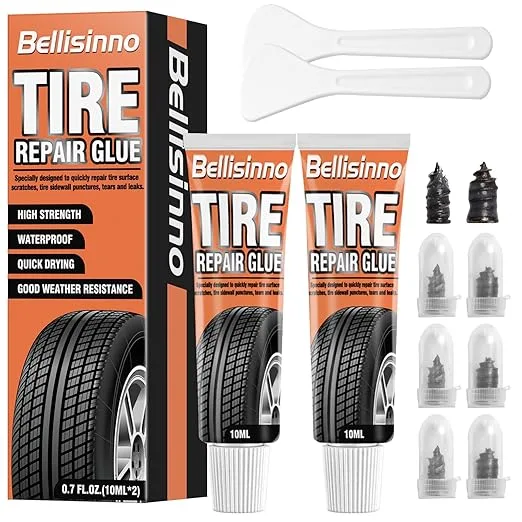
2. GlueTread Sidewall Repair Kit for Motorcycles and Off-Road Vehicles
Best Tire Patch Kits for Quick Repairs – Expert ReviewsBest Tire Patch Kits for Quick Repairs – Expert Reviews

Check Price on Amazon

Overview

For motorcycles, ATVs, tractors, and other off-road vehicles, the GlueTread Sidewall Repair Kit offers a compact yet powerful solution for sidewall punctures.

Features

  • Universal Application: Works with various tire types, including those on motorcycles, ATVs, and farm equipment.
  • Rapid Repairs: Adhesive cures quickly, minimizing downtime.
  • Portable Design: Compact and easy to carry, this kit is perfect for riders on the go.

Why Choose This Kit?

This kit is a top choice for motorcyclists and off-road enthusiasts who need a reliable, lightweight solution for handling sidewall damage during rides. It’s simple to use and ensures that you’re prepared for unexpected punctures.


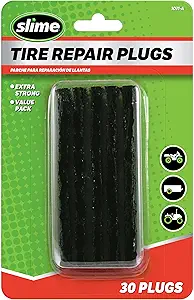
3. Slime 1034-A Tire Repair Kit
Best Tire Patch Kits for Quick Repairs – Expert Reviewsas

Check Price on Amazon

Overview

The Slime 1034-A Tire Repair Kit is designed for standard tubeless tires on vehicles like ATVs, wheelbarrows, lawnmowers, and small trailers. This kit provides everything you need to repair punctures quickly and effectively.

Features

  • T-Handle Tools: Includes a T-handle reamer and plug insertion tool for easy application.
  • Durable Plugs: Heavy-duty strings ensure a secure seal for tread punctures.
  • Multi-Purpose: Suitable for various small vehicles and equipment.

Why Choose This Kit?

If you’re working with smaller vehicles or equipment, such as lawnmowers, wheelbarrows, ATVs, or small trailers, this kit provides an efficient and easy-to-use solution for addressing minor tread punctures. Its straightforward design ensures that even those with limited experience can perform quick and effective repairs without the need for professional assistance. Compact and portable, this kit is ideal for keeping in your workshop or taking on the go for fieldwork, ensuring that you’re prepared for unexpected tire issues wherever they occur. Whether you’re maintaining your equipment at home or handling a puncture in a remote location, this kit delivers dependable results with minimal effort.


How to Choose the Best Tire Patch Kit

When selecting a tire patch kit, consider the following factors:

  1. Type of Damage: Sidewall damage requires specialized kits like GlueTread, while tread punctures can often be repaired with standard plug kits.
  2. Ease of Use: Look for kits with clear instructions and simple application processes.
  3. Compatibility: Ensure the kit works for your vehicle type, whether it’s a car, truck, motorcycle, or ATV.
  4. Durability: High-quality patches and plugs should be able to withstand pressure and long-term use.
  5. Portability: For on-the-go repairs, opt for compact kits that can be stored in your vehicle.

Conclusion

A reliable tire patch kit is an essential part of any vehicle maintenance toolkit, providing peace of mind and practicality for drivers. Whether it’s a sidewall puncture, tread damage, or general wear, unexpected tire issues can derail your plans and lead to costly repairs. Products like the GlueTread Full-Size Sidewall Repair Kit, GlueTread Motorcycle Repair Kit, and Slime 1034-A Tire Repair Kit are designed to handle a variety of tire problems, ensuring you’re never left stranded. These kits are tailored to different needs, from off-road enthusiasts to daily commuters, making them invaluable for all types of drivers.

Investing in a high-quality tire repair kit not only saves money on professional repairs but also ensures your journey remains uninterrupted. Kits like GlueTread’s offer quick and effective solutions for sidewall punctures without the need for tire removal, while the Slime 1034-A is ideal for small tread punctures on tubeless tires. With clear instructions and easy-to-use tools, these kits make DIY tire repairs accessible, even for beginners. They’re compact enough to keep in your vehicle, so you’re always prepared for emergencies, whether on the road or trail.

Visit Amazon.com today to explore these expert-recommended tire patch kits and find the one that fits your needs. Whether you’re an off-road adventurer or a city commuter, these kits ensure you can handle tire emergencies efficiently and get back to driving safely. Regular maintenance and preparedness can make all the difference, saving you time, money, and stress in the long run.


FAQs About Tire Patch Kits

  1. FAQs About Tire Patch Kits
  2. Can tire patch kits fix all types of punctures?
    Most kits are designed for tread punctures, but specialized kits like GlueTread can repair sidewall damage.
  3. Are these kits suitable for off-road vehicles?
    Yes, kits like GlueTread are specifically designed for off-road tires, making them ideal for 4x4s, ATVs, and motorcycles.
  4. How long does a patch repair last?
    A properly applied patch can last the remaining lifespan of the tire.
  5. Can I use these kits on tubeless tires?
    Yes, all the kits mentioned are compatible with tubeless tires.
  6. Are these kits easy to use for beginners?
    Most kits come with clear instructions and are simple enough for DIY repairs.
  7. Do I need to remove the tire for sidewall repairs?
    No, GlueTread kits allow you to patch the sidewall without removing the tire.
  8. Can these kits be used in extreme weather conditions?
    Yes, most patches and adhesives are designed to withstand temperature variations and high pressure.
  9. Are the repairs permanent?
    While many kits offer long-lasting solutions, professional repairs may still be needed for extensive damage.
  10. Can these kits handle high-pressure tires?
    Yes, high-quality kits are designed to handle the pressure levels of most standard and off-road tires.
  11. Where can I purchase these kits?
    All the mentioned kits are available on Amazon.com for easy purchase and delivery.
  12. How long does it take to patch a tire?
    Depending on the kit and experience level, most repairs can be completed within 15-30 minutes.
  13. Are these kits reusable?
    Some components, like tools in plug kits, can be reused, but patches and adhesives are typically single-use.
  14. Can I patch a tire more than once?
    Yes, as long as the punctures are not overlapping, multiple patches can be applied.
  15. Do these kits work on tractor tires?
    Yes, heavy-duty kits like GlueTread are suitable for large tires, including tractors and heavy equipment.
  16. What tools are included in these kits?
    Most kits include T-handle reamers, insertion tools, patches, adhesives, and instructions.
  17. Can I use these kits on inner tubes?
    Most kits are designed for tubeless tires, but some patches may work on inner tubes with proper application.
  18. Do these kits require additional equipment?
    Basic kits don’t require additional equipment, but having an air pump or compressor is helpful for reinflation.
  19. Are tire patch kits safe to use?
    Yes, when used according to the instructions, these kits are safe and effective.
  20. How do I know if a patch is holding?
    Check for air leaks by reinflating the tire and applying soapy water to the patched area to look for bubbles.
  21. Can patched tires be driven at high speeds?
    Properly patched tires can handle normal driving conditions, but consult the kit’s instructions to ensure suitability for high speeds.
Posted in:

Related Posts

when to Clean the Air Filters on a Ram 1500

When Should You Clean the Air Filters on a Ram 1500?

When Should You Clean the Air Filters on a Ram 1500? You should check the air filters on a Ram 1500 at every oil change and replace them when they are dirty, restricted, damaged, or at the mileage interval listed in the owner’s manual. The simple answer is this: inspect the engine air filter every 10,000 to 15,000 miles, replace it around 15,000 to 30,000 miles under normal driving, and replace it sooner if you drive in dust, construction zones, wildfire smoke, dirt roads, off-road trails, or heavy traffic. Many Ram service references list engine and cabin air filter replacement around 10,000 miles in severe conditions and 15,000 to 30,000 miles in normal use. Larry H. Miller Dodge Boise Engine Air Filter vs Cabin Air Filter Your Ram 1500 has two different air filters. The engine air filter cleans the air going into the engine. A dirty engine air filter can reduce airflow, hurt throttle response, lower efficiency, and make the engine work harder. The cabin air filter cleans the air coming through the HVAC system. A dirty cabin filter can reduce A/C airflow, create musty smells, make the fan louder, and allow more dust or pollen into the cabin. They do different jobs, but both should be checked regularly. Should You Clean or Replace the Engine Air Filter? For most Ram 1500 owners, replace the engine air filter instead of cleaning it. Most factory-style paper engine air filters are not designed to be washed or reused. You can gently tap out loose dust during inspection, but once the filter is visibly dirty, clogged, wet, oil-soaked, torn, or packed with debris, replace it. Reusable performance filters are different. If your Ram has a washable aftermarket filter, follow that filter brand’s cleaning and oiling instructions exactly. Over-oiling a reusable filter can cause sensor problems. When to Replace the Engine Air Filter Under normal driving, a Ram 1500 engine air filter often lasts around 15,000 to 30,000 miles. Replace it sooner if you drive in: Dusty roads. Construction zones. Off-road trails. Desert conditions. Heavy pollen. Wildfire smoke. Farm or jobsite use. Frequent towing. Long idle periods. Severe service can shorten the interval to around 10,000 miles, especially if the truck sees dirt roads or dusty work conditions. Courtesy Chrysler Jeep Dodge Ram When to Replace the Cabin Air Filter The cabin air filter is commonly replaced around 15,000 miles, or once a year for many drivers. If you drive in Los Angeles-area traffic, dusty roads, wildfire smoke, or heavy pollen, replacing it sooner makes sense. A dirty cabin filter can make the A/C feel weak even when the system itself is working properly. Some service schedules list cabin air filter replacement every 15,000 miles, while others allow up to 30,000 miles depending on driving conditions. Firestone Complete Auto Care Signs Your Ram 1500 Needs an Air Filter Your engine air filter may need replacement if you notice weaker acceleration, lower fuel economy, rougher engine response, dirty filter pleats, debris in the air box, or a check engine light related to airflow. Your cabin air filter may need replacement if you notice weak vent airflow, dusty cabin air, musty smell, louder blower fan noise, foggy windows that clear slowly, or allergy symptoms getting worse inside the truck. Do not wait for major symptoms. Filters are cheap compared with the systems they protect. Can a Dirty Air Filter Hurt a Ram 1500? Yes, especially if it is severely restricted. A dirty engine air filter can reduce airflow to the engine. Modern Ram engines can adjust fuel delivery, but the truck may still feel less responsive and less efficient. Dirt getting past a damaged filter is worse because it can increase engine wear. A dirty cabin air filter will not damage the engine, but it can make the HVAC system work harder and make the cabin less comfortable. Best Practical Schedule For most Ram 1500 owners: Every oil change: inspect engine and cabin air filters. Every 10,000 miles: replace sooner if driving in dust or severe conditions. Every 15,000 miles: replace cabin air filter for cleaner airflow. Every 15,000 to 30,000 miles: replace engine air filter under normal use. Immediately: replace any filter that is wet, torn, oil-soaked, moldy, or packed with debris. Final Answer You should check your Ram 1500 air filters at every oil change. Replace the engine air filter about every 15,000 to 30,000 miles, or around 10,000 miles in dusty or severe conditions. Replace the cabin air filter about every 15,000 miles or once a year, especially if you drive in traffic, smoke, dust, or pollen. The safest rule is simple: inspect often, replace when dirty, and follow the owner’s manual for your exact Ram 1500 model year.

The Most Accurate Car Value Websites of 2026

The most accurate car value websites in 2026 are Kelley Blue Book, Edmunds, J.D. Power/NADA, CarGurus, Cars.com, Autotrader, and Consumer Reports. But the real answer is this: no single car value website is perfect. The most accurate number comes from comparing multiple sources, checking live local listings, and adjusting for mileage, condition, trim, accident history, location, and demand. For most shoppers, the best starting point is Kelley Blue Book because it offers trade-in, private-party, and retail value estimates. But if you want a stronger real-world number, compare that with Edmunds appraisals, J.D. Power values, CarGurus Instant Market Value, and current local used-car listings. Why Car Values Are Hard to Pin Down Used car values change fast. A vehicle’s value depends on location, condition, mileage, trim, color, accident history, service records, title status, demand, fuel prices, interest rates, inventory levels, and even seasonality. A clean Jeep Wrangler in Southern California may bring stronger money than the same Wrangler in a slower market. A used hybrid may spike when gas prices rise. A truck may hold value better in areas where towing and work use are common. That is why a website can give a good estimate but still miss the exact market price. The best value is not one number. It is a range. Best Overall: Kelley Blue Book Kelley Blue Book is still the most recognizable car value website for everyday shoppers. KBB is useful because it gives different value types, including trade-in value, private-party value, and typical listing price. That matters because your car is not worth the same amount in every situation. A dealer trade-in value will usually be lower than a private-party sale price. A retail listing price will usually be higher than both. KBB is best for: Quick vehicle value checks. Trade-in estimates. Private-party price ranges. Retail price guidance. Mainstream used vehicles. KBB should not be your only source, but it is one of the best places to start. Best for Real-World Appraisals: Edmunds Edmunds is one of the strongest tools for real-world used car values. Edmunds is useful because it focuses heavily on vehicle-specific details, including year, make, model, trim, mileage, condition, options, and ZIP code. It can also help shoppers understand the difference between trade-in, private-party, and dealer retail pricing. Edmunds market reports also show how used values move over time. In its Q2 2025 used-car report, Edmunds reported that average transaction prices for 3-year-old used vehicles increased year over year, while days-to-turn also rose. That is exactly why current market data matters when valuing a car. Edmunds is best for: Detailed appraisals. Used car shoppers. Trade-in research. Private-party pricing. Comparing used vs new value. Best Dealer-Grade Reference: J.D. Power/NADA J.D. Power is the modern home of NADA-style vehicle values. This is important because NADA values have historically been used by dealers, lenders, insurance companies, and automotive professionals. J.D. Power values can be especially useful when you want a more industry-facing reference instead of only a consumer estimate. J.D. Power Valuation Services also publishes used vehicle market updates, which can help explain broader pricing trends. J.D. Power/NADA is best for: Dealer-style value checks. Loan and finance reference. Trade-in discussions. Industry pricing context. Trucks, SUVs, and mainstream vehicles. Best for Live Market Pricing: CarGurus CarGurus is useful because it is built around live listing data. CarGurus Instant Market Value estimates retail pricing based on real-time data from millions of car listings. That makes it especially useful when you want to know what similar vehicles are actually listed for right now. This is different from a pure valuation guide. A valuation guide estimates what the car should be worth. A marketplace tool shows what sellers are currently asking. CarGurus is best for: Live retail price comparison. Seeing whether a listing is overpriced. Checking local market competition. Buyer-side research. Dealer listing comparisons. Best for Listing Comparisons: Cars.com Cars.com is another strong tool for checking real used-car listings. It is not just about calculating one value. It helps you compare similar vehicles in your area, which is critical when pricing a trade, buying used, or selling privately. If ten similar cars are listed between $22,000 and $24,000, your $27,000 asking price may be unrealistic unless your vehicle has lower miles, better condition, rare options, or warranty coverage. Cars.com is best for: Local listing research. Comparing asking prices. Dealer inventory checks. Understanding market supply. Used vehicle shopping. Best for Trade-In Shopping: Autotrader Autotrader is useful because it connects valuation research with active vehicle listings. It can help sellers understand what similar vehicles are listed for and help buyers compare asking prices across dealers and private sellers. Autotrader is especially useful for popular models with many listings because it gives you enough market examples to understand price spread. Autotrader is best for: Trade-in research. Private sale pricing. Listing comparisons. Dealer retail comparison. Finding similar vehicles nearby. Best for Reliability Context: Consumer Reports Consumer Reports is not the best pure pricing tool, but it is very useful for understanding whether a used car is worth the price. A car’s value is not only about mileage and market demand. Reliability matters too. A vehicle with strong reliability, safety, and owner satisfaction may justify a higher price than a similar vehicle with known problems. Consumer Reports is best for: Used-car reliability research. Model-year problem history. Safety and ownership context. Avoiding bad used-car buys. Comparing long-term ownership risk. Use Consumer Reports alongside KBB, Edmunds, J.D. Power, and live listings. Best Auction and Wholesale Reference: Manheim Most consumers cannot use Manheim the same way dealers do, but wholesale auction data affects the whole used-car market. Dealers often pay close attention to wholesale values because those values help determine trade-in offers and retail pricing. When wholesale prices rise, retail prices often follow. When wholesale demand softens, trade-in offers and retail prices may move down. For normal shoppers, you do not need direct Manheim access. But market updates from Cox Automotive and Manheim can help explain why trade values feel higher or lower than expected. Which Website Is Most Accurate? The most accurate website depends on what you are trying to do. For a quick value, use Kelley Blue Book. For a detailed appraisal, use Edmunds. For a dealer-style value, use J.D. Power/NADA. For live market pricing, use CarGurus, Cars.com, and Autotrader. For reliability context, use Consumer Reports. For wholesale market direction, watch Manheim and Cox Automotive updates. The most accurate value comes from combining them. How to Get the Most Accurate Car Value Use this process: Check KBB trade-in and private-party value. Check Edmunds appraisal. Check J.D. Power/NADA value. Search local listings on CarGurus, Cars.com, and Autotrader. Compare only similar trims, mileage, drivetrain, options, and condition. Subtract for accidents, worn tires, bad brakes, cosmetic damage, or missing records. Add value for clean history, low miles, new tires, warranty, rare options, or strong service records. Get a real dealer trade offer if you plan to trade. That gives you a realistic value range instead of relying on one website. Trade-In Value vs Private-Party Value Trade-in value is what a dealership may offer for your car. Private-party value is what you might get selling it yourself. Retail value is what a dealer may list a similar car for after inspection, reconditioning, marketing, paperwork, and profit margin. These numbers are different for a reason. If KBB says your car has a private-party value of $18,000, that does not mean a dealer will offer $18,000 on trade. The dealer still has to inspect it, recondition it, handle risk, and resell it. Why Your Trade Offer May Be Lower Than Online Value A trade offer may be lower than an online estimate because the vehicle needs work. Common deductions include: Worn tires. Brake wear. Accident history. Paint damage. Interior stains. Warning lights. Open recalls. Bad windshield. Missing second key. Poor service records. Smog or emissions issues. High mileage. Title concerns. Online tools depend on accurate condition input. Many owners overrate their vehicle’s condition, which creates a gap between the online estimate and real offer. Used Car Value in Los Angeles Los Angeles used-car values can differ from national averages. Fuel-efficient cars, hybrids, trucks, SUVs, Jeeps, and commuter-friendly vehicles can have strong demand. California smog rules, registration costs, local fuel prices, and insurance costs can also influence what buyers are willing to pay. For Los Angeles-area shoppers, use national value tools first, then confirm with live local listings. If you are comparing trade or purchase options, review current used inventory to see how similar vehicles are priced nearby. You can also use a trade-in valuation tool to start the appraisal process. Common Mistakes When Using Car Value Websites The biggest mistake is using only one website. Other mistakes include choosing the wrong trim, ignoring options, entering the wrong mileage, overrating condition, ignoring accident history, comparing dealer retail to private-party value, and using national values without checking local listings. Another common mistake is assuming listed price equals selling price. Some vehicles sell below asking price. Others sell quickly at asking if demand is high. A value estimate is a guide. The market decides the final number. Best Website for Selling Your Car If you want to sell your car privately, use KBB, Edmunds, CarGurus, Cars.com, and Autotrader together. Price your vehicle slightly above your minimum acceptable number, but not so high that it gets ignored. Include service records, clean photos, VIN, mileage, trim, options, title status, and honest condition notes. If you want less hassle, get dealer trade offers or instant cash offers and compare them. Private sale may bring more money. Trade-in is usually easier. Best Website for Buying a Used Car If you are buying, use CarGurus, Cars.com, Autotrader, KBB, and Edmunds. Marketplaces show live inventory. KBB and Edmunds help you judge whether the price is fair. Consumer Reports helps you avoid unreliable models. Before buying, compare the vehicle history report, inspection results, tires, brakes, warranty, title status, and total out-the-door price. The cheapest car is not always the best value. Final Answer The most accurate car value websites of 2025 are: Kelley Blue Book for quick values. Edmunds for detailed appraisals. J.D. Power/NADA for dealer-style values. CarGurus for live market pricing. Cars.com for listing comparisons. Autotrader for retail and trade research. Consumer Reports for reliability context. The best approach is to use at least three valuation tools, then compare real local listings. That gives you the most accurate value range and keeps you from overpaying, underpricing, or accepting a weak trade offer.

Version 1.0.0

BlueDevil Rear Main Sealer: A Mechanic's Perspective

Version 1.0.0 BlueDevil Rear Main Sealer: A Mechanic’s Perspective BlueDevil Rear Main Sealer can be worth trying if you have a small rear main seal leak and the vehicle is not worth tearing apart immediately. But from a mechanic’s perspective, it should be treated as a temporary or low-cost attempt, not the same thing as replacing the rear main seal. The simple answer is this: BlueDevil may help if the leak is caused by an old, dried, or slightly shrunken rubber seal. It will not fix a torn seal, damaged crankshaft surface, clogged PCV system, major oil leak, overfilled engine, or oil leak coming from somewhere else. BlueDevil says its Rear Main Sealer is designed for gas and diesel engines and works by restoring dried, cracked, or shrunken rubber seals. What Is BlueDevil Rear Main Sealer? BlueDevil Rear Main Sealer is an oil additive made to reduce or stop leaks from the rear main seal and certain other engine oil seals. The rear main seal sits at the back of the engine where the crankshaft exits toward the transmission. When it leaks, oil can drip from the area between the engine and transmission. That is why the repair can be expensive. Access usually requires removing the transmission or separating major drivetrain parts. That is exactly why products like BlueDevil are popular. A bottle costs far less than a rear main seal job. How Does It Work? BlueDevil is designed to condition rubber seals. As seals age, they can dry out, harden, shrink, or lose flexibility. A seal conditioner attempts to soften and swell the rubber enough to help it seal again. This can reduce seepage if the seal is still physically intact. That is the key point: it works best on an old seal that has shrunk slightly, not on a seal that is destroyed. If the rear main seal lip is ripped, the crankshaft sealing surface is grooved, the engine has excessive crankcase pressure, or the leak is actually from the oil pan, valve cover, or intake area, an additive will not solve the real problem. A Mechanic’s Honest Take A mechanic would usually see BlueDevil as a gamble with limits. It is not snake oil in the sense that seal conditioners can sometimes reduce small leaks. But it is also not a proper mechanical repair. The proper fix for a confirmed rear main seal leak is replacing the seal and inspecting the crankshaft surface, oil pan area, PCV system, and related gaskets. The reason mechanics hesitate is simple: many “rear main seal leaks” are misdiagnosed. Oil can run down from valve cover gaskets, oil pressure sensors, intake gaskets, oil filter housings, oil cooler seals, oil pan gaskets, or timing cover leaks and end up dripping near the bellhousing. That makes it look like a rear main leak when it is not. Before using any sealer, confirm the leak source. When BlueDevil Rear Main Sealer Is Worth Trying BlueDevil is most worth trying when the leak is small and the vehicle is older. It makes sense if: The leak is a slow drip or seep. The oil level is not dropping quickly. The engine runs normally. The vehicle is older or high mileage. You want to delay an expensive repair. The rear main seal leak has been properly diagnosed. You understand it may not work. It is especially reasonable on an older daily driver where a $1,000-plus repair may not make financial sense right away. Rear main seal repair costs can be high because the labor is intensive, and some estimates place the job around hundreds to well over $1,000 depending on the vehicle. Endurance notes rear main seal replacement can range from about $600 to $1,200+, while some vehicle-specific repairs can be higher. When You Should Not Use It Do not rely on BlueDevil if the leak is major. Skip the additive and diagnose properly if: Oil is pouring out. The vehicle leaves large puddles. The clutch is slipping from oil contamination. The transmission bellhousing is soaked. The engine oil level drops quickly. There is blue smoke from oil burning. The PCV system is clogged. The engine has excessive blow-by. The leak started after recent repair work. The engine is already low on oil pressure. A bottle of sealer is not a substitute for repairing a serious oil leak. Use Clean Oil First For best results, use it with clean engine oil. Hot Rod recommends making sure the engine has clean oil and the correct oil specification before using BlueDevil or any rear main seal stop-leak product. That advice makes sense. Dirty, old oil filled with fuel dilution, sludge, or contaminants is not the best carrier for any additive. If the oil is due for a change, change the oil and filter first, then add the product according to the directions. How to Use BlueDevil Rear Main Sealer Follow the instructions on the bottle. BlueDevil’s directions commonly state to add one 8 oz bottle directly into the engine oil, with one bottle treating up to 8 quarts. The product is designed to stay in the oil while you drive. Highline Warren lists the basic direction as turning off the engine and pouring one 8 oz bottle into the engine oil. Do not overfill the crankcase. If your oil level is already at the full mark and you are adding 8 oz, it is usually smart to leave enough room or drain a small amount if necessary. Overfilled oil can create foaming, pressure issues, leaks, and other problems. How Long Does It Take to Work? Do not expect instant results. Many seal conditioners need driving time and heat cycles to work into the rubber. You may need to drive for several days or a few hundred miles before deciding whether it helped. If the leak gets slightly better, keep monitoring the oil level and the leak area. If nothing changes after a reasonable period, the seal may be too damaged or the leak may not be from the rear main seal. Will It Hurt the Engine? Used correctly, it usually should not hurt a healthy engine. The risk comes from using too much, using it in an engine with the wrong oil level, ignoring a serious leak, or using additives as a replacement for maintenance. Any oil additive changes the oil mixture slightly, so I would not use it casually in a new engine, performance engine, warranty vehicle, or engine with known oiling issues. For an older high-mileage vehicle with a small leak, the risk is usually more acceptable. Will It Fix Every Oil Leak? No. BlueDevil Rear Main Sealer is meant for rubber seal-related oil leaks. It is not a universal repair for every gasket and sealing surface. It will not properly fix: Oil pan gasket leaks. Valve cover gasket leaks. Cracked covers. Bad oil filter housing gaskets. Loose drain plugs. Bad oil pressure sensors. Damaged timing covers. Crankshaft groove damage. Improperly installed seals. Excessive crankcase pressure. Misdiagnosis is the biggest issue. If the leak source is wrong, the product cannot work. Rear Main Seal Leak Symptoms A rear main seal leak usually shows up as oil at the back of the engine. Common signs include oil dripping between the engine and transmission, oil on the lower bellhousing, oil spots after parking, burning oil smell if oil contacts hot exhaust, and gradual oil loss. But those symptoms can overlap with other leaks. That is why cleaning the engine and using UV dye can help confirm the leak path before spending money. Mechanic’s Diagnostic Advice Before using BlueDevil, clean the oily area first. Then drive the vehicle and recheck where fresh oil appears. If needed, add UV dye to the engine oil and inspect with a UV light. This can help identify whether the oil is truly coming from the rear main seal or running down from above. Also check the PCV system. A clogged PCV valve or crankcase ventilation issue can increase crankcase pressure and force oil past seals. If the pressure problem remains, a sealer may not hold. BlueDevil vs Rear Main Seal Replacement BlueDevil is cheap and easy. Rear main seal replacement is expensive and labor-intensive. That is the tradeoff. BlueDevil is worth trying when the alternative repair cost does not make sense yet. But if the vehicle is valuable, the leak is severe, or you plan to keep the car long term, replacing the seal is the correct repair. A sealer is a shortcut. A seal replacement is the fix. Is It Good for Trucks? It can be used in gas and diesel engines if compatible with the oil system and directions. That includes many older trucks, SUVs, and high-mileage vehicles. But trucks often work harder, tow more, and run hotter. If a truck is leaking badly, diagnose it properly before relying on a bottle. For Ram, Jeep, Dodge, Chevy, GMC, Ford, Toyota, and Nissan trucks, the same rule applies: confirm the leak source first. Should You Use It Before Selling a Car? Be careful. Using a sealer to hide a known leak from a buyer is unethical. If you use it and sell the vehicle, disclose the leak history if asked. A small leak treatment on an older vehicle is one thing. Concealing a serious rear main seal issue is another. For dealership or professional use, proper disclosure and diagnosis matter. Final Verdict BlueDevil Rear Main Sealer is not a miracle, but it can be useful in the right situation. From a mechanic’s perspective, it is a reasonable low-cost attempt for a minor, confirmed rear main seal leak on an older or high-mileage vehicle. It is not the right answer for a major leak, torn seal, oil-soaked clutch, damaged crankshaft surface, clogged PCV system, or misdiagnosed oil leak. Use it with clean oil, follow the directions, do not overfill the crankcase, and monitor the result. If the leak continues, the vehicle needs real mechanical repair.